
I am joining the Halloween train, y’all. I don’t usually decorate for this holiday – for two reasons: #1) I love my fall décor and really dislike the idea of taking it down and then putting it back up through Thanksgiving, and #2) I don’t really love spooky stuff and I’m not a huge fan, personally, of skeletons and skulls and severed fingers and zombies. (I don’t mind this stuff out for the actually holiday, but I don’t really like it in my own home for an extended period of time. I will say that I have seen some people use skulls and skeletons with flowers, and I think in the right space that looks so elegantly spooky – so if that’s your jam, you do you!)
However, having said all of that, my boyfriend Jake is a HUGE Halloween fan. I am still not at all planning to have bloody limb décor or anything too scary, but I am compromising and doing some more traditional Halloween décor. Things like traditional ghosts, classic jack-o’-lanterns, et cetera. I’m thinking lots of wood and twine to make it looks really rustic. I find that style to be charming and match more with my personal tastes.
I am only going to be decorating for Halloween for one week – because, seriously y’all, I love my fall décor. The week leading up to and including Halloween, I will incorporate several Halloween pieces I’ve found that are starting my future Halloween collection.
Yesterday, I made an additional décor set to go with the few purchased pieces I’ve found. So today, I’m going to take you along my DIY journey on how to make these cute, rustic candy-corn jar lanterns!
Here’s what you need: 3 mason jars; craft paints in white, yellow, and orange; paint brushes; 3 flameless votive candles; twine; glue gun & sticks.
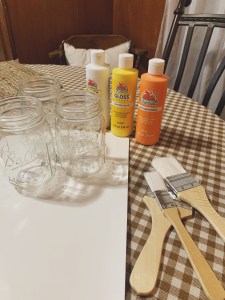
First, it’s important that you know that the idea is to dry brush on the paint – so don’t wet your brush down. Instead, pour a little of each paint on a paper plate (or artist palette if you’re getting fancy).
I started with the orange paint in the middle. (And in case it’s been a calendar year since you saw candy corn, remember that the colors, from top to bottom, are white then orange and then yellow. I had to check because my organized mind wanted to put them in color-wheel order.)
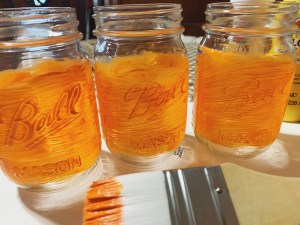
When I brushed on the paint, I did the entire middle section – encompassing the “ball” raised logo on the jar. Once you’ve covered the middle, let it dry. If you’re short on time or impatient like I am, you can use a hairdryer on low to help the drying process along.
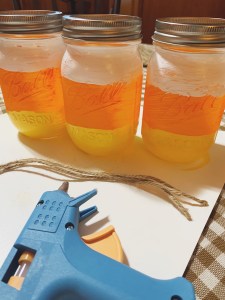
Then, paint the white section at the top. Only paint down to or on the first part of the raised wording/branding, and be sure to paint up to the lip at the top of the jar under where the lid screws on. You should let this dry now, too.

Finally, paint the bottom with yellow, covering the “mason jar” writing. Let this dry.
Once all of the paint is dry, screw the lid back on but without the flat-top seal lid. Essentially, you’re using the metal twist lid, open, for the sake of country décor. Trust me, it looks cute – gives it a little of a galvanized metal feel.

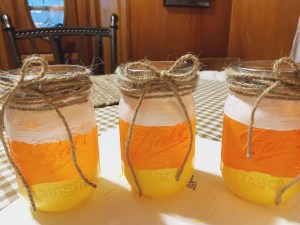
Now, get your hot glue gun ready and cut your twine. If you’re making three of these as a set like I did, you want to cut three lengths of about your wingspan. (Mine is about 5 feet, so that’s what I cut three times.) I then wrapped these around the top of the jar from lip to the start of the metal lid, using hot glue as I went to secure them in place. They don’t have to look perfect – in fact, a little imperfection looks great with a country rustic décor theme.
After these are securely glued on, I decided to add little twine bows to really up the quaint & cute factor. I tied these and then hot glued them on, using a dab of glue behind the knot of the bow and on the end of each tail.
Once all of your jar decorating is done, it’s time to place them and add the lights! I got my flameless votives from Walmart in a large pack for under $8 – you can get flameless tea lights at Dollar Tree too, but I like that the votives give a little more height, and I figured I’d get a bigger pack and use the others elsewhere in the future.
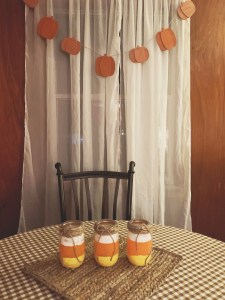
I absolutely love how these turned out! I think they add a fun, whimsical touch to my newly-acquired rustic & traditional Halloween décor!
What do you think? What Halloween DIY décor items do you love in your home? Comment below – would love to hear from you!

These are to cute! I just did a similar post yesterday with decorates mason jars. I seen some candy corn ones done I’m thinking about doing these as well.
LikeLiked by 1 person
So fun to make your own decor!!
LikeLiked by 1 person