
Y’all know I love to get a little crafty, and this week is no exception! I love having unique and handcrafted items in my home, and, while I do have some coasters, they don’t all match or add a ton to my spaces. (Well, my Rae Dunn ones are cute as pie, but since I have two, I’m putting them on the bedside tables in my bedroom.) So I have been thinking of several different crafty coaster options for weeks now, and I finally settled on two easy and cute projects!
The first is a simple DIY stamping craft, and the second is a Mod Podge upcycle project. I’m going to walk you through the process for each project so you can make either or both for your own home!
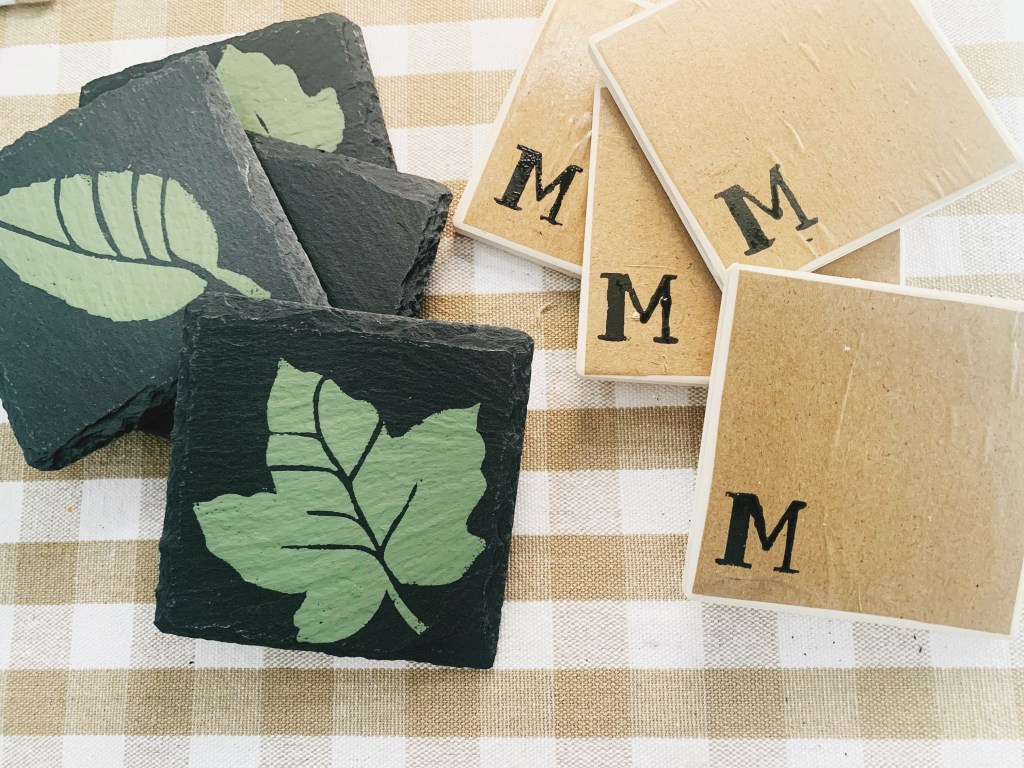
#1: DIY Stamped Slate Coasters
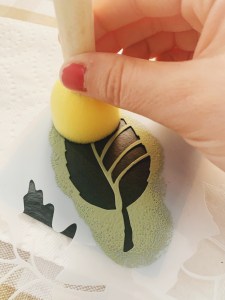
I found these amazing coasters at Michael’s craft store for under $3.99, I think. I could NOT pass them up – they’re a slate material and they match the black accessories in my living room so well! I also grabbed some stencils from Michael’s (I went with a large sheet of nature-inspired leaves because Jake and I thought they’d match my decor best) and I had green chalk paint and sponge brushes on hand at home already.
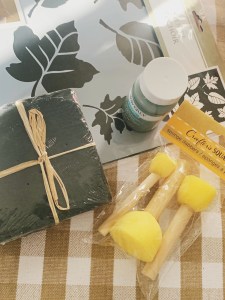
Then all I had to do was simply use the stencil lightly tap on the chalk paint! I did this on all four coasters, using two designs, which gave me two coasters with each leaf style.
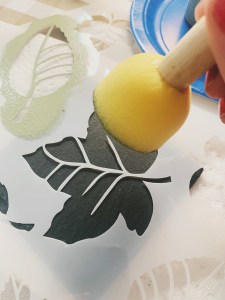
I absolutely love how these turned out! I think they are the perfect addition for my living room, and they’re so simple.

#2: Mod Podge Monogramed Upcycled Coasters
Dollar Tree has ceramic coasters with corked backing for $1 each. These are the most plain ones they offer, and, if they match your existing space just the way they are, that’s great! For me, we are finishing our basement and doing a lot of black and white and natural tones (think touches of wood and leather), so I wanted to make some simple coasters to add to that vibe. Four of these Dollar Tree coasters make a great starting point.
To upcycle these simple coasters, I got the following supplies: Mod Podge (and yes, Dollar Tree has some in the draft aisle!), foam brushes, craft paper (I used craft wrapping paper I had on hand), alphabet stencils (Dollar Tree again), and black chalk paint.
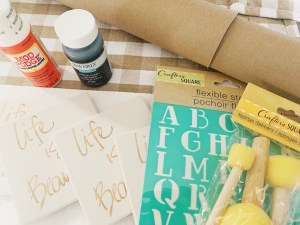
First, I cut four squares of craft paper that would totally cover the printed font on the Dollar Tree coasters.

Then, I added a layer of Mod Podge on the coaster, laid down the craft paper, and put on another layer of Mod Podge on top. Your paper will bubble some, so use a flat, stiff surface to smooth it out like I do in the video clip below. I used the cardboard from the sponge brush package, but you could also use a credit card or another straight edge. Once it’s smoothed out, set it aside to dry.
After the pieces are dry, simply add your stencil to the spot you’d like your monogram and dab paint on lightly with a sponge brush. What I love about this is that you can use the monogram that works for your family, the color that coordinates with your space, and the look that you like best!
These turned about even cuter than I anticipated!

A Final Look
Both coasters turned out as really nice, unique little additions for my spaces. I think these might even make really nice handmade gifts for a housewarming or shower.
Which do you like better – the stenciled leaf design or the monogrammed upcycle? Comment below – I would love to hear from y’all!

One thought on “DIY & Upcycled Coasters”