
As I mentioned in last week’s blog post, our new house has an office for Jake and a designated playroom area for little man, but there wasn’t a clear space just for me. When Jake realized that I didn’t have my own designated space, he was concerned and wanted me to have a place to write, since that – and this blog – are kind of my set aside hobby for myself. I suggested we revamp the closet beside the basement stairs – located conveniently beside the play area – into a nook that would fit my ladder desk. This wasn’t an immediate priority so we have been using the space for storage in the meantime as we’ve worked on more pressing projects, like finishing the rest of the basement into useable family and playroom space, remodeling the kitchen, and other more urgent spaces.
Fast forward a few months, and I’ve accepted a new job that started mid-May. I committed to work in-office two days a week and remote from home three days a week… which means I need a spot. So my office nook jumped up the priority list A LOT.
And Jake did NOT disappoint, y’all.
I had a vision from the beginning, and I described it, made a list of supplies I knew I wanted and needed, and drew some of it out for Jake. This dude, y’all – he is a champ. He literally didn’t know at least a good half of this stuff until we bought this house, and then he absorbed everything our dads taught him as they helped with our initial projects. He did this entire closet-to-office redo himself – I mean, I guess I helped, but the blood and sweat was all him! I’m so thankful for my handy fella.
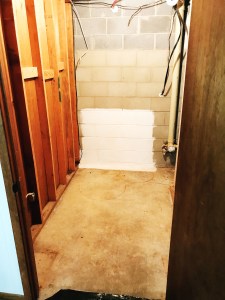
Here’s the before photo. I mean it when I say that this closet was nothing special – it already had a door, some (poorly done) framing, and power to a ceiling light, but otherwise it started out as a completely unfinished space. (The white paint you see was already done by Jake and his dad when we initially bought the house – it was meant to seal off any potential water issues, since the outside of that wall is also where the backyard spigot is located.)
The first thing we did was make a Lowes trip – or 73. Seriously, when you buy a house, no one tells you that you’ll know Lowes employees by their first names. I had found some paneling that I really liked for the in the office. Although we could have drywalled the space, I didn’t really want to have the expense of drywall and mud, then primer, and then paint. Paneling is a much quicker process, and nowadays, there are so many good options for paneling! I found sheets of this white-washed oak-looking paneling for under $16 a piece for an 8’x4’ sheet. We bought 7 sheets after having measured out the space and accounting for some potential errors.
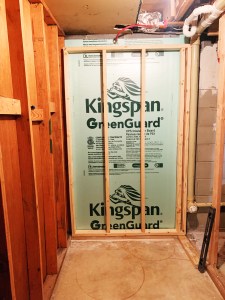
We also bought the necessary 2”x4”s and other supplies. When they say lumber is up over 300% right now, they aren’t lying – it’s outrageous! But luckily, we had some lumber at home from past projects that we could use and the sides of the closet were already framed in and usable for this room redo. Jake had some wall insulation already for the back wall, so we only needed one more sheet of the green foam.
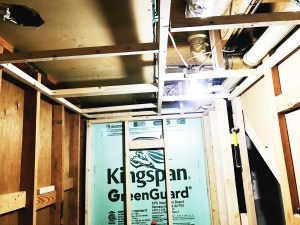
After the Lowes trip, Jake got started right away with building the framing for the back wall. After he built the frame and we carried it in and confirmed it fit and was level, we inserted the foam insulation and the framework. We did have to borrow a pistol-grip drill by Dewalt from my dad to drill the wooden framework to the concrete floor using tapcons and concrete screws.

We also had some interesting pipes to work around in this space. This closet butts up to the under-the-basement stairs area and that area is attached to the laundry room – and our bathroom is just above it. So it’s pipe city, y’all. We had to build a bump out in the back right corner of the office nook to accommodate for a large pipe, and – as you’ll see in a bit – we had to bring the ceiling down to account for the bathroom pipes above. The build out used the same tools and supplies as the back wall. We also did gap-fill some drainage pipes that went outside from this back wall.
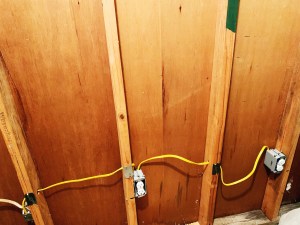
Jake also added two outlets on the long left-side wall for me. This wall is where my desk goes, so I needed outlets. He also replaced the old light switch, replacing the faded almond-colored switch and cover with a nice white one to match the new outlets.
Next, Jake and I talked extensively about my idea for the ceiling. It morphed some as the project went along, but essentially, I knew that we needed to be able to have later access to the pipes below the bathroom that would live in this newly built ceiling in my office space. But I needed a ceiling so that I could have a real light fixture instead of a lightbulb hanging down between exposed bathroom pipes.
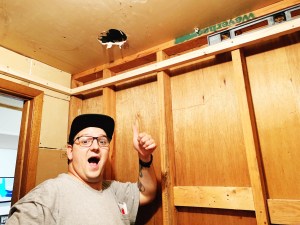
Jake first lowered the overhead junction box for the light. He brought it down to the level that the ceiling framework would be so we could insert a flat ceiling light with long-lasting LED so there was more headroom clearance and a less frequent bulb change. This is the light we bought.
So, I suggested we build a framework using mostly furring strips just under the lowest pipe, then attach some already painted white luaun board for the ceiling boards themselves. We built the frame work as a large rectangle around the room, then added a center furring strip and pieces from the center rod to the sides for extra stability.
Then, on the right side of the ceiling, Jake had to do some unplanned plumbing work. We had discovered a minuscule drip on one of our copper pipes to the bathroom sink, so Jake cut the water line momentarily, cut the pipe, replaced with PEX, and used SharkBite couplings to attach the new piece to the old. We did have an injury – Jake cut his hand pretty dang good on one of the pipe ends wrestling with the SharkBite, and he’s probably going to have a nasty crescent-moon shaped scar on his hand beside his pinky finger.
Before adding in the ceiling boards and the new light fixture, we decided to go ahead and do the floors and walls.
We already had flooring from when we had floored Jake’s office and the family rec room and play area. We found it at a local salvage place for really cheap – and we bought everything they had in this pattern because they had just enough to do our space and have a few pieces for any future touch ups or needs. The flooring is vinyl click board, so it snaps together in place nicely, and Jake installed it by first putting in a thick black plastic barrier that my dad gave us, then inserting a vapor-barrier underlayment, and then adding the click boards piece by piece. We did spend a little extra on the vapor-barrier, but it was important to us when we were doing the rest of the basement rec room because we wanted to protect our basement from any additional moisture – being underground already provides more access for mustiness or moisture, and we wanted to avoid that at all costs. Luckily, that cost was expensed to the larger basement projects, and we just happened to have enough to use in this office nook project, too!

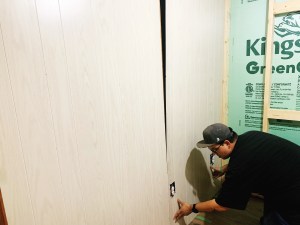
Next, we measured all of our walls – which were admittedly a little wonky. Remember, we used most of the existing framing for this project, and the left-side wall was NOT perfectly straight. So we did specifically measure each and every section to fit in the paneling as best we could and to make sure we left room for the little cutouts for things like the outlets. As a fun side note, the water heater for our house is under the stairs, which is the right-side wall of this office nook – so we also cutout a miniature doorframe on the right-side wall so we can access the heater when needed – you’ll see that in a moment.
To put up the paneling, Jake again used the brad-nail gun.
Then, we returned to the ceiling, now that much more of the room was complete. Jake was able to use one long skinny piece of luaun board on the left side of the office, where there were no pipes above that we’d need to access in the future – and we used a power brad-nailing gun to install it and attach it to the framework we built.
We sort of had to piece together the right side of the ceiling with smaller pieces since the pipework was on this side of the room, and we used screws instead of brad nails, so that we can easily unscrew the ceiling if we need to access the bathroom pipes in the future.
Then we added the new light fixture!
Finally, Jake added in the trim work. We used PVC trim in the entire space – the ceiling to join the walls and ceiling boards, the corners and access panel section, the floor trim, and the quarter round. Jake installed these using the nail gun again.
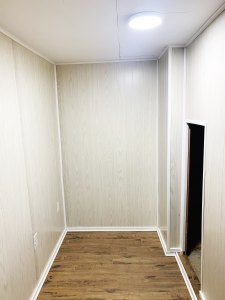
We still want to caulk in some areas to really finish the look, but overall, the space is complete and usable – and I love it!
I decorated with a lot of light, cool-tone colors to make for a relaxing work environment. I incorporated my existing ladder desk from Walmart with a matching cube-shelf in the wood tone “canyon walnut” and with ivory bins. I also got my standing lamp in the corner from Walmart for under $15. The chair was featured in last week’s blog post here – and it was under $10 at a thrift store, and I totally refinished it to match the room! The bird nest painting is one gifted to me when I was expecting my little one and it’s an original by my artist sister, Samantha L Doyle (here’s her etsy shop), and my college diplomas are framed on the right-side wall.
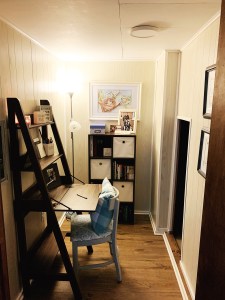
I absolutely love my new workspace – and I’m so thankful to my best friend and fiancé for helping me make my vision a reality!
What do you think of this renovation – from storage closet to office nook? Comment below – I’d love to hear from you!

2 thoughts on “Storage Closet Turned Office Nook”