
If you follow me on social media, you know that the past few months have been a total whirlwind. I’ve changed jobs, we bought a house, are DIY-ing our way through a fairly significant refresh or remodel of the house, and Jake proposed a couple weekends ago. It’s been BUSY over here, y’all.
The house was a together purchase with the long-term plan of continuing to build our lives and our family together. We’ve been working on it since we purchased it in December – with a TON of help from our families, particularly our dads – and things are really coming along! (Don’t worry, we’ve taken pictures as we’ve gone so we can share more as projects and spaces get completed – and you’ve seen a little as we’ve done them, like the Front Porch Refresh or the Entryway Décor post, and on social media, such as here and here.)
When we bought the house, we envisioned Jake’s future home office in one of the basement rooms and little man’s playroom space in the larger rec room/den-like space. What Jake realized is that I didn’t have a space that was designated for me. It honestly didn’t matter a ton to me because we were nearly completely overhauling the kitchen to be the kitchen I’d dreamt up, but he felt like giving me some kind of space to write and to call my own was important. (Because he’s sweet and thoughtful like that. Insert heart-eyed emoji here.
So I suggested that we turn the large storage closet next to the basement stairs into an office nook for me. It’s not huge, but it’ll fit the ladder desk I had in my rental home (see here) and even a storage shelf. This was going to be a project for way down the line, but when I recently accepted my new position at a local nonprofit, I agreed to work from home 2-3 days a week. So the home office nook has taken a leap way up the priority list now. And it’s in the works – so you’ll get to see that soon!
Even though, when we bought the house and started revamping it, we didn’t plan to get my office going for a while, I couldn’t resist buying a wooden chair that needed some love. I found it thrift store shopping at a local KARM store for $9.99. (If you aren’t familiar with KARM – especially if you’re in the East TN region – check out their mission here.)
Here’s the before picture. I thought it was a pretty good find for under ten bucks!
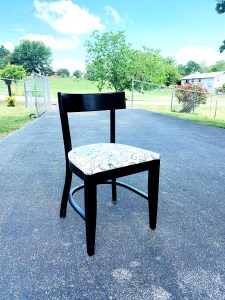
While it’s not super unattractive, I knew it didn’t quite match what I wanted in my space. So I decided to DIY a makeover. While everyone else was out sunbathing in the heat this Sunday after church (seriously, I got so many snapchats of friends in bathing suits – what y’all doing out there?!), I was being a #GirlWithPowerTools.
Here’s the step-by-step tutorial of my DIY chair revamp!
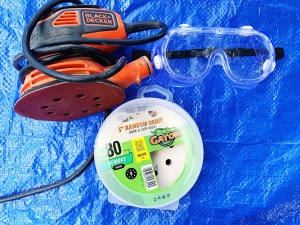
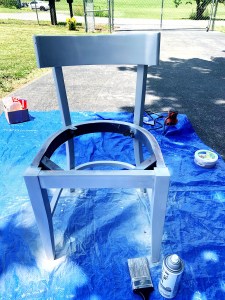
Before I started, I did make sure to lay out a tarp. Since I planned to repaint the chair with a spray chalk paint, I knew I needed to cover my driveway to protect it as much as possible.
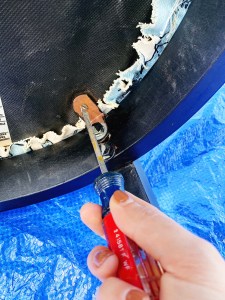
Then, I laid the chair down and used a screwdriver to take off the seat. Mine was only held on by two L-brackets, so it was easy enough.


Then, I grabbed the oh-so-pretty safety goggles. They’re ugly as can be, but my dad always instilled in me that a job site is worthless if it’s not safe, and now Jake won’t let me do anything without safety measures in place too. I also got 80-grit gator paper for the Black + Decker sander.
I sanded down the chair taking as much of the black paint off as I could. I didn’t bother wrestling with the part that would be hidden when I reattached the seat, but I removed paint from anything that might be seen when the chair would be assembled and in use. The sanding took a bit, and the sander does shake my hands a lot, so I took some breaks (mostly for Diet Coke, honestly) to let me hands rest some, but the original paint did come off fairly easily with the 80-grit paper.
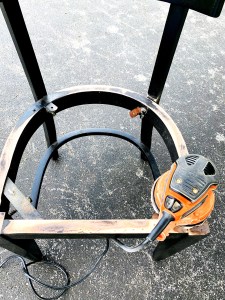

Once the paint was removed, I wiped the chair down with a rag to remove any dust. Because the prior paint was black, I had black dust all over my clothes, my face, and my chair. (Jake said I looked like a coal miner, haha!)
I then used this Rus-Oleum Chalked spray paint in the color aged gray. I’m not a first-class spray painter, if I’m being honest, so it’s not perfect, and in the few places that I sprayed too heavily, I used a paint brush to keep it from having any drips. Overall, I think the paint turned out just fine, and I do like the finish of the chalk spray paint, so I definitely recommend it for a simple DIY like this one!

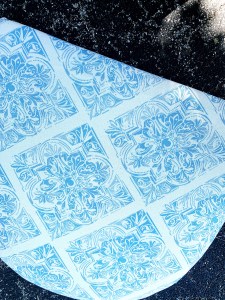
While the paint dried, I filled my time by recovering the seat. I wanted something light and clean, and I found this really cute fabric at JoAnn’s Fabrics.
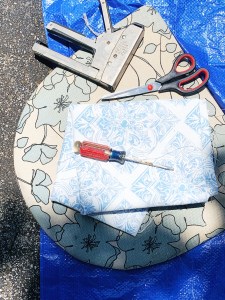
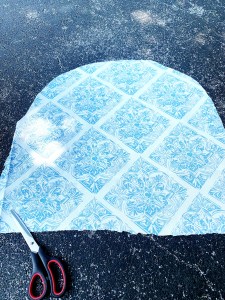
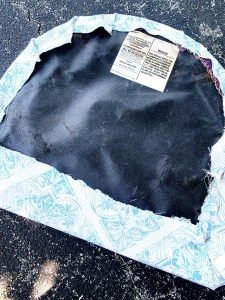
I pried the existing fabric off, pulling the staples out using a flathead screwdriver. Then, I cut a piece of my new fabric to match the shape of the piece I took off. Next, I flipped the fabric to face down (the back facing me) and set the seat, cushion down, on top of it. I used the hand-held stapler to staple down the pieces. I did have to do some folding and stapling together to make it fit right, but it was fairly straightforward.

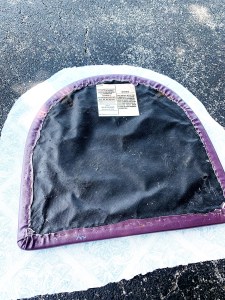
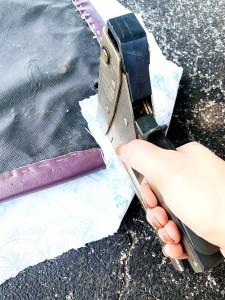
Next, I screwed on the seat to the now-dried painted chair frame. I just used Jake’s Black + Decker drill and some new screws to reassemble. Since my chair only had two L brackets on the back, I added one on the front for added stability, too.

Here is the finished product!
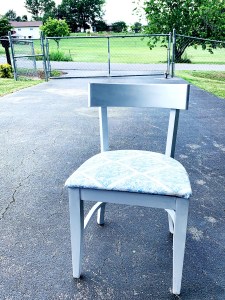
What do you think? I can’t wait to show you all this chair in my finished office nook soon!

What a fantastic job you did, the chair looks amazing and totally updated!!
LikeLiked by 1 person
Thank you so much! 🙂
LikeLiked by 1 person
Thank you!
LikeLiked by 1 person