It’s fall, y’all! I know it’s just now September 1, but like I told my favorite Walmart cashier (and yes I have one because she is the sweetest), “if decorating early for fall makes you happy, then by all means, decorate early!” (We also talked about watching Hallmark Christmas movies, but that’s neither here nor there.)
I started prepping for fall weeks ago – and, honestly, I would have done a lot of decorating much earlier, but I decided that I had to get a larger project done alongside decorating: refreshing my living room.
When I first moved in, I had a lot of furniture that had been passed down to me from my grandparents. When my gram passed and my grandfather moved into assisted living, I was also in the process of moving into my first apartment with my now-former husband. My grandfather gave me a lot of furniture that he didn’t need as he moved from his apartment into a smaller assisted living space, and then when we bought our house, my mom handed off some additional furniture that was helpful. I had two bookshelves with storage cabinets in the bottom that were pretty worn, but worked well. I have used them for the past year, but for a while now, I’ve wanted to update the living room space of my rental, and I just knew that more modern shelves could do that.

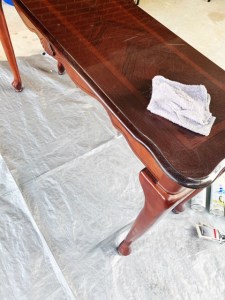
My biggest concern was that I have a Queen Anne-styled sofa table that I use to display my TV, and it was a cherry color – so VERY traditional. I wasn’t sure how to merge the two styles I wanted, but I did want to keep the Queen Anne table, as it had been my gram’s and also fits my space perfectly. I also don’t love houses that have only one style in them – when someone says that everything they own is one style (whatever style it is), I cringe a little. I appreciate variation – and I think we are comprised of the things we love, and our homes should be, too.
I saved a little for new shelves, and I decided to refinish my Queen Anne table. I asked my mom if she thought my gram would have been okay with this, and she literally laughed – my gram was the queen of refinishing furniture. We decided she might be more offended if I didn’t.
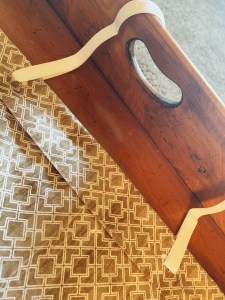
My new shelves are from Walmart.com (click here to see the Gymax 4-Tier Ladder Shelves), and because they featured black and wood, I chose to refinish my sofa table black. I asked my dad what he would use to do this project, and he happened to have Miniwax PolyShades in black, which is stain and polyurethane all-in-one.
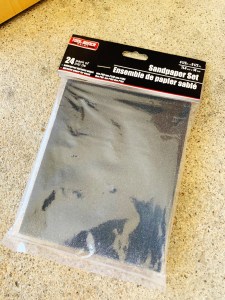
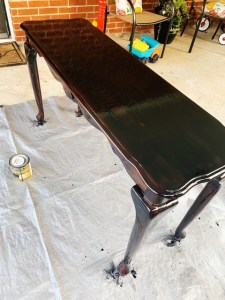
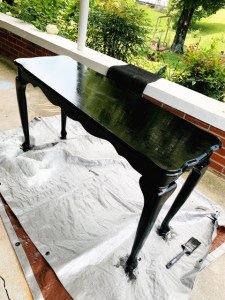
This was super easy to do – I simply had to use steel wool to scrape off a thin layer of the previous stain (not too much – you’re really just scrubbing off enough so that the new stain sticks), then using a paint brush to restain. I did 3-4 coats because I wanted a really thick, solid black color. This process took a few days because I did want the stain to dry between new coats, and I did use a little steel wool between each to let the next layer adhere a little better.
It’s by no means perfect, but I really do love how this piece turned out!
I also decided that, because my rental has wood paneling in the open concept living space, I should probably paint my wood and brown lamps a lighter, brighter color to pop off of the black and wood furniture. (Two of my favorite furniture pieces are the end tables that my dad got at a garage that he completely refinished for me, which have black wrought iron legs and wood tops – so the lamps standing out against these tables and the paneled walls was the goal.) I decided to take the lamps outside and do some spray painting. I used Rustoleum’s Heirloom White spray paint to paint all of these lamps, and I think they turned out even better than anticipated.


Since I had spent a few days working on the paint projects, and because I was still waiting on the delivery of my shelves, I figured I could shop, shop, shop for some updated fall décor! Last year, I had just moved into my rental around the fall season, so I didn’t buy a ton of décor, but I had about one box full of pumpkin-related décor items. I started sorting through that – and my two-year-old son kept picking things up enthusiastically, “pumpkins! Oh, I love it! Leafs, oh I love it!” It was precious. (He now has a felt leaf garland in his playroom on the window because he seemed to the love the fall décor so much.)
When I looked through what I had in storage, I realized I could use some more pumpkins and a few small items here and there. As I waited for my shelves, I went to a few low-cost décor places: Dollar Tree, Walmart, and Old Time Pottery. (If you haven’t explored an Old Time Pottery yet, you absolutely should! It’s one of my favorite stores – probably because my mom and gram used to love going in Ohio when I was kid – and the prices are great. My sweet boyfriend knows how much I love it, and since my son is on vacation time with his father this past weekend and week, Jake suggested that we make a trip. He never even complained, the whole time we were perusing the store – and we had such a good time looking around and finding some new fall pieces! Girls – get you a boy who takes you to craft and décor stores and makes the best of your shopping sprees. That’s love.)
I’ll take some time below to show off the completed living room all put-together as well as to show off the new fall décor pieces I found this season!
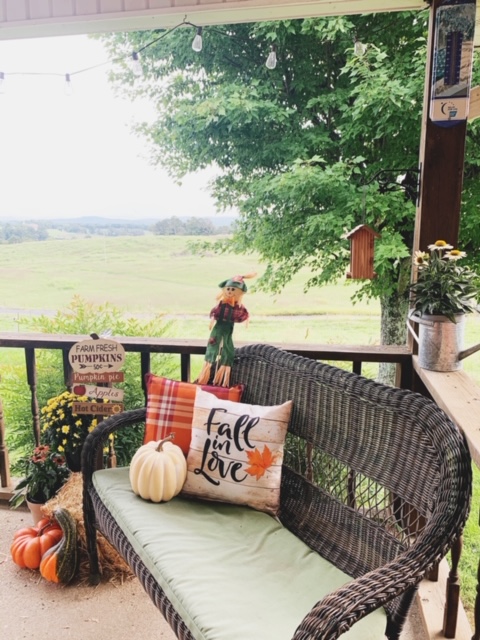
We’ll start outside. The first picture is my front porch, which, as I’ve said before, is a huge blessing! The original owners of the house built it backwards, so the front faces away from the road or driveway, but it’s because this view is breathtaking! So every season, I feel like I need to decorate a sweet space to see the view. This year’s was primarily brought to us by Walmart’s seasonal section – the pumpkins, gord, flowers, square hay bale, and pillows are all from Walmart. The scarecrow was a Dollar Tree purchase, and the fall sign was actually a reused piece of decor from last year.
The sitting area in my car port (featured in my spring blog here) was a quick fix this year for me – probably an area I can invest more in next year. I just grabbed a few small signs from Walmart. The door though, is a spot I love. My sister made this twine wreath for me right before I moved into the rental house, so I wanted to display it on the door. I’ve started adding floral picks or wood signs to give it a little seasonal flair, and this sign was under $2-3 at Walmart and the pick was under $1.


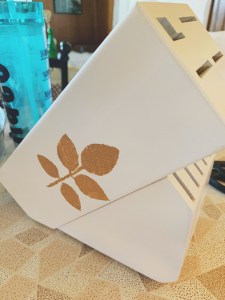
When you come through the door pictured above, you step into my kitchen. I have a few small touches of fall in the kitchen. The ceramic glass pumpkins are from Dollar Tree, the green pumpkin plate was a set I had found last year at Bargain Hunt (originally Target), the glass pumpkin plate was from Bargain Hunt as well, the “grateful” sign is a Walmart find, and the galvanized metal cylinder with a pumpkin cutout was a gift from my sister last year, which she found at AC Moore before they closed.


As you look out from my kitchen, you see my dining nook and living room, which are open concept. There’s a built-in bar between the kitchen and the dining nook, so I decided to decorate the bar a little for fall as well.
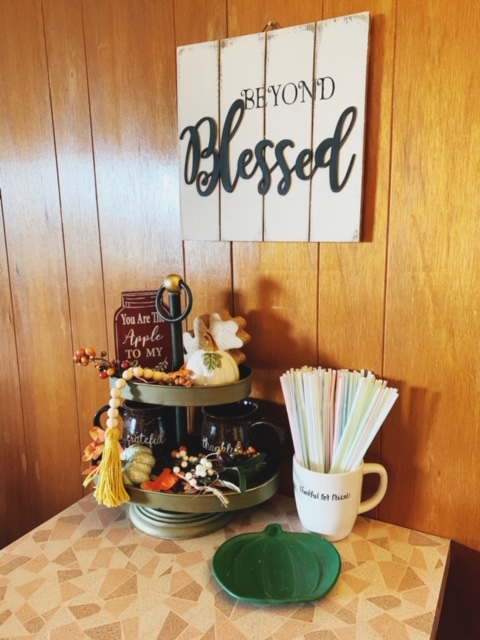
I am loving all of the decorated tiered trays on Pinterest and Instagram! I have wanted one for a while, but didn’t want to order one that looked exactly like what everyone else had. So I searched a lot of places, but I ended up finding one on Amazon; this is a metal, oval-shaped, two-tier tray, and I love it! I invested in it because I know that I can use it each season to decorate with smaller items that I either already have or can get on the cheap!
On my two-tiered tray, I have a wooden leaf I found at Target last year, a glass ceramic pumpkin from Dollar Tree, a sign from Walmart (“you are the apple to my pie” – too cute), mini fall floral picks from Dollar Tree last year, two mugs I got last year at Big Lots, a fall pumpkin pick from Walmart, and farmhouse beads from Amazon. These farmhouse beads came in a set of three – two small ones and one large one – and they have a nice mustard-like yellow tassel that I love for fall!
The green pumpkin pate is the second in the set I found at Bargain Hunt last year, the “beyond blessed” sign is a Walmart find, and the Rae Dunn mug was actually a thrift store find last year.
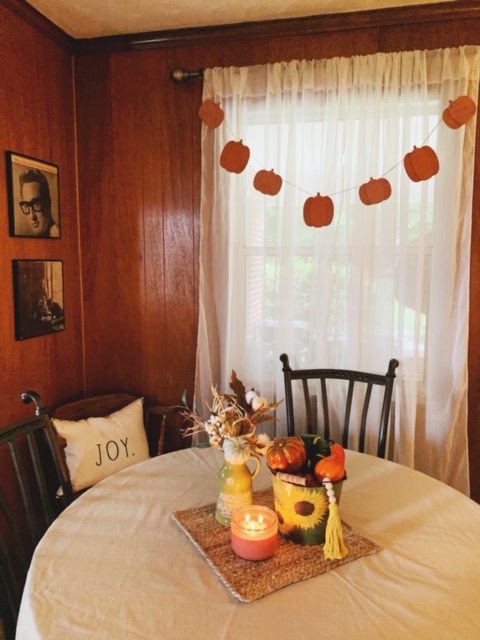
Moving into the dining room…! My pumpkin garland was a Target deal last year in the $1-$5 section. It’s wooden, and it was one of the décor items that my toddler said “I love it!” to – and I couldn’t agree more! The centerpiece is a placemat from Walmart (like $4 or less), a fall mini pitcher from Walmart with a pumpkin pick from Walmart combined with a cotton pick from Old Time Pottery in it, a Mainstays candle in Cozy Gathering scent from Walmart (my favorite – you should order one!), another small strand of my farmhouse beads from Amazon, and plastic pumpkins from Dollar Tree in a sunflower bucket that originally came with a floral arrangement from my boyfriend a few weeks ago.
I recently bought a small piece of furniture for really cheap from a place in my hometown called Dandridge Furniture Outlet. I’m using this storage table for mail sorting and other important small items. I quickly decorated the top with a pitcher I got from Old Time Pottery last year filled with dried floral pieces I already had, a ceramic pumpkin from Dollar Tree, and a frame from Old Time Pottery with a recent picture of my little one.

The living room probably has the most fall décor – with new shelves, I took the opportunity to do a LOT of seasonal decoration.
I’m really happy with how the freshly-painted lamps look on my wooden tables, and I am obsessed with throw pillows, so my few fall-inspired ones bring me a lot of joy. The “thankful grateful blessed” pillow was a Walmart purchase last year, but my location has some this year, too. The mustard yellow one on the couch was from Walmart.com and it’s a soft faux-fur material.


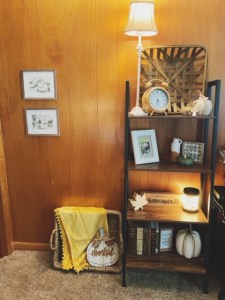
My largest, non-window and non-door wall houses my TV and shelves. You can see the end result of the Queen Anne sofa table and the new shelves all assembled (thanks, Jake – he’s my boyfriend and my assembly man!). I am SO pleased with how these turned out!
The yellow throw in the left corner on the basket was supposed to be a larger couch throw, but it was TINY when I got it – I guess I didn’t read the Amazon description closely enough, but that’s okay because it gives a great pop of color behind the white, rustic pumpkin I got at Walmart last year. The pumpkins and fall décor on my shelves from a variety of places – Target last year (the fabric ones), Bargain Hunt last year (the terra cotta one), Dollar Tree (the small ceramic ones), Walmart (the larger one by the candle sticks), and Old Time Pottery (the wooden one on the top right). The wooden leaf was another Target find last year, and I have the wax warmer cubes in the scent Cozy Gathering (again my favorite at Walmart) in the black and tan warmer on the second left shelf.
The “autumn” sign was a find last year at Walmart, and it fits perfectly on my TV base, right under the screen to bring that mustard-yellow across the room. The floral arrangement on top of my BluRay player is a combination of a pumpkin pick from Walmart and a cotton pick from Old Time Pottery in a thrifted vase I found at Goodwill recently. You’ll also notice I have the longer strand of farmhouse beads on the end of the second shelf – I wanted to pull a lighter color into the corner and the mustard color all the way over the wall display.


My little boy has this cuter-than-pie rocking chair that I found at a local Goodwill over a year ago. I stuck a fall board book on it for him and placed it in front of his handmade rocking horse that a church friend made for him this past spring!

Overall, I’m so pleased with my living room refresh and my fall décor! Have you started decorating yet? Where do you find your favorite fall décor items? Comment below – I would LOVE to hear from you!