Easy Sweet Potato Dish

Its Thanksgiving week! That means good food is just TWO DAYS AWAY. Are y’all as excited as I am?

I know that this holiday looks a lot different than it has in years’ past, thanks to the pandemic. However, I still think that Thanksgiving is an amazing opportunity for us to focus on the silver linings – despite COVID-19 and the many hardships that it has brought along with it, we each have things we can be grateful for – so my challenge to you (and to myself) is to spend Thanksgiving day focusing on those blessings and bright spots!

This year, I’m hosting Thanksgiving for my family. Don’t worry – we’re sticking to the rules and keeping it small. Just my little guy, my parents, and my sister and brother-in-law.

We have to do our dinner a little late, since my son spends Wednesday night and the first part of Thanksgiving Thursday with his dad, so he gets to me at 4 PM. So dinner is going to be closer to 5:30 or 6 PM at my place.

I’ve already been thinking about my table set up and my dishes. My sister and mom are each bringing some sides, so I’m preparing a few sides and the main dish – the crockpot turkey breast.

Today, I want to share my favorite easy dish: sweet potatoes! If you’re hosting this year, just having your immediate family eat together, or are going to another home and need to take a dish, this is a must have – and it’s SO easy.

This is sort of a mixture of sweet potato casserole and straight up sweet potatoes. It’s not mashed or whipped like most casseroles and it doesn’t have marshmallows, but it’s also not whole or individual baked sweet potatoes.

Here’s what you need:

  • 1 40-ounce can of yams/sweet potatoes
  • 1/3 cup of brown sugar
  • 1/2 cup of raw walnuts
  • 2 tbsp of butter, cut into slices or cubes

Don’t forget – on a holiday when you’re feeding more than 2-4 folks, you’ll need to double or even triple this recipe. I’m sharing what I did for dinner last week, which was about 1/3 of my usual for holiday get togethers.

First and foremost, preheat your oven to 375F.

Then, open your can of yams, drain the liquid, and rinse lightly, re-draining. Then, spray a glass baking dish with non-stick spray, and pour your sweet potatoes into the dish, covering the bottom completely.  Drop your walnuts on top of the yams, spreading them about evenly. Add in butter in the various sections of the dish – I usually add two in the middle and one on each end. Finally, sprinkle on your brown sugar fairly evenly over the entire top of the dish.

Bake at 375F for about 25-30 minutes. If you’re doing a LOT more – like 2 or 3 times this – you’ll want to up it to like 35-40 minutes, but keep an eye on it. You want your sweet potatoes to be soft, the butter and brown sugar to be melted, and the dish to be visibly steamy when you pull it from the oven.

Enjoy!

As you’ll see below, we enjoyed this dish last week at dinner – along with some of the Avengers assembled at the table. (#BoyMom, amiright?)

Baby & Toddler Books You Can’t Go Without

When I was growing up, we read all of the time.

As a kid, I used to sneak books into bed and read in the dark after bedtime. I guess reading Babysitters Club really was a thrilling experience. My parents found out and extended bedtime so I could read later into the night with a light on, so that they didn’t have to pay for glasses later on top of the braces I already had. Ha!

I really think my love for books and for academia started with board books. I attribute my vocabulary and my schoolwork to my parents never saying no when we wanted to read another story before bed or when we wanted to visit the library in the summers.

My goal with my son is to make sure he has access to books all the time, and I’m really fortunate to have family and friends that support that too as they buy birthday and Christmas gifts for him.

I’ve got two lists for you this week: 5 classics that you shouldn’t go without on your kiddo’s bookshelf, and 3 modern additions that you should purchase for their collections, too!

5 Classics

#1: Brown Bear, Brown Bear, What Do You See?

I completely attribute my son’s early ability to name more than primary colors to this book by Bill Martin Jr and Eric Carle.

We have the board book, and we read this every single night that I had custody for nearly six months straight – and we practiced both our colors and our animals by letting him go through each animal’s name and color on the final page. This one is absolutely a must-have for any toddler.

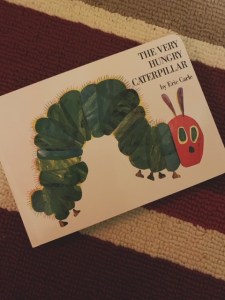
#2: The Very Hungry Caterpillar

This is another Eric Carle board book that we have in our reading corner, and my little LOVES the colors. It was a gift at one of my baby showers, and it was a perfect addition to the bookshelf. Not only does combine an understanding of nature and science, but also the colors and artwork that are charming and compelling for my son’s age range.

#3: The Little Engine That Could

My son LOVES trains, so this book by Watty Piper is perfect for him! The can-do message is motivational and inspiring, and now that we’ve transitioned from Brown Bear (listed above), we’re reading this book most nights before bed.

We received this as one of our Imagination Library mailings. If you’re not from East Tennessee, you might not be familiar with Dolly Parton’s Imagination Library. Let me just say that Dolly Parton is a gift to East Tennessee, and her efforts to promote education are absolutely admirable. We’re so thankful that my kiddo can be a recipient for books from Dolly’s program. To find out more, check out her program here.

#4: The Velveteen Rabbit

The Velveteen Rabbit is an absolutely classic. I found this modern children’s adaptation at my local Ollie’s Bargain Outlet, and I couldn’t pass it up. It’s a sweet story, and this version has warm images in kid’s colors to stay visually engaging for your toddler audience.

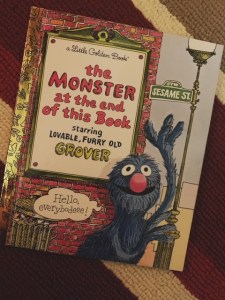
#5: The Monster at the End of This Book

My favorite Sesame Street monster as a kid was Grover – and this book was one we had on our own shelves! When I found it at a local store, I had to get for my son, and he loves it just as much as I did.

Spoiler: the monster is silly old Grover himself – but we have all kinds of fun discovering that when I use my own silly Grover voice throughout the book. My son recalls the pages and says some of the phrasing along with me, so it’s extra fun as he continues to grow older!

3 Modern Additions

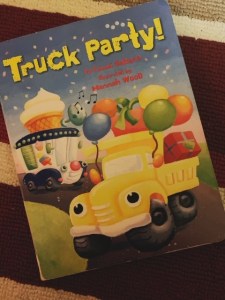
#1: Truck Party

I grabbed this book at a local Goodwill, and it was one of the best $.99 purchases I’ve made! Before he was even two years old, my son could repeat whole lines. If your little one is a truck or transportation fan, they will LOVE this book by Tammi Salzano!

#2: Mama Loves You So

Terry Pierce’s newborn board book was sitting on a TJ Maxx shelf when I was shopping for my son’s first Christmas; it was meant to be. This book is so sweet. It highlights animals and their mamas, and the illustrations by Simone Shin are absolutely gorgeous. If you are having a new baby – or if a friend is – this is a must have.

#3: Hands Are Not for Hitting

My son’s sitter shared that he was using his hands to hit or push some, and he had begun to hit me on our custody switch days, so I was concerned. I brought up the issue with the pediatrician at a previously-scheduled appointment, and she suggested this book by Martine Agassi.

I didn’t know how much it would help, but I am SO thankful I purchased it on Amazon! This book details how hands are not for hitting, but they are for high-fives, for playing, for building… It follows the little boy on the cover through lots of activities you CAN do with your hands. Now, on the way to the sitter’s on every morning I have custody, my son and I talk about how are hands are NOT for hitting, pushing, pinching, or taking, but ARE for high-fives, hand-holding, clapping, and playing kindly.

What books would you add to the list? I’d love to hear your recommendations in the comments below!

Simple Crockpot Roast Beef

If there’s one dinner that is always going to be well received in my house but takes minimal work, it’s a roast beef dinner – made easy by the crockpot!  With the evenings getting cooler and fall weather really settling in, I thought this was the perfect dish to share with you this week.

Here’s what you’ll need:

  • 2-3 lb chuck roast, thawed
  • 1 bag of small yellow potatoes
  • ½ bag of baby carrots
  • Olive oil
  • Salt
  • Pepper
  • Italian seasonings
  • 1 can of brown beef gravy
  • Dinner rolls of your choice

To start, plug in your crockpot and fill it with the beef, potatoes, and carrots. I have a smaller crockpot (I caught it on sale at my local Bargain Hunt for $11 last year, so I’m not complaining!), but that I means my roast is always a Jenga-kind of game to get all of the ingredients in.

Once they’re in, add a steady drizzle of olive oil. Then salt and pepper and add in Italian seasonings. A few shakes will do!

Turn your crockpot on high for about 4 hours.

At the four hour mark, you should be almost done. Turn the heat dial to low for 1-2 more hours.

After another 1-2 hours on low, you’re ready to serve! Your kitchen will be smelling like dinner already, so you’ll know it’s time. You can also cut into the meat to make sure you’re content with how cooked it is.

Before I serve, I like to warm rolls in the oven (I used Sister Schubert’s yeast rolls this time around) and heat up my gravy.

I like to serve it on the table, so I put my roast – including carrots and potatoes – in a serving dish and set the table. Now you’re ready to enjoy!

Butterscotch Walnut Cookies

The holidays are the perfect time for some homemade baked goods! But I have good news: you don’t have to be an expert in the kitchen to whip up some seasonal sweets.

I have a butterscotch walnut cookie recipe that you’re sure to love – and that will taste more homemade and complex than it really is.

Here’s what you need:

  • 1/3 – 1/2 cup butterscotch chips
  • 1/3 – 1/2 cup chopped walnuts
  • 1/2 cup cooking oil
  • 2 large eggs
  • 1 box yellow cake mix

Preheat your oven to 350F.

Then, add your cake mix, eggs, and oil to your mixing bowl.

My sweet boyfriend just bought me this stand mixer from Kuppet. Because I’ve not had it long, I’ve only made cookies in it so far, but I already can tell that I love it! It has multiple attachments for various batters, and that makes a huge difference in how much air gets into your mix.

I whipped this cookie dough up using one of the slower settings.

Then, after mixing my cake mix, eggs, and oil for a few minutes, I added my walnuts and butterscotch chips and mixed for just about 20-30 seconds so they were evenly dispersed.

Roll your cookie dough into ping-pong sized balls, and spread them out on a cookie sheet. Bake for 10-11 minutes.

Enjoy! I hope you love how the sweetness of the butterscotch gets complimented by the crunch of the walnuts.

Celebrating a Pandemic Halloween

It seems that all is lost – we can’t safely trick or treat on Halloween! Don’t panic – there are solutions that will allow you to still celebrate this well-loved fall holiday, despite COVID-19 restrictions.


I’ve mentioned in other posts that my boyfriend, Jake, is ALL about Halloween. He was so disappointed when COVID numbers in our state began to spike again – he said “Halloween won’t be the same.” Obviously, with a two year old in our lives, we totally understand WHY it can’t be the same – why trick or treating is unsafe and why bobbing for apples isn’t a healthy choice – but it was still a little heart wrenching for my spooky-season-loving guy.

Y’all better believe that I wasn’t going to let Halloween season go by without SOME level of fun, even in a pandemic. And we went ahead and did our Halloween stuff this past weekend, since I don’t have my toddler on actual Halloween this year.

Here are 5 ways you can celebrate this fall holiday in the midst of our national and global pandemic!

#1: Decorate Your Home

I’ve never been much of a Halloween-decorator. I love my fall stuff so much that I don’t usually take it down until the day after Thanksgiving. But with a toddler who loves imaginative play and a boyfriend who adores all things Halloween, it seemed time to start thinking about at least a few Halloween-inspired décor pieces.

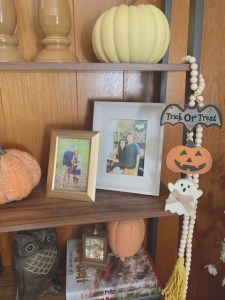
I collected just enough to decorate my living room shelves and make a display.

You can see my step-by-step tutorial for my candy-corn jar lanterns here. I found the “haunted house” truck stand at Big Lots for about $14-15 – I’ll eventually use that as front porch décor, but decided to use it indoors this year. I found the “little sheets” sign at Walmart and the burlap-esque banner at Dollar Tree.

The hanging wooden bat, pumpkin, and ghost décor was a Walmart find. The wood block pumpkin and the three black and white pumpkins were each found at Dollar General.

I really am a fan of this more traditional Halloween look. I like jack-o-lanterns and ghosts instead of skulls and severed fingers, personally, and I think they’re much more kid-friendly, too. Although, I’ll admit – I’ve seen some really pretty and glamorous skulls with glitter and roses, and if you have a house with glam décor, you can probably rock it!

#2: Halloween Snacks

Halloween is the holiday of snacks and candy, and this year should be no exception!

Whether you’re making Pillsbury’s ready-to-bake pumpkin sugar cookies, making homemade treats, or simply eating candy corn out of the bag, there’s something special about Halloween-themed snacks.

You can also try my Halloween Salty and Sweet Snack Mix. It’s just 5 ingredients – and it’s so delicious, you’d never guess how easy it is! Click here for the recipe.

Halloween snacks like this are perfect for watching family movies like Halloweentown, fall football, or – spookiest of all – even fall election news!

#3: Dress Up at Home

Growing up, I really did love costumes and dressing up for this holiday.  Even though my son is with his father this year for official Halloween, we weren’t going to totally skip out on the fun of dressing up!

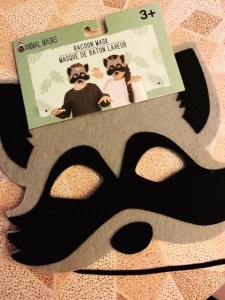
I found felt animal masks at my local Dollar Tree – and this little racoon was PERFECT for my little one! He had a ball trying it on and saying he was “playing pretend.”

Costumes at home are just as much fun as costumes out and about for the little ones, so don’t hesitate to dress up and take a cell-phone photoshoot in your living room!

#4: Treat Buckets

If you can’t trick or treat, that doesn’t mean you can’t have treats! I found these cute mini buckets at Dollar Tree and decided to fill them with some treats for my son and boyfriend. Jake’s has a lot of snacks and candy, but my toddler had much less – just one piece of candy, a board book, a stuffed animal black cat, and a pumpkin light.

The pumpkin light was the real winner. He kept saying “this is Halloween” and waving it around proudly. It even had to serve as a nightlight that evening in his room.

#5: Pumpkin Patch

If you have a local pumpkin patch that you can visit safely, I highly recommend you do so! Oakes Farm is relatively local to us, required ticket purchase in advance with limited spots, and encouraged mask wearing when in large groups. We appreciated their safety measures and decided to visit.

If you’re in East Tennessee, Oakes is a must-visit for you! They have so much to do that is family-friendly. We ran around a kids pumpkin patch (where my son picked the ugliest, bumpiest pumpkin available), picked fall flowers to fill a vase, took a tractor-pulled wagon ride to another pumpkin picking area, had kettle corn and lemonade, and visited the petting zoo.

If this experience didn’t scream fall, I don’t know what would! This was a blast, and we each got to do something we enjoyed.

Happy Halloween! I hope you enjoy this season – even if it looks a little different this year!

Halloween Sweet & Salty Snack Mix

We are so close to Halloween! Although I personally am not a fan of anything too spooky or frightening, I do love the excitement that comes with dressing up, eating lots of candy, and celebrating fall. I particularly like this season this year, now that my little one is just over two and can engage more actively, play dress up, and eat a few small sweets. 

And while I don’t enjoy super scary films, I do enjoy iconic fall and Halloween movies from my childhood. Think Halloweentown, Casper, Haunted Mansion, the Harry Potter films that usually premiered in theatres in the fall, et cetera. And when you watch a good movie, you always need a good snack. Something sweet and a little salty, like candy and popcorn at the theatre.

My Halloween Salty & Sweet Snack Mix is perfect for this season of nostalgic movies and blanket weather!

Here’s what you’ll need:

  • 1 cup of cinnamon life cereal
  • 1 cup of mini pretzels
  • 1/2 cup candy corn
  • 1/2 cup of salted peanuts
  • 1/2 cup of white chocolate baking chips

First pour your half cup of white chocolate baking chips in a glass bowl or measuring cup and put it in the microwave. You’re going to melt them into the thick syrup consistency, so you’ll probably need to put them on high heat for about 90 seconds to two minutes.

While that’s melting down, go ahead and pour all of your other ingredients into a mixing bowl. 

Once your white chocolate chips are melted, drizzle them slowly over the mixture in the bowl. I used a fork at first to get the primary amount in there as I stirred with a rubber spatula. Then I used the rubber spatula for any remaining white chocolate out of the Bottom of my glass measuring cup. Continue stirring for a minute or two to make sure that most of your mixture is covered in a light amount of white chocolate. It will start to stick together which is exactly what you want.

Once your mixture is covered fairly well, it should look like the picture below. 

Now, put your mixing bowl complete with your entire mixture in the refrigerator for about 15 to 20 minutes. You want the white chocolate to harden just enough.

If you’re making it for family or friends, you can use cute Halloween or fall bags and tie with festive ribbon. If you’re eating it on your own in your pajamas on the couch – no judgment – you can just leave it in the mixing bowl and eat it right from there.

If you’re making this for more than about two or three people to just casually munch on, you’re going to want to double or even triple the recipe.

Enjoy! If you make it, comment below – I’d love to hear from you!

Affordable Refrigerator Organization

If you’re like me, clutter drives you NUTS – but when life is busy, it starts to pile up. As it piles up, I can simultaneously feel the anxiety rising in me. One place that seems to clutter up quickly for me is my refrigerator.

Between my own Diet Cokes (yes, it’s an addiction and yes there’s aspartame, leave me alone, it’s my vice), my little one’s yogurts and applesauce packets, and leftovers (because who can cook the perfect amount for one adult and one toddler every time?), my fridge fills up and gets chaotic QUICKLY.

I was beyond frustrated with the amount of sheer STUFF in my fridge, so I used a night that I didn’t have my little one and took the time to really clean it out and reorganize.

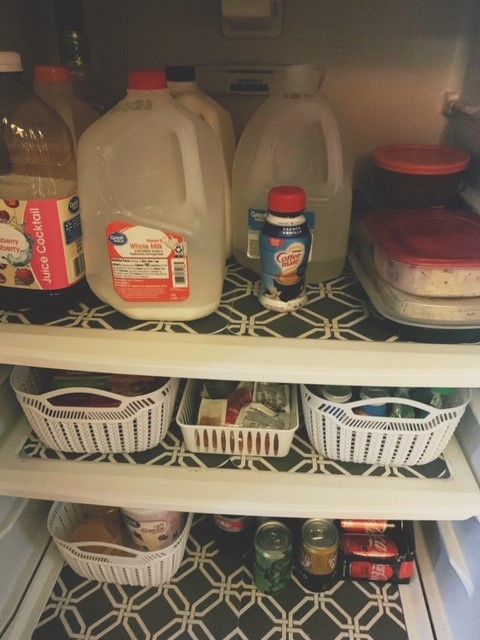
I started by spending my lunch hour at Dollar Tree. Y’all know I love a good bargain. At Dollar Tree, I got several plastic placemats, three bigger white basket-bins, and a 2-pack of the smaller white plastic bins.

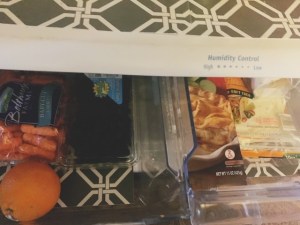
The first thing I did was line the bottom of all the shelves with the placemats. I have a fairly small fridge, so I did have to cut some edges to fit properly in various places. I did also line my crisper drawers with trimmed placemats for easier cleaning. You can see the bottom of the crisper drawers here. I store produce on the left and things like tortillas and pie crust on the right.

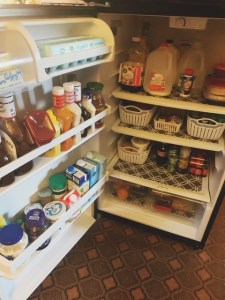
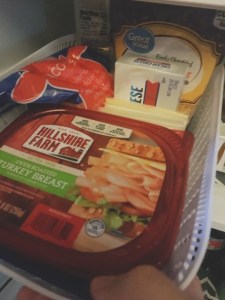
I then started organizing my shelves. The top shelf has bottles, drinks, and leftovers, so it was easy enough to organize. The second shelf fit 2 larger baskets and 1 smaller bin. I love sauces, so I always ask for a lot of extra sauce when I’m out places. A few weeks back, my boyfriend brought takeout Chinese over, and I love duck sauce, so he asked them to toss in some extra – we have so much duck sauce I could bathe in the stuff (and if given enough eggrolls, I might). I put all of my miscellaneous sauce packets in the smaller bin and stuck it between the two larger bins. The larger bins contain deli meat and cheese on the left and my toddler’s yogurt and applesauce on the right.

On the bottom shelf, I organized canned drinks on the right and used the remaining white basket to put in my miscellaneous items like my Greek yogurt, individual containers of hummus, laughing cow cheese triangles, et cetera.

For the side door, I made sure to wipe out the ledges. I spent a lot of time throwing out or recycling near-empty bottles of sauce or dressing. You don’t realize how much you have until you start tossing things out! I left just the items that were in-date, usable, and of interest.

All in all, I spent about $7-8 on placemats and $4 on bins/baskets, so with tax, I was under $15 for this fridge clean out and organization effort! It took about an hour of my time, but in the days since I did it, I’ve felt way less stress opening up the fridge or preparing meals, and my two year old can reach in and grab his yogurt easily, too.

What tips and tricks do you use for organizing spaces in your kitchen? Comment below – I’d love to hear from you!

7 Tips for Young Professionals

This single momma hen is also a working professional. I’ve worked at the same institution (my undergrad alma mater) for over seven years now, and I’ve moved from an entry level recruiting position into a director-level role. I don’t say that to brag – I say that to share that I have learned a lot from being a relatively recent new professional and then hiring and training many recent college graduates.

I hope that some of the things I’ve observed in my almost eight years of professional, fulltime work, and approximately six years in supervisory roles, will be of help to you.

These are just seven simple items that will help you look composed, organized, successful, and professional on the job.

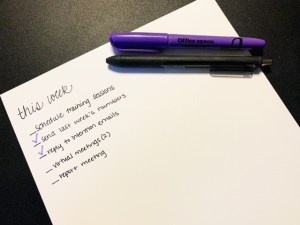
#1: Make and manage your to-do list.

How in the world can you say you’ve had a productive day if you didn’t measure it from beginning to end? How can you end the work week and say you feel accomplished?

I always start every work week by coming up with achievable, priority goals. I even ask my recruiting team to send me the same; every Friday, they’re expected to send me their 4-5 achievable goals for the next week. As their supervisor, this lets me do two things: 1) see how busy they are so I don’t try to over-delegate tasks to one and under-delegate projects to another, and 2) let me know where they are focusing and offer re-directional coaching if needed.

For my own goals, I tend to write down larger, over-arching projects that must be done by the to-do list end-date (either today or this week).

Giving myself clear priority goals helps me make sure that these are the items that are done – but it also allows for time to accomplish those smaller items, like a surprise walk-in visitor that needs to be assisted or phone call that absolutely needs to be taken.

The particulars of your to-do list don’t matter. If you like color coding in your printed daily planner, great. If you like using the calendar app on your phone, awesome. If you simply have a yellow legal pad with your to do list jotted down in sharpie, that’s fine too. If a white board is up in your office, go for it. Whatever works for you, that is systematic and easy to replicate each time you start a new day or week, is what you should continue doing.

Don’t forget – check off or highlight each completed task as you complete them. It’ll make you feel accomplished!

#2: Dress for success. Look like an adult, not a preteen.

If you are working a professional-level job, even if it’s not your dream job or the end-goal, dress like a professional. You were hired because you projected the impression that you could handle this work – that you had the abilities and the level of competence to get this work done, and that means looking the part too. You likely dressed up for the interview, so don’t slack off now.

I read once that we should all dress for the job we want, not the job we have.  That means that we’re not walking into a “Netflix and chill” scenario, so no jeans unless approved by the supervisor, no graphic tees (yes, even tucked into a cute skirt or pair of dress pants, ladies – and yes, even if it’s under a half-buttoned button down shirt, fellas), and no off-brand (or on-brand, for that matter) Ugg boots, for crying out loud.

If it’s a dress down day, don’t feel bad asking your supervisor what’s okay and what’s not. I’d much rather be asked what the appropriate shorts-length is for a Saturday team bonding experience is than to see your butt cheeks all day.

Dress professionally. If you are doubting that it’s professional, go with your gut and wear something else. (And yes, that includes your ties that have cartoon characters on them, gentlemen.)

As a side note: If you have a nametag, it goes on the right side of your shirt.

#3: Know how to appropriately use Outlook features.

It’s likely that your organization uses Outlook. If not and you’re using another resource, like Gmail, replace every use of “Outlook” with your resource’s name.

First off, read receipts are the worst invention ever. They are straight up annoying. Why do you, as my colleague and not my supervisor, need to know if I read the email you sent? Also, even if you are my supervisor, what if I’m not ready to reply yet because I’m trying to allot the appropriate amount of time to answer fully? Maybe I’m swamped and can’t devote the time right now to get you the detailed answer you need. What if I’m mad about what you sent, and I need some time to mull over and respond respectfully? Using “read receipts” is a surefire way to get marked off of your coworker’s Christmas card list. Don’t use them.

Second, please understand how to check your coworker’s outlook calendars (or google calendars) before you schedule a meeting.  Conflicts arise and can’t always be avoided, but if you’re leading an event or project, and you schedule a meeting when everyone else has other meetings on their calendars, that’s on YOU as a poor project manager. Pick the time you have available that has the least conflicts – and then make sure to save notes for the folks who do have conflicts so you can catch them up to speed.

#4: Learn the basic rules of grammar – and apply them all the time, not selectively.

You would not believe how many college graduates I hire or interview that don’t use proper grammar in written communication. If you are representing an organization, I assume that that organization wishes for you to project an image of authority and education.

First and foremost – read everything you send BEFORE you send it. If you need a second set of eyes, that’s okay – make a friend at work or, if you have a boss that appreciates coaching and mentorship, you can ask them to review some items occasionally, too. As a supervisor, I want to know when my staff members are trying to improve and want to offer help, so knowing that someone sees this as a professional weakness but wants to grow is incredibly important to me. I’ll make the time to quickly review and offer my edits and suggestions.

If you are not a grammar wizard, that’s okay! There is a really simple solution. Simply type everything you’re planning to send out of your email or messaging system in a Word document first – and make sure your spell and grammar check functions are on. Trust the squiggly lines to correct you.  While Word isn’t 100% on the nuances of the English language and might try to tell you to stop using contractions when you actually DO want to us them, you’re likely to have 90%+ success with this method.

If you’re struggling beyond that, there are a TON of books available that focus on improving your business writing skills. Just check out amazon using key words like “business writing” and “improvement” or “help.”

#5: Ask questions about expectations and policies, and then meet them.

What does your supervisor consider a job well done? How do your departmental goals fit into the overall goals for the company? What processes exist that need to be taken for requesting time off, submitting project results, or in preparing for team meetings?

Y’all might not believe this, but out of the over ten folks I’ve either helped train or hired myself, a sold 3-4 of them have had NO idea that you are supposed to REQUEST your time off, rather than just take it whenever you please without supervisor approval. (I hope y’all knew that, too.)

There is likely a formal process for things like requesting personal time off (also called PTO in the business world), for alerting your supervisor when you need a last-minute sick day, or for scheduling adjustments. Ask your supervisor for their preferred method of PTO and sick time requests – then, follow that instruction.

You may also think you’re doing a great job in your role, but you may feel like your supervisor thinks differently. Schedule a fifteen-minute sit down with your boss and ask them directly what things are required to be seen as “meeting expectations” in your role. DO this BEFORE your annual performance review so you have time to excel in your role.  IF you’re starting a new job, the way I’d ask this is two-fold: 1) “What are the top three objectives of my job?” and 2) “What are the characteristics of a successful [position title]? How will you measure those on my evaluation?”

It will help you to know exactly what your supervisor expects. Without knowing expectations, you can’t meet them – and you certainly can’t exceed them.

#6: Find your why – and remind yourself of it every day.

There is a reason you took this job. What is it?

Maybe the job provides you with fulfillment – that’s awesome. If so, you buy into the mission of your organization so much that it brings you personal joy and contentment to do the job! That’s a total win.

Maybe the job has amazing healthcare benefits for your family. If so, then keep on keepin’ on, because that is rare in a capitalist world that prioritizes work outcome over family care.

Maybe the job is providing a great schedule or PTO for you and your home life. This is a big why for me in my current job. I get off of work at 4:30 PM – that’s an extra half hour (or more) with my kiddo than many working adults get. On top of that, I get two weeks of vacation days and a few personal days, and I can use my sick time for my dependents, so if my toddler needs to go to the doctor, I can use my sick day for that appointment. Because I serve a faith-based institution, I also get a wonderful Christmas break and a four-day weekend for Easter, and I treasure spending those religious holidays with my family.

There a ton of reasons why you might love or appreciate your job – why you continue to plug away at your to-do list even when you’d rather be in your pajamas watching Hallmark Christmas movies in October, why you vent about your boss but then turn around and hand him a report that exceeds expectations, why you want to turn on snooze on your alarm but get up out of bed and get ready.

Why? What’s your motivation? Make note – stick the picture of your family on your desk. Pin up an encouraging note from your coworker or a thank you note from a customer. Save that email from your boss that says you did great work on your last solo assignment.

Remind yourself frequently that your work provides something (or lots of somethings) that make your effort worthwhile.

#7: Declutter and organize your workspace regularly.

Be honest: what does your desk look like right now? Is it a hot mess express? Or is it organization central?

Mine gets cluttered up by the end of each week. It’s important to clear off the nonessentials (or the items that don’t make your workplace productive or happy) and file them for future needs. Give yourself a few minutes each week (either at the start of the day Monday or last-thing on Friday) to clear off your desk and get prepared for the week ahead. It’ll be well worth the five or so minutes you spend.

Clean workspace, clear mind.

I hope that this was helpful! I’d love to hear some of your on-the-job success tips in the comments below.


Halloween Candy-Corn Jar Lanterns

I am joining the Halloween train, y’all. I don’t usually decorate for this holiday – for two reasons: #1) I love my fall décor and really dislike the idea of taking it down and then putting it back up through Thanksgiving, and #2) I don’t really love spooky stuff and I’m not a huge fan, personally, of skeletons and skulls and severed fingers and zombies. (I don’t mind this stuff out for the actually holiday, but I don’t really like it in my own home for an extended period of time. I will say that I have seen some people use skulls and skeletons with flowers, and I think in the right space that looks so elegantly spooky – so if that’s your jam, you do you!)

However, having said all of that, my boyfriend Jake is a HUGE Halloween fan. I am still not at all planning to have bloody limb décor or anything too scary, but I am compromising and doing some more traditional Halloween décor. Things like traditional ghosts, classic jack-o’-lanterns, et cetera. I’m thinking lots of wood and twine to make it looks really rustic. I find that style to be charming and match more with my personal tastes.

I am only going to be decorating for Halloween for one week – because, seriously y’all, I love my fall décor. The week leading up to and including Halloween, I will incorporate several Halloween pieces I’ve found that are starting my future Halloween collection.

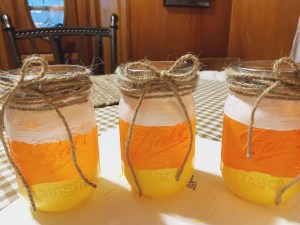
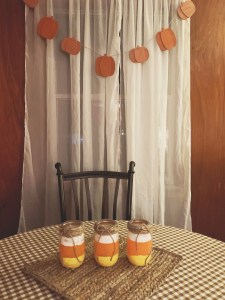
Yesterday, I made an additional décor set to go with the few purchased pieces I’ve found. So today, I’m going to take you along my DIY journey on how to make these cute, rustic candy-corn jar lanterns!

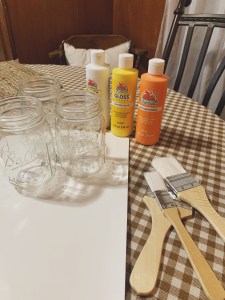
Here’s what you need: 3 mason jars; craft paints in white, yellow, and orange; paint brushes; 3 flameless votive candles; twine; glue gun & sticks.

First, it’s important that you know that the idea is to dry brush on the paint – so don’t wet your brush down. Instead, pour a little of each paint on a paper plate (or artist palette if you’re getting fancy).

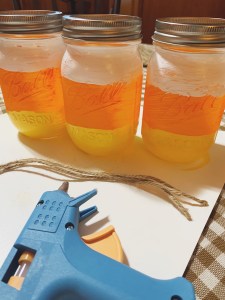
I started with the orange paint in the middle. (And in case it’s been a calendar year since you saw candy corn, remember that the colors, from top to bottom, are white then orange and then yellow. I had to check because my organized mind wanted to put them in color-wheel order.)

When I brushed on the paint, I did the entire middle section – encompassing the “ball” raised logo on the jar. Once you’ve covered the middle, let it dry. If you’re short on time or impatient like I am, you can use a hairdryer on low to help the drying process along.

Then, paint the white section at the top. Only paint down to or on the first part of the raised wording/branding, and be sure to paint up to the lip at the top of the jar under where the lid screws on. You should let this dry now, too.

Finally, paint the bottom with yellow, covering the “mason jar” writing. Let this dry.

Once all of the paint is dry, screw the lid back on but without the flat-top seal lid. Essentially, you’re using the metal twist lid, open, for the sake of country décor. Trust me, it looks cute – gives it a little of a galvanized metal feel.

Now, get your hot glue gun ready and cut your twine. If you’re making three of these as a set like I did, you want to cut three lengths of about your wingspan. (Mine is about 5 feet, so that’s what I cut three times.) I then wrapped these around the top of the jar from lip to the start of the metal lid, using hot glue as I went to secure them in place. They don’t have to look perfect – in fact, a little imperfection looks great with a country rustic décor theme.

After these are securely glued on, I decided to add little twine bows to really up the quaint & cute factor. I tied these and then hot glued them on, using a dab of glue behind the knot of the bow and on the end of each tail.

Once all of your jar decorating is done, it’s time to place them and add the lights! I got my flameless votives from Walmart in a large pack for under $8 – you can get flameless tea lights at Dollar Tree too, but I like that the votives give a little more height, and I figured I’d get a bigger pack and use the others elsewhere in the future.

I absolutely love how these turned out! I think they add a fun, whimsical touch to my newly-acquired rustic & traditional Halloween décor!

What do you think? What Halloween DIY décor items do you love in your home? Comment below – would love to hear from you!

Lazy-Lady Veggie Soup

I’ve said it before: I am not a seasonal food person. I think if you like food, you should be able to eat it whenever you want, so that means chili in summer or hot cocoa in spring. However, some things are just the right amount of cozy for certain times of year. Think Christmas cookies or, in this case, crockpot soup.

I love homemade food, but as a working single momma hen, I don’t always have the time to make everything completely from scratch. Even before I was a mom, or when I was a mom but before I was divorced, I didn’t always have the time to make the homemade things I wanted. So, I created some easy hacks to still make the food I wanted without simply making things straight out of a box from the store. This soup is one of those hacks.

If you love a warm bowl of soup on a chilly day (or let’s be honest, any day), this recipe is something you have to try. All you need is a crockpot and the following ingredients:

  • one can of beef broth
  • 3/4-1 cup of frozen corn
  • 3/4-1 cup of frozen green beans
  • 3/4-1 cup of frozen peas & carrots
  • onion flakes
  • salt & pepper

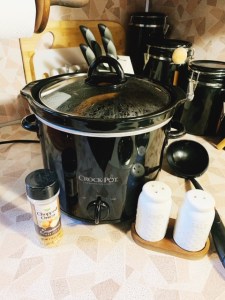
Before you start, I do recommend using liners because they’re not that expensive and they help keep your crockpot a lot cleaner. I didn’t have any in my cupboard when I made this batch, so you won’t see one pictured here, but I do prefer to use them usually!

Go ahead and add all of your veggies to the pot, then pour the broth in. If you pour the broth in first instead, your veggies will cause it to splatter, so I always do my vegetables first. Go ahead and stir everything up so that it’s all mixed together and you don’t end up with a pile of smooshed peas on the bottom.

Add onion flakes and then salt and pepper. Remember you can always add more salt and pepper later, but you can’t take it out once you add it in. My tip is to always salt and pepper moderately in the beginning, and taste test when the dish is closer to done.

Turn your crockpot on low for four hours. If you’re home and able to check it occasionally and stir it up, that’s great. If you’re not home, it should be fine, but I do recommend trying to be home a little before your four hours is up to stir it at least once or twice.

At the end of four hours, your veggies and broth should be hot. This is a great time to test for additional salt and pepper. Then it’s ready to serve alongside a grilled cheese, hot hoagie, or warm Italian or French bread.

Enjoy!