Tater Tot Breakfast Casserole

I am a huge fan of breakfast food at any time of day, and this past weekend I made a breakfast casserole for dinner that we really enjoyed – so I just had to share it with y’all! And, even better, it has tater tots in it!

Here’s what you need:

  • Salt + pepped
  • 1 cup milk
  • 5 eggs
  • 1 lb sausage (thawed)
  • 4 cups frozen tater tots
  • 1 cup shredded cheese

Preheat your oven to 350F. While the oven is preheating, cook your sausage in the skillet until all the pink is gone.

In a big mixing bowl, combine your cooked sausage, frozen tater tots, and shredded cheese and mix.

Then in another mixing bowl, combine your eggs, milk, and salt and pepper. Whisk until its mixed together very well.

Spray a glass baking dish – I used a glass pie dish but you could use a square or rectangular Pyrex too.

Dump your tater tot mixture in the sprayed pan. Then pour your egg mixture over the entire dish.

You will place this in the oven at 350F to bake for about 45-50 minutes, until the egg looks set and cooked well enough.

Scoop, then serve in a bowl and enjoy!

Comment below if you love breakfast foods, too. I’d love to hear from you!

Terra Cotta Pot’o’Gold Craft

This week contains St Patrick’s Day! Since it’s a Wednesday night, I am planning some fun themed activities for my youth group. We’re going to learn about some traditional Irish prayers and faith-based sayings, and I wanted to make them a special treat – but one that is pandemic friendly, so it only contains individually wrapped candies.

I had some of these mini terra cotta pots leftover from my Christmastime DIY Santa Treat Pots, so I decided to make “pots of gold” to give to all of my youth kiddos!

Here’s what you need:

  • Mini terra cotta pots
  • Rolo candies (wrapped)
  • A paint brush
  • Black paint
  • Hot glue gun & glue sticks
  • Some kind of clover (I got these glittery clover cupcake picks from Michaels for under $2 and I just removed the sticks)

First, you’re going to paint your mini pots black on the outside. This doesn’t take a ton of skill and it can be a little messy on the rim of the pot and even on the bottom – you simply want it to look like a leprechaun’s black pot.

Once you’ve painted all of the pots you’re making, just make sure they are dry to the touch before moving to the next steps.

Next, if you bought cupcake picks like I did, you’ll need to break off the wooden stems. If you found some clover stickers or foam, you’ll skip that step, of course.

Then, using a heated hot glue gun, simply place a line of glue on the center of the clover vertically. Then push the clover onto the pot as a decorative touch. You’ll need to hold the clover to the front for a minute as the glue sets.

Fill your dried pots with about 4-6 Rolo candies, still in their gold wrappers. My mini pots held 5 really well. This should look like a completed pot of gold to celebrate St. Patrick’s Day with a little sweet treat!

This is the finished product! Now, don’t forget to wear your green tomorrow!

DIY & Upcycled Coasters

Y’all know I love to get a little crafty, and this week is no exception! I love having unique and handcrafted items in my home, and, while I do have some coasters, they don’t all match or add a ton to my spaces. (Well, my Rae Dunn ones are cute as pie, but since I have two, I’m putting them on the bedside tables in my bedroom.) So I have been thinking of several different crafty coaster options for weeks now, and I finally settled on two easy and cute projects!

The first is a simple DIY stamping craft, and the second is a Mod Podge upcycle project. I’m going to walk you through the process for each project so you can make either or both for your own home!

#1: DIY Stamped Slate Coasters

I found these amazing coasters at Michael’s craft store for under $3.99, I think. I could NOT pass them up – they’re a slate material and they match the black accessories in my living room so well! I also grabbed some stencils from Michael’s (I went with a large sheet of nature-inspired leaves because Jake and I thought they’d match my decor best) and I had green chalk paint and sponge brushes on hand at home already.

Then all I had to do was simply use the stencil lightly tap on the chalk paint! I did this on all four coasters, using two designs, which gave me two coasters with each leaf style.

I absolutely love how these turned out! I think they are the perfect addition for my living room, and they’re so simple.

#2: Mod Podge Monogramed Upcycled Coasters

Dollar Tree has ceramic coasters with corked backing for $1 each. These are the most plain ones they offer, and, if they match your existing space just the way they are, that’s great! For me, we are finishing our basement and doing a lot of black and white and natural tones (think touches of wood and leather), so I wanted to make some simple coasters to add to that vibe. Four of these Dollar Tree coasters make a great starting point.

To upcycle these simple coasters, I got the following supplies: Mod Podge (and yes, Dollar Tree has some in the draft aisle!), foam brushes, craft paper (I used craft wrapping paper I had on hand), alphabet stencils (Dollar Tree again), and black chalk paint.

First, I cut four squares of craft paper that would totally cover the printed font on the Dollar Tree coasters.

Then, I added a layer of Mod Podge on the coaster, laid down the craft paper, and put on another layer of Mod Podge on top. Your paper will bubble some, so use a flat, stiff surface to smooth it out like I do in the video clip below. I used the cardboard from the sponge brush package, but you could also use a credit card or another straight edge. Once it’s smoothed out, set it aside to dry.

After the pieces are dry, simply add your stencil to the spot you’d like your monogram and dab paint on lightly with a sponge brush. What I love about this is that you can use the monogram that works for your family, the color that coordinates with your space, and the look that you like best!

These turned about even cuter than I anticipated!

A Final Look

Both coasters turned out as really nice, unique little additions for my spaces. I think these might even make really nice handmade gifts for a housewarming or shower.

Which do you like better – the stenciled leaf design or the monogrammed upcycle? Comment below – I would love to hear from y’all!

Helpful Dollar Tree Items for Parenting in the Pew

This one is for all of my Christian momma hen friends out there. 

Those of you who attend church regularly and have a little one (or multiple little ones) know that church is an entirely different experience when you’re on your own versus when you have a child to tend to. I’m not complaining – there is something profoundly spiritual and special about attending worship with your child(ren), and I fully adhere to the belief that the most important thing you contribute to the world and to the Kingdom of Heaven is the faith of your family. But let’s be real for a moment – parenting in the pew is hard.

Before the pandemic struck and altered the church experience signficiantly, I was attending church (and serving, since I am the Youth Director) every weekend and every Wednesday. On the weekends that my son did not spend with his father, he attended with me. While he was absolutely a quintessential toddler in the pews, he behaved fairly well overall. There were lots of snacks and board books, but he danced to the music (even tried to sing some) and he said his own sweet little “amem” (the cutest attempt at “amen” that is still how he says it today) at the end of prayers. He often said “amem” REALLY loud, and the congregation members that attend our “early service” (which also serves as our more contemporary service with more modern music and a more casual feel) loved it. While I taught the big kids Sunday school, he played with one or two other toddlers in the nursery just a few steps away, and he loved it.

When COVID-19 caused a state-mandated shut down in spring of 2020, church went virtual. (And, let me just take up some space here to say that my church really did a stand up job of trying to adapt – we already had Facebook streaming set up, but our music minister went out of his way to make sure we added a YouTube channel and increased our virtually-friendly efforts and still had dynamic worship experiences – so appreciative of his leadership in weird times and for all of the people that participated in making that a workable solution.)

My church is a part of the Holston Conference of the United Methodist Church, and we were closed down for a lot longer than just the state mandate; our Bishop and Cabinet wanted to monitor cases and provide a framework for safe regathering at our churches in the conference. (Again, appreciative of their hard work to come up with safe ways for worship!)

When we finally went back to some in-person worship in summer 2020, we were on a hybrid model that we’re still using for worship now – in person with masks and distancing, online streaming on Facebook, and recorded services on YoutTube. 

Up until this weekend, I hadn’t taken my son back for in-person. When case numbers were so high and things were so uncertain, it didn’t feel wise to expose him any extra (we still limit going into stores and my two-year-old wears a mask when we do because better safe than sorry). Instead, I had church family members substitute teach for Sunday School lessons on my parenting weekends, and we watched virtually.

On Ash Wednesday, my church held a virtual-only service, and I watched with my kiddo. He looked up at me and said, “That’s church! Take me there. Take me there, Mom-Mom, please.” My heart was straight-up goo. 

So I can’t resist a kid getting excited about the Lord. (I guess it’s the youth leader in me.) I promised him that on my next weekend with him, we’d go back. I decided we’d sit in our socially-distant pew during service (masks on, too!) and to take him to Sunday School with me to continue limiting exposure – he sat at my desk which I disinfect after every youth lesson, well over six feet away from anyone other than me, and kept his mask on the entire time.

But I was anxious. I know how challenging it could be to manage him in the pew last year when we were attending regularly and he was in the habit. Now, he’s even MORE verbal, MORE active, and totally OUT of the habit of sitting still during worship. I was so nervous, y’all. 

I’m very blessed to have a church family that loves me and my son – that has truly been supportive throughout the challenges of divorce and parenting solo and that absolutely adore my son  and get excited to see him – so that helped a LOT in easing my nerves at a church return. It also helps that our early service really is casual in nature – I feel much more at ease if he rolls on the floor in the pews (ugh yes it happens) during that service than I would during our traditional service.

I remembered, too, that I gave some advice to a youth student a few years ago that would be helpful to me with parenting my son in the pew. The youth student confessed that he liked worship for the music, but had a hard time focusing for the length of the sermon. At the time, I encouraged the student in two ways: 1) it is okay to get more spiritual connection with God during prayer or music in service than in the sermon because at least you ARE connecting with God in worship, and 2) do something else during the sermon time – take notes that help you focus on the message, or keep reading that same chapter of scripture yourself during that time – God will bless your focus on HIM, no matter what form that takes.

It hit me that maybe I should give my little one something ELSE God-related to do in the pew during sermon time. I know Dollar Tree has some faith-based word searches, because I’ve bought them before for youth prizes, but I wondered if I’d find any coloring books for toddlers or small children that might occupy my son during service. 

Y’all, Dollar Tree had SO MUCH STUFF! I was floored. Here’s my haul – and then I’ll tell you a little more about each.

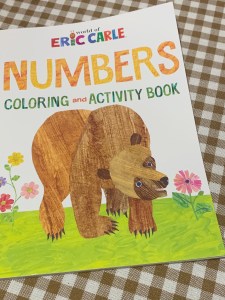
So the thing I really wanted was a coloring book. He’s so proud of knowing his colors and can focus on art for a fairly decent amount of time for his age, so I knew if they had a coloring book, it’d be a win. They had some really good ones by Dreamtivity, in their coloring line called Colortivity. I chose this one and a pack of jumbo crayons (which, for some reason I have always called “fat crayons” – yikes).

While I was there, I found SO MANY more things that are faith-based and perfect for parenting in the pew. I bought six books that are age appropriate for my almost three-year-old. 

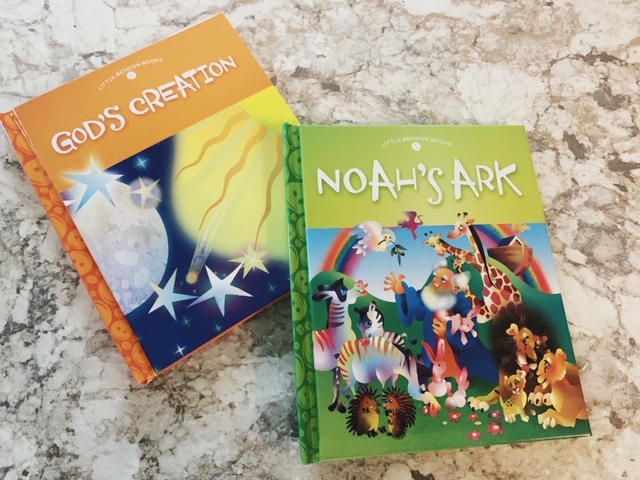
They have these sweet little hardback, glossy-paper paged books by Little Benton Books that are full of bright illustrations – I grabbed a copy of Noah’s Ark and God’s Creation. These are a little wordy, so they’d also be good for elementary schoolers.

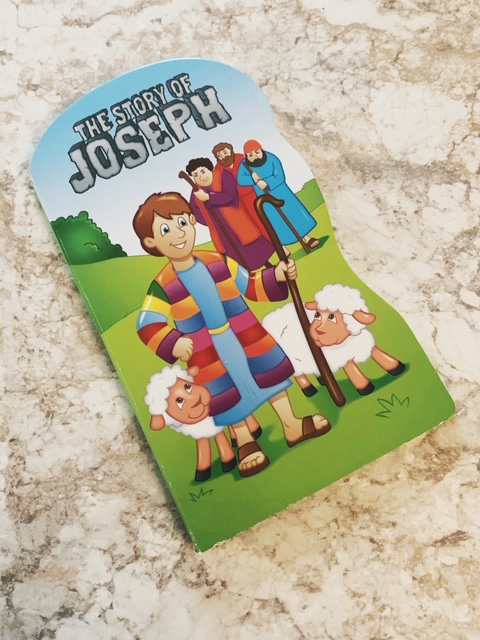
Dollar Tree also has a GREAT selection of board books by The Clever Factory! I grabbed a traditional kid’s board book about Joseph and the coat of many colors, and then three of their pop-out board books. The pop-outs I grabbed were about David, Moses, and Joshua. These are all traditional board books, so they’re perfect for toddler age.

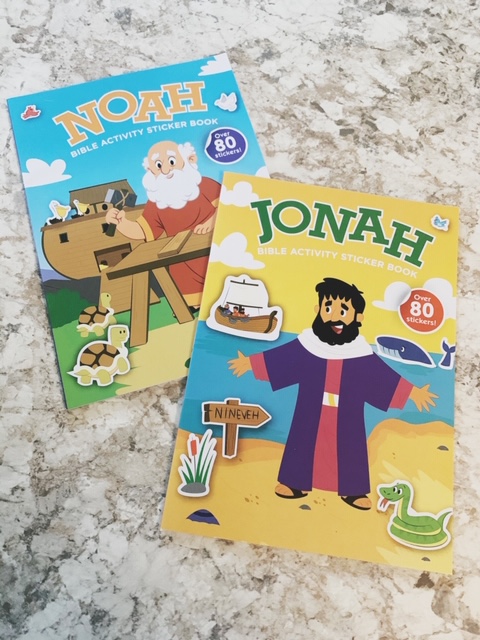
Finally, my little one has arrived at the sticker age – so I couldn’t resist these sticker books about Jonah and Noah! They have over 80 stickers in each, and they have activities like sticker scenes, coloring pages, mazes, word scrabbles, and word searches. While a lot of those activities are a little too advanced for a toddler, there are activities for kids of all ages inside and these might even be good for elementary-aged kids.

These products are SO cool and are truly perfect for teaching your children about God at home or, like I am using them now, as a sermon activity. (And, if you have older kids that are readjusting to sitting through service as the COVID vaccines are released and it’s become safer to worship, I suggest looking at the Bible activity books, devotions, or word searches that the Dollar Tree has for them, too. The Chicken Soup for the Soul devotions and word searches are faith-friendly, too!)

I’ll be honest – the coloring book did NOT solve the issue. My son is not quite three – he is NOT going to be a perfect angel in service, no matter what preparation measures I take. That’s just the reality. At one point during this Sunday’s service, while our pastor was preaching, I had to tell him he couldn’t run in the pew, and he said, super loudly, “YOU don’t tell ME ‘no!’” YIKES. Talk about embarrassing. But that stuff is going to happen – that’s life. Jesus meets us where we are, not expecting perfection – and my son is at the age where he doesn’t want to be told ‘no’ and, yes, he came to worship with that attitude. 

But you know what? He loved the music (every time a song ended, he said “oh no, the music stopped”) and he folded his hands nearly every time we prayed – even, sometimes, whispering over and over “dear God, kank you, amem.” And if that doesn’t remind me that having him in church and talking about faith at home is totally and always worth it, I don’t know what will.  

It was admittedly very hard to focus on my own worship while I was parenting (and wrestling) him in the pew – but parenting is a huge part of my relationship with God, in becoming who he calls me to be. So teaching my son how to behave and focus on God in church is, in itself, an act of worship.

But yes, the coloring book helped. There was a whole point of the sermon I was able to listen to without stress, and we’ll call that a win.

What tips and tricks do you have for parenting during worship or keeping your little ones busy while also feeding their faith? Comment below – I’m open to all the tips and tricks and product recs you have!

Easy Stainless Sink Cleaning Process

I know that farmhouse sinks are all the rage, but unless you have a pretty hefty budget or luck into a house that already has one, you may not end up with the Chip and Joanna-esque sink of your dreams.

In my last two homes, I’ve had stainless sinks. And I’m not even mad about it. They are easy to keep clean, and I don’t worry about chipping or staining any white porcelain or ceramic.

Today I’m going to show you my deep-clean process for the sink – and it’s cheap, simple, and not reliant on bleach!

What you’ll need:

First, before we clean, we need to make our cleaning mixture. Just add a small drop of soap into your spray bottle, then fill the rest of it with water (leaving a few inches unfilled at the neck of the bottle). Close the lid tight and shake it until you see bubbles – that’s when you know the soap is dispersed evenly. (For future uses of premixed spray, shake before use for the same reason.)

Before I show you my process, we’re gonna have a real life moment… this is the before of my sink. It’s dingy, discolored, stained, and basically just gross.

So here’s the step-by-step process I use.

#1: Sprinkle the baking soda in your dirty sink. (I do take anything solid out – so if you had a noodle left or a piece of leftover celery or something, remove anything tangible first and quickly rinse out the sink.)

#2: Spray your mixture over the baking soda layer until it’s lightly damp. Let this sit for a few minutes – maybe check the mail or empty the dishwasher or something while it sits for a bit.

#3: Using your sponge, begin scrubbing the sink bottom. You’ll need to use some elbow grease with the scrubby-side of your sponge, but it should pull up any staining or discoloration. Check out this picture and video to see what I mean!

#4: Still using your sponge, be sure to collect some of the sudsy baking soda and wipe down the inside walls of the sink, too. You don’t realize how much splatter gets on the walls of the sink until you’re comparing it to a clean sink bottom!

#5: Rinse the sink, including the sides!

#6: Wipe the sink dry with your bar mop or kitchen towel.

All done! While a general sink photo still looks lovely, I’m going to include the before picture AND the after picture so you can see the huge difference this method makes!

What other cleaning tips do you have for the kitchen or home? Comment below – would love to hear from you!

Easy Crock-Pot Roast Chicken Dinner

It’s COLD, y’all. Like, snowing in Texas kinda cold. Oddly, it’s snowing all around Tennessee, but not IN Tennessee, so this week we’ve not had any snow falling on our mountains – just a lot of rain and cold wind.

When it’s this kind of cold in the evenings, you probably find yourself wanting something hearty and warm for dinner. Today’s recipe is the perfect simple dinner for this kind of season (or really any season year round, in my opinion!)

Here’s what you’ll need:

  • 3 Cups of tri-colored small potatoes (you can also wedge large potatoes instead if you need to)
  • 3 Cups of baby carrots (or chopped whole carrots)
  • 1/2 Cup of chopped onion
  • 2 Frozen chicken breasts
  • Italian seasonings
  • Olive oil

First, you’ll layer all of these ingredients in the crock pot in this order: potatoes, frozen chicken, onion, and carrots. Then, sprinkle on a hearty dose of Italian seasonings before drizzling on the olive oil.

Set your crock pot on low for 6-7 hours.

If you happen to be home, and not working or out and about while this is cooking, you can stir it around the 4 or 5 hour mark.

Before you serve it, check that your chicken is cooked – it should be white all the way through and should be so tender that it’s falling apart.

Serve with bread or gravy and enjoy!

Valentine’s Day Gift Bag for Your Little One

It’s mid-February, and that means everyone’s favorite heart-shaped holiday is approaching!

I’ll be honest – both Jake and myself believe this is a totally commercialized and materialistic holiday, but I also feel like any reason to celebrate your loved ones is worth taking advantage of. So, having said that, I took the opportunity to make up a gift bag for my toddler son, and I had a ball!

I’m going to show you what I found, where I found it, and how I wrapped it all together, in case you’re looking for a cute gift idea for your own kiddo(s).

First, you need to make a run to your favorite affordable stores for a fun bag, small gifts to stuff including a small holiday-themed treat, and some tissue paper. As I write this blog, I’ll be sure to share where I got items and for how much in case it’s helpful!

Here’s an overall look at everything I got. (Yes, I went a little overboard what my initial plan was. I don’t think my two-year-old will mind.)

I shopped primarily at Target. I love any excuse to be there, so this worked out perfectly for me.

The first place I checked was the $1-$5 section at the front of the store, known as Bullseye’s Playground. (Did y’all know that it’s called that? Bullseye is the name of the Target dog, by the way.) Oh, and fun pro-tip: you can actually buy some of these dollar section items online by searching “Bullseye’s Playground” on the Target website or app.

In this section of the store, I found the cutest reusable tote bag – Peppa Pig with a multicolored heart! My little boy loves Peppa Pig (though I think it’s a really odd little show), and this one works well for Valentine’s Day, but also looks traditional enough to be carried or used at other times as well.

I also found a board book called “Bear Hugs,” a Paw Patrol puzzle in a small cardboard tube (and we’re really in a big puzzle phase right now), and a Peppa Pig projection flashlight. The puzzle, bag, and flashlight all came in various characters in case your little one prefers other shows and themes.

The next section I visited was the seasonal section. They had a TON of holiday-themed candy, but I really wanted to limit the sugar. I settled for a $1 box of Russell Stover chocolates (I think it has a 4-piece variety inside) – they had a huge selection of options and I picked this space/rocket-themed box for my star-loving kiddo.

I also looked at the Valentines Cards and found this dinosaur one that I thought was perfect!

I got Jake’s card and candy in the seasonal section at Target, too, if you’re looking for a gift for your partner, too.

The final spot I visited in Target was the toy section. I am all about age-appropriate toys, and I firmly believe that children learn through guided and appropriate play. One of my favorite kinds of toys to get for my son is the Fisher Price “Little People” line. Target has these automobile and people sets for under $5 each, so I grabbed two that he doesn’t have yet – a racecar and a helicopter.

After I found all of these goodies at Target, I realized I hadn’t gotten tissue paper! There’s a Dollar Tree just down the road from my most local Target, so I ran in there. I grabbed two kinds of tissue paper – traditional red and a shinier red – and then I peeked through the kid’s section, too. I found this amazing Eric Carle coloring book that I couldn’t resist adding to the gift bag! It features the bear from Brown Bear, Brown Bear, What Do You See? which is one of our favorite books, so I know my little one will be so excited to open it, and it’s all about numbers, so it’s a learning activity, too.

If you’re not near a Target, or you simply want to stay on a low budget, I think you could make a really nice gift bag for your kiddo(s) at Dollar Tree alone. They have puzzles, toys, reusable totes, and holiday cards, so I think you could make a comparable gift in a very affordable way.

Here’s a quick video of me filling the bag up! Check it out – and you can see the tissue paper I purchased too.

I loved putting this together and can’t wait to give it to my little one this coming weekend!

What are you gifting to your loved ones? Comment below – I’d love to hear from you! And Happy Valentine’s Day!

Super Bowl Snack Ideas

It’s FOOTBALL time! And, like, the BIG ONE – the SUPER BOWL!! 

My two-year-old LOVES football and all things sports! Unfortunately, I’m bumming a little because he’ll be with his father during the Super Bowl, but I still plan to have some good food for my boyfriend and me to enjoy as we watch the game.

Comment at the end of this post to tell me who you’re rooting for in Super Bowl LV. I’m not a major fan of either team (my family are Washington Football Team fans, my boyfriend is a Packers fan, and I can root for the Browns or the Titans based on where I’ve lived), but I think I might be rooting for the KC Chiefs… Or do y’all think I should be on Team Tampa Bay this year?

Even though we’re in a pandemic, you may still be celebrating the big game. You may be celebrating with work friends that you’re already exposed to, your close family, or even just your household. (Actually, you know what – props to you if it’s just your household and you get to watch in your PAJAMAS!! That sounds like a win to me!)

If you are like me, your favorite part of sports is the FOOD. So here’s a list of my already-shared recipes that are perfect for snacking while you cheer on your team!

#1: Beef & Cheddar Rolls

These are the perfect finger food! They combine the salt of the roast beef with the creamy dairy of the cheddar cheese with the soft and warm crescent roll – and they’re easy to hold in one hand as you cheer on your team!

You’ll only need deli roast beef, cheddar cheese, and canned crescent rolls. You can read the full recipe and instructions here.

#2: Sweet & Salty Snack Mix

I originally made this snack mix for Halloween, but it can be easily adapted to the big game! If you don’t have candy corn (because I realize it’s February), you can replace that element with M&Ms, Reese Pieces, or other candy options. 

You – and any guests or housemates – will be reaching in for fistfulls of this sweet & salty snack as the game plays! For the full ingredient and recipe list, check out this page.

#3: Cheesy Bacon Ranch Dip

I am a HUGE FAN of veggie trays! If we’re throwing a shower, party, or get together, I am always down to provide the vegetable tray, complete with my favorite homemade dip.

Even though I’m not a ranch fan normally, this cheesy bacon ranch dip is to die for! It compliments the crisp and fresh veggies nicely and adds a little “less than healthy” vibe to your otherwise nutritious dish. Also, for anyone who doesn’t love cooking, it is SUPER EASY! You just need sour cream, ranch seasoning, bacon bits, and shredded cheese – plus the veggies of your choice.

Check out the full recipe here

#4: Rudolph’s Red Noses Candy Recipe – Re-Thought

These are my favorite Christmas candy to make – and my little one has discovered a love for helping me make them, too! 

While it may seem odd to suggest a Christmas candy for Super Bowl festivities, I think it’d be really fun to use M&Ms in team colors (instead of just the red M&Ms like at Christmas) to pep up your food display! You can see the original recipe here

#5: Cookie Tray

If you’ve been around the blog for awhile, you know we have a little bit of a sweet-tooth in my house. I have several cookie recipes posted, so if you’re a sweets-eater, I’ll suggest that you check out these recipes: Butterscotch Walnut Cookies, 4-Ingredient M&M Cookies, and Peanut Butter Chocolate Chip Cookies

Bake them, and then assemble them on a nice platter or tiered tray to have a great cookie selection for your game-day get together! 

What else are you preparing to make for this coming weekend’s game? Don’t forget to comment below on which team you’re rooting for!

Quick Chicken & Broccoli Fettuccine Alfredo

Let’s make dinner! I love pasta, and I love love love easy dinner options.

Today I want to share the super simple way I make my chicken & broccoli fettuccine alfredo dish. It’s perfect for making a delicious dinner after a busy day of work or homemaking!

Here’s what you need:

  • 1 can of alfredo sauce (I like the Prego brand in the home style alfredo flavor)
  • Fettuccine noodles
  • Frozen broccoli florets
  • 4-5 thawed chicken tenders (or 2 small chicken breasts)
  • Olive oil, salt, & pepper

I’ll also show you how I do my Italian bread, so for that you’ll want Italian seasonings, oil, and Italian bread.

We’ll start with the pasta dish. Preheat your oven to 350F.

You’re going to want to start to boil your pasta. I always add a dash of olive oil into my water so that it’s less likely to boil over. I do break my noodles in half to fit into the smaller pot.

While the noodles are boiling, I line a baking sheet with tin foil. Then, I cut up my chicken into bite-sized pieces and scatter on half of the baking sheet. Then I pour out half a pan’s worth of broken broccoli florets.

Drizzle olive oil over the chicken and broccoli, then salt and pepper. Put in the oven for 20-22 minutes.

When your noodles are done, use a strainer and run some cool water over them. Set aside.

Pour out your jar of sauce into a small pot and heat, on low, until your chicken and broccoli are done. Stir occasionally.

When you only have about 5-7 minutes left on your chicken and broccoli, cut your Italian bread into slices. Lay the pieces in a pan, drizzle olive oil over it, and sprinkle on Italian seasonings. Heat in the oven for about 4-5 minutes.

When everything is done, plate your food, starting with your noodles, adding sauce, then adding your chicken and broccoli, and then adding bread as a side! Enjoy!

What’s your favorite pasta dish? Comment below – I’d love to hear from you!

3 Easy & Cheap Homemaker Hacks

Homemaking isn’t easy – and sometimes it feels like it’s near impossible to get it all done. But they always say to “work smarter, not harder,” right? So today I’m going to share three easy – and affordable – homemaking hacks!

All of these items can be purchased very inexpensively at Dollar Tree or Walmart.

#1: Clothespins for Bag Clips

I don’t know about you, but I have a hard time making those plastic chip clips last. They break – either because they don’t open wide enough, because my toddler gets ahold of them, or because they don’t hold up to the cold freezer for my frozen veggies.

I decided to start using wooden clothespins instead – they have a longer lifespan in my kitchen and if one breaks, they come in a pack of 50 or 100, so I’m not out 1 of 3 or 4 in a pack. They’re also SO much less expensive. I can get a pack of 50 for $0.97 or 100 for $1.78 at Walmart.

I use these for chips, frozen vegetables, animal crackers, and any other bag-packaged foods.

#2: Placemats for Fridge Liners

A clean fridge is so satisfying! I think one of the things that makes the biggest impact to me, when cleaning the refrigerator, is clean shelves. While you can get really cheap liners at the Dollar Tree, I find that they’re easy to tear or move in the fridge and you end up replacing them. However, more expensive liners that hold up can get PRICEY.

Instead, my solution is to buy Dollar Tree placemats and cut and fit them to sit correctly in the fridge shelves and drawers. To see the entire process, check out this blog post here: Affordable Refrigerator Organization.

I love how these look, how easy they are to pull out and clean, and how inexpensive they are in case I need to replace any pieces!

#3: Soap Dispensing Brush for Shower Cleaning

In my rental home, I only have a walk-in shower, not a tub. (I’ve added a toddler-sized tub that I can remove for my son to still take baths.)

Other than missing the occasional relaxing bath myself, I haven’t had any issues with having only a standing shower – but I have found that the bottom of a standing shower has a rougher texture. This is to keep you from slipping, which is helpful, but it takes a little different cleaning approach. Soap scum does tend to get caught in the texture.

To clean this shower flooring to the best of my ability, it takes some elbow grease. I’ve found that using a $1 Soap Dispensing Brush with a sponge head can really work! I spray a few sprays of foaming bathroom cleaner and using the sink to add a little cold water. Then I just scrub away!

What are your favorite cost-effective homemaker hacks? Comment below – I’d love to hear them!