Cheese & Barbecue Smothered Chicken

I’ve recently pulled one of my old recipes back out to the forefront of my kitchen. My cheese + barbecue smothered chicken was a dish I made often when I moved into my first apartment and then was married to my first husband.

I hit a rut recently, making a lot of the same dishes again and again, so I started trying to think through dishes I made previously. When this one came to mind, I thought it sounded like something Jake and I would really enjoy.

My assumption was correct, and Jake loves this dish, so I thought that meant it was time to share on the blog!

Here’s what you need:

  • chicken breasts (thawed)
  • olive oil
  • onion flakes
  • barbecue sauce
  • shredded cheddar cheese.

Preheat your oven to 375 F.

As the oven heats, you’re going to want to clean your chicken up some – if the breasts aren’t thinly sliced, you’ll want to cut them into more manageable sizes. I also clean off some of the fat and such during this step.

Spray down a baking sheet. Spread out your chicken, then drizzle on your olive oil. Next, sprinkle on your onion flakes. You’ll see that I leave a tender-sized piece or two plain on my baking sheet – my little one hasn’t decided to like condiments yet, so I have to cook some plain for him.

Bake the chicken, as is, for 25-30 minutes at 375F.

When the chicken is done in the oven, pull it out. Drop a dollop of barbecue sauce on top of each piece (unless you’re making some plain for your picky eater, too!). I always swear by Sweet Baby Ray’s – it’s a staple in our house!

I spread on the sauce so it’s over the top of each piece of chicken. Next, sprinkle some of your shredded cheese on top of the barbecue on each piece.

Stick this back in the still-heated oven for about 3-5 minutes.

Serve and enjoy!

Also, you’ll note that I served this with super basic sides – boxed mac and cheese and corn. That’s because I’m a working momma and although I love to make everything homemade, some nights it’s just a victory to get a meat dish with two sides on the table. We love that real life here, y’all. 🙂

Hot Wheels Backyard Birthday Bash

Okay, fellow momma hens…! Who can relate? MY BABY IS GROWING UP TOO FAST!

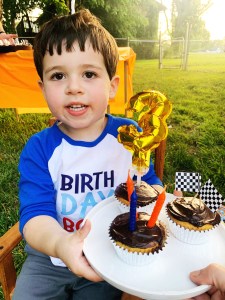
I am SO shocked at how BIG my little one is. He turns three today, and I canNOT believe that the gummy-bear-looking baby from my sonograms is now a small child. Where did my baby go?

I didn’t believe my own parents when they said kids grow in the blink of an eye, but here we are, on my little guy’s third birthday, and I am in shock. Will I cry all day? Maybe. No judgement, please – you either have or will cry over a special little one yourself!

This past Friday, I threw my kiddo a backyard birthday party to celebrate this new year of life. The theme? Hot Wheels, of course. Because what former Barbie-obsessed, lipstick-wearing little girl didn’t dream of being a boy mom and playing with race cars? (Seriously, this life is nothing like I expected but full of way more joy than I could have dreamt.)

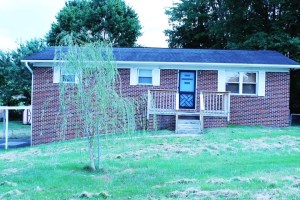
I’m a big fan of backyard, home-made parties. They aren’t perfect – there are pictures within this post of crooked tablecloths and imperfect cupcakes and handmade photo props – but they are full of intentional effort and love. I so enjoyed thinking up this sweet party especially designed for my boy, and every purchase, every craft, every cooked or baked item – it was all full of love from beginning to end.

Before I show y’all the pictures, I have to give a HUGE shoutout to the best guy on the planet – my Jake. This dude isn’t officially a stepfather yet, but YIKES has he put in the hours and the heart. He goes 100% on everything, and I didn’t know a partner could or would match my effort in every way, including in hosting my son’s birthday party. Jake was a champ – cleaning some of the house, doing yard work, setting up tables and a banner, being the pinata master, and blowing up balloons. He is my hero. (If I wasn’t in love before, I was by Friday night – seriously, even with the “oh my gosh, we have negative three minutes to be ready, get out of my way” vibe at 6:33 PM. He’s dreamy.)

So, onto the Hot Wheels party!

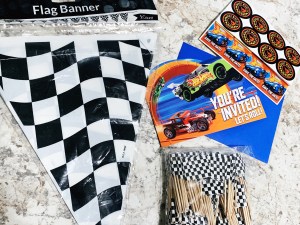
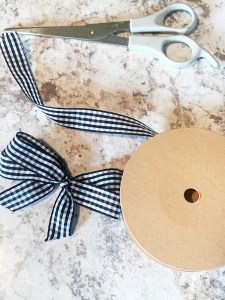
We ordered Hot Wheels branded invites, race car checkered cupcake flags, and a race car checkered banner online.

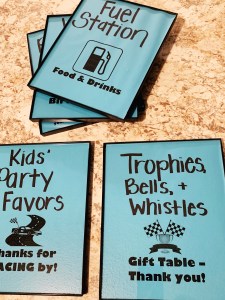
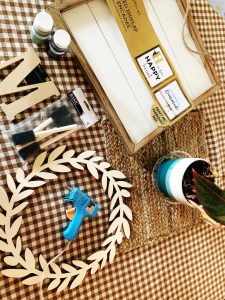
For each of the stations or activities, I brainstormed cutesy car-themed or race-themed titles. I printed them on blue paper and fitted them to format frames (the frames were around a buck a piece at Walmart, and I knew I could save and reuse them with different inserts for future parties). The titles were things like:

  • Kids Party Favors: Thanks for RACING by!
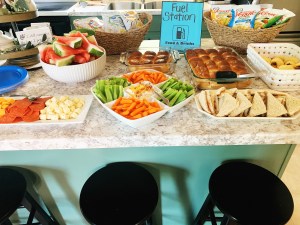
  • Fuel Station: Food & Drinks
  • Trophies, Bells, & Whistles: Gift Table – Thank you!
  • Pit Crew: Stick a Car to the Track
  • Winner’s Circle: Take a Picture with the Birthday Boy

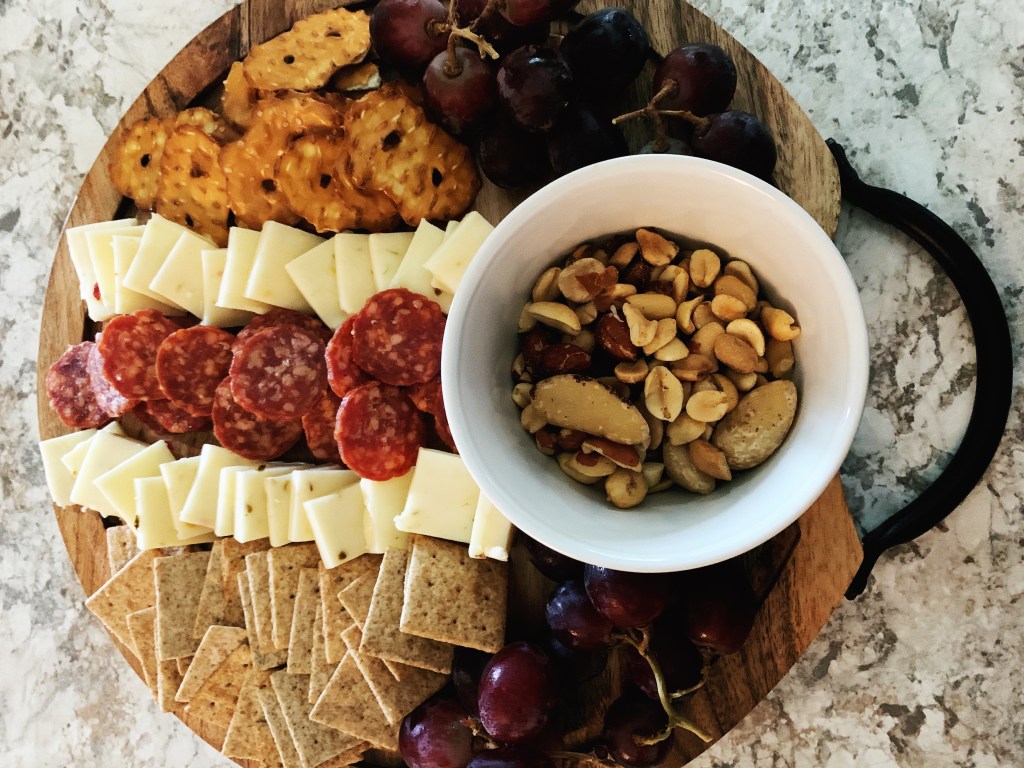
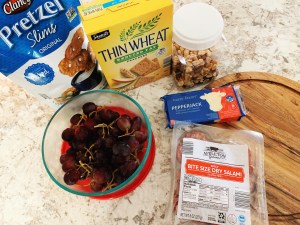
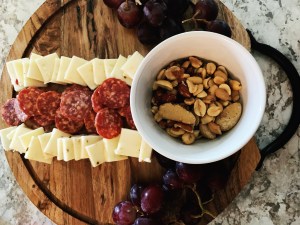
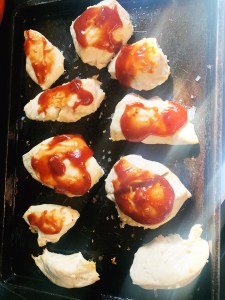
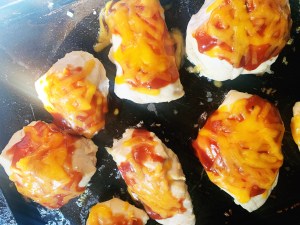
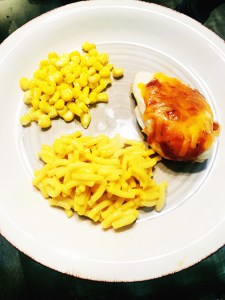
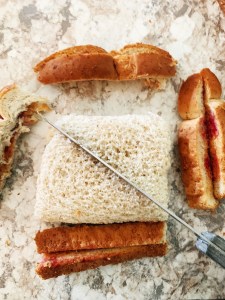
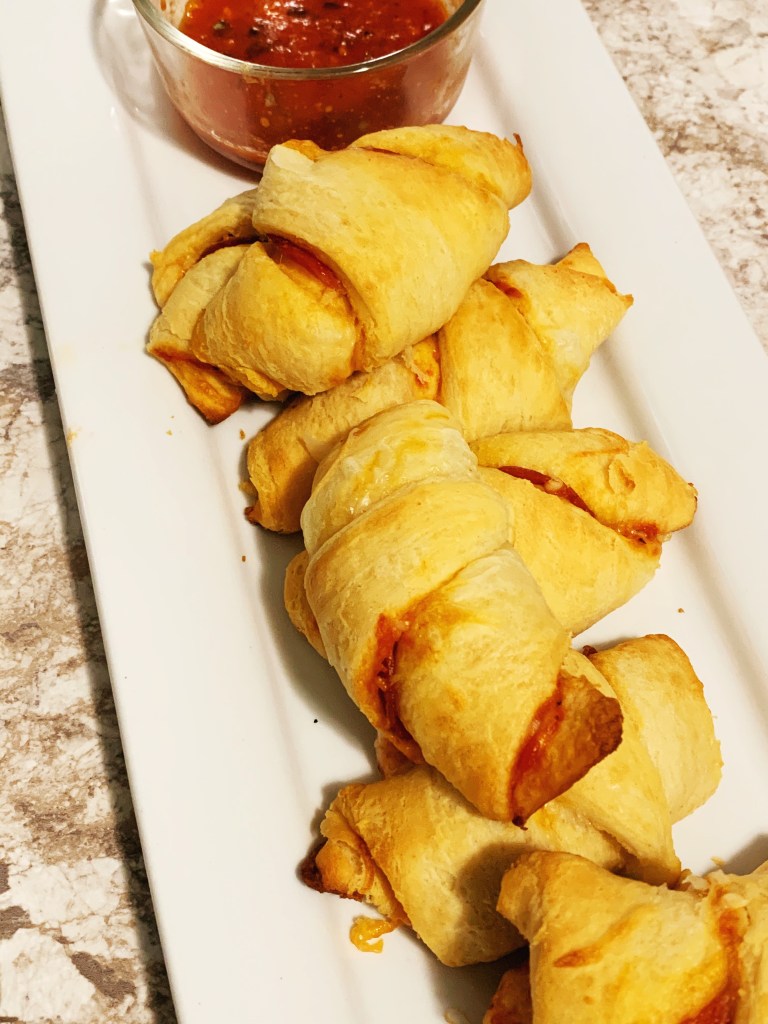
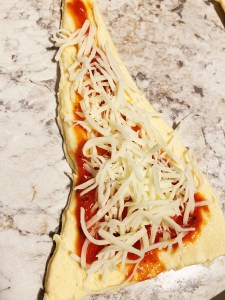
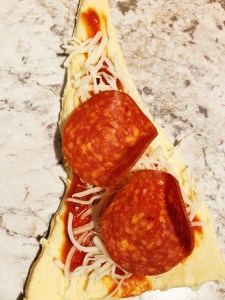
For food, I really wanted everything to be finger-friendly and kid-friendly. I prepared PBJ triangles, roast beef rolls, ham and cheese sliders, a pepperoni and cheese tray, a veggie tray with my cheesy bacon ranch dip, watermelon slices, individually bagged popcorn and individually bagged veggie straws, and cupcakes. We had juice bags and miniature waters to drink.

I thought the PBJ sandwiches were a good idea in case any kids (including the birthday boy) didn’t want ham sliders or roast beef rolls. I just made about 8-10 PBJ sandwiches, cut off the crust, and cut the remaining sandwich in half diagonally.

I decided on individually bagged sides – the veggie straws and popcorn – for two reasons: I liked the idea of limiting fingers in a large bowl and we had gluten allergies on our guest list, so having gluten free choices like popcorn, cheese and meet, veggies and fruit, seemed like a smart move.

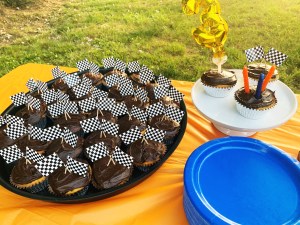
For the cupcakes, I went with a basic yellow cake with chocolate icing. I added the cute race flag picks – two to each, crossed like on race day emblems – and I thought they looked really darling. I found the blow-up, number three cake topper at Five Below, and I thought it was an awesome addition. Jake picked up really cute candles and I added three on one of the cupcakes in the blue and orange that are traditional Hot Wheels colors.

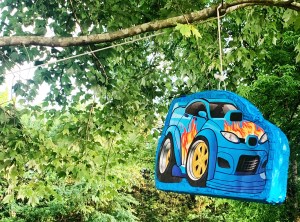
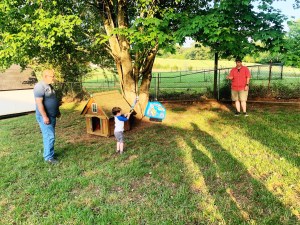
Jake stuffed the pinata, from Amazon, with dum dum suckers – a treat that I knew most of my son’s toddler friends are allowed to have occasionally. Jake was also the pinata master of the evening – he put it up, pulled it down, and made sure the kids took turns. I love this picture of the birthday boy at bat – my dad, Pop-Pop, is helping him with his swing and Jake is manning the pinata – all my favorite guys in one picture!

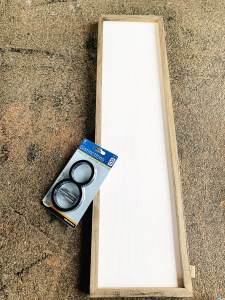
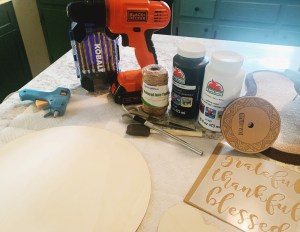
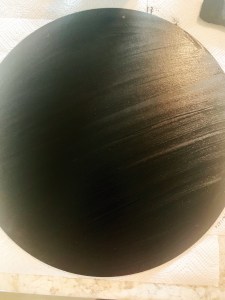
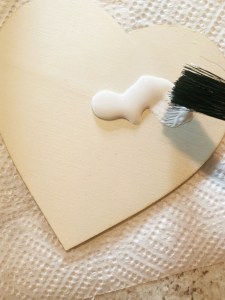
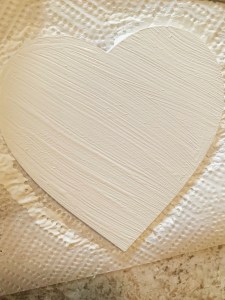
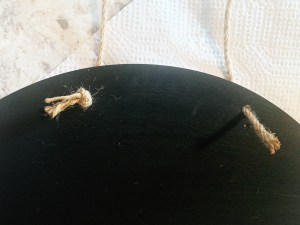
For activities, I had snagged two smaller, thick, black poster boards at Hobby Lobby for under two bucks each.

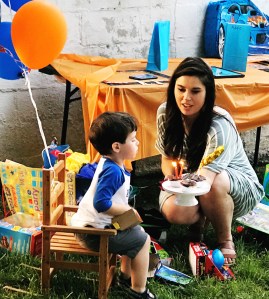
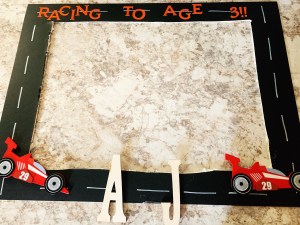
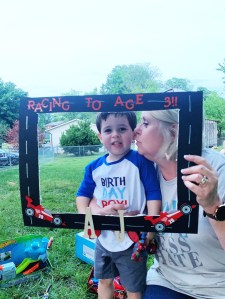
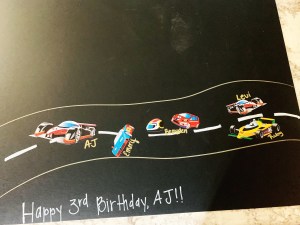
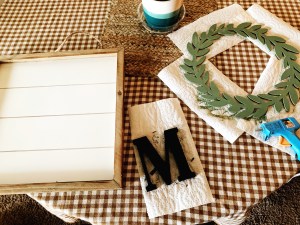
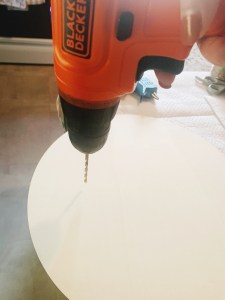
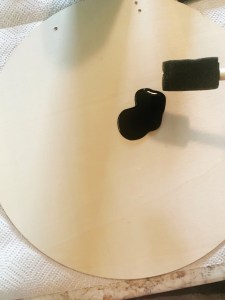
I really love adding a homemade photo element to my backyard birthday parties, because I think it helps you remember to take photos. (Of course, I somehow didn’t get a single posed picture with the birthday boy this year, which completely bums me out, but I did get some cute ones of others with my little one, that I’m sure we’ll look back on fondly when he gets older.) For this photo prop, I made a frame. I cut the middle out (albeit a little sloppily), drew on road dashes with a white paint marker, used orange letter stickers to spell out “Racing to Age 3” on the top, attached my son’s initials to the bottom, and added wooden chipboard racecars from Hobby Lobby to the bottom corners.  I think it turned out fairly cute overall! (And here’s a sweet picture of my mom and my little one posing after presents were opened.)

I used the second posterboard to make a sort of kids’ guest book. The birthday boy’s friends attached stickers of race cars to a “road” and had their parents help write their names next to their car.

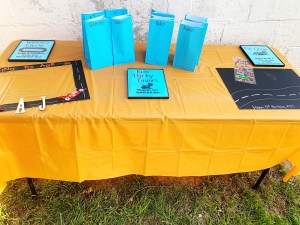
With us finally having other kids at a birthday celebration (COVID got us last year, and the year prior we only had one other little one at our party), I did goody bags. Jake and I had so much fun picking out hot wheels specifically for each kiddo on the guest list, and then I bagged up chocolate-covered donuts and tagged them as “spare tires.”

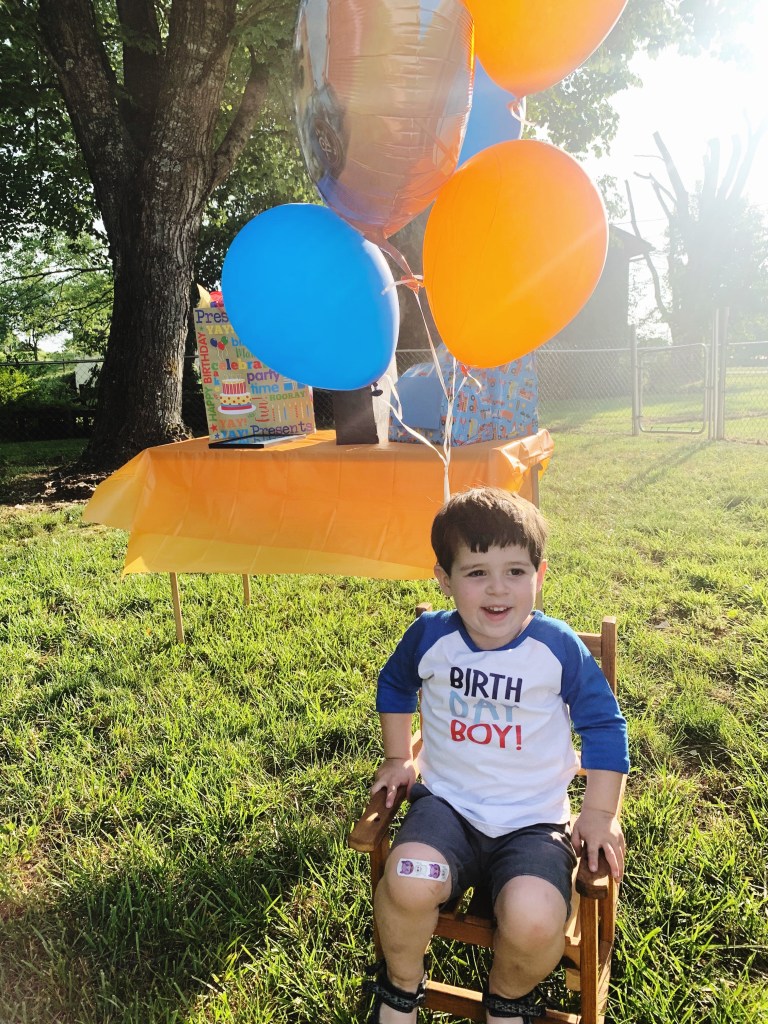
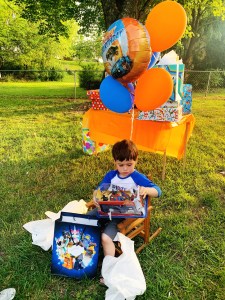
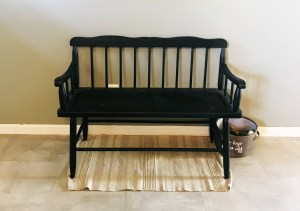
For our present-opening spot, I had Jake blow up several blue and orange balloons and a Hot Wheels-specific balloon. We tied them to little man’s wooden rocking chair and had him sit in it while he opened his gifts. While this was probably my favorite little spot of the party, I am most proud that I only had to tell him once, before the party started, that we say “thank you” for every gift we open. He did a great job being appreciative and grateful, and it warmed my momma hen heart.

We had so much fun celebrating our sweet kiddo this past Friday, and I hope you’ve enjoyed a little dive into my Momma Hen Life in today’s blog! I’d love to hear about your own backyard parties and kid-themed events, so be sure to comment below!

Mexican Rice Bowls

I’ve been making these Mexican Rice Bowls for dinner often for over a year now – and I have no idea why I haven’t shared my super easy recipe! If you follow me on Instagram and Facebook (and you should), you may have even seen these featured in a photo post, but I haven’t ever gone through the super simple way to make them on the blog, so today I’m going to share my easier-than-can-be process for making one of my favorite at-home Mexican dishes!

Here’s what you need:

  • Knorr’s Spanish rice packet (for 4-6 servings, I use 2 packets)
  • thawed ground turkey
  • taco seasoning packet
  • 1.5 cup of frozen corn
  • shredded cheese (taco blend)
  • salsa

First, cook your thawed ground turkey on the stovetop in a pan. You could also use traditional ground beef, but I find that ground turkey is super affordable at Aldi and it’s fairly healthy.

As the meat browns, sprinkle on about 1/4-1/3 of your taco seasoning packet.

As I move into the next step, I keep the meat skillet on a warm or low setting.

Cook your Knorr’s Spanish rice according to the stovetop directions on the packet.

To cook my frozen corn, I simply use a glass Pyrex, small slice of stick butter, and the microwave for a couple minutes. (If I were cooking corn for a traditional side for dinner, I’d add a sprinkle of salt and maybe even pepper, but because this is going to be layered into a dish with seasoned rice and meat and salsa, it really doesn’t need any additional flavor or additional salt.)

Once everything is hot, you’re ready to assemble your bowls!

It’s really a layering game at this point – and you can make them with the quantities of ingredients you like best. I start with rice at the bottom, and I do typically go heavy on the rice. Then I add in a scoop or two of my seasoned meat on top of the rice. Next comes the corn, then the salsa. I have found that a chunkier salsa works best so your dish doesn’t get soupy. Finally, I sprinkle on the cheese – I like the taco blend and I personally use cheese liberally.

You are ready to eat!

Jake likes to use chips with his, and I eat mine as-is and all stirred up with a fork. (And, if you’ve got young kids, it may be helpful to know that Little Man likes each of the items separately placed on a plate rather than layered.)

Enjoy!

Pizza Crescent Rolls

We are a pizza roll family in my house. Maybe it’s because Jake and I are both 90’s kids and they’re nostalgic – or maybe it’s because we’re snack-lovin’ people… But no matter what the cause is, we’re a snacking crew when it comes to streaming shows or watching a game, and my easy crescent pizza rolls are perfect for finger-foods in front of the TV or at a small get together!

Here’s what you need:

  • 1 can crescent rolls
  • A handful of pepperonis
  • Shredded mozzarella cheese
  • Tomato sauce
  • Italian herbs/spices

Preheat your oven to 375F.

As your oven preheats, roll out the canned dough into the pre-cut triangles. Spread a small amount of sauce on each triangle, then sprinkle on a healthy dose of cheese, and add a couple pepperonis. I found that 2 pepperonis were plenty for these little two-bite rolls.

Set them on a sprayed pan (my first time making these, I forgot to spray and they stuck and were sort of a stringy-cheese mess on the bottoms), a few inches apart. Bake for about 11 minutes.

As these are baking, you can use some leftover sauce with Italian herbs and spices. Mix them together, heat, and prepare to serve with your baked rolls.

Enjoy these pizza rolls as a snack, light meal, or party treat!

Front Porch Refresh

The new house is continually being worked on and improved, and I’m so so happy. It just feels like HOME. Pretend I’ve inserted a heart-eyed emoji here, y’all – that’s how in love this millennial is with her little brick basement ranch.

We have little man’s birthday party coming up soon – like, in less than three weeks – and I wanted the front of the house to look a little more inviting than it did. Plus, my sweet parents bought us a new front door of our choice as a housewarming gift!

For reference, here’s what we were working with before. Throwback seventies door in a robin’s egg blue, crooked and falling cement steps, small porch light that blends into the brick, and no house numbers.

Jake and his dad, Roger, built up new stairs right away – like within weeks of the house being bought. It was a minor safety hazard, and because AJ is still a little one, we wanted to make sure that the steps were even and comfortable. Plus, with the concrete steps falling down, the top step onto the porch was a BIG step, and if I wasn’t comfortable, my not-quite-three-year-old definitely wasn’t.

Jake won’t mind me saying this, I don’t think, but Roger totally took lead on the steps and worked some magic – they are beautiful, match the existing porch railing, and fit perfectly! We didn’t remove the concrete ones because that is a HUGE mess to do, so Roger built the new steps around them. They’re stable and evenly set and just perfect. Every time my toddler climbs up them, I am so thankful!

I picked out a set of white goose-necked outdoor light fixtures. Well, technically, I picked out one really expensive one and then Jake found a set that was nearly identical for a lot less and ordered them for the house. (The link to the lights are here, and so far, I really like them.) He installed one on the front porch and one on the back (back porch redo coming later this year, hopefully) as well as installing our Ring doorbell.

Jake and my dad worked together to install the new door – a craftsman-style, fiberglass door that seems to be a family favorite, as my sister and brother-in-law have the same one painted another color at their home. (Also, can I just make a side note here and say that I LOVE that Dad and Jake like working together on projects? And my kiddo has started learning the names of tools, too, so I can just imagine how my heart will explode when he’s old enough to help with projects, too!)

Beside the super perfect new door is the tiered planter I crafted last summer at my rental home – you can check out that DIY by clicking here – and a galvanized watering can I thrifted for a few bucks and planted a succulent in.

A pet project of mine was to get the address posted on the house. From the street, there’s no way for a guest to easily see that they’re in the right place if they’re visiting, so I really wanted some visible numbers up. Jake and I picked out some metal numbers at Lowes, and I grabbed this large piece of framed wood at Hobby Lobby. I did use smaller screws for the numbers since the wood piece I bought was more shallow, but this turned out so nicely!

I already had the bench, bench cushion, and rabbit statue from Lowes a few years’ back, and the pillows were from Walmart about a year ago. (I definitely recommend their outdoor pillows – they’re about $5 a piece and they’re pretty durable and weather-proof for the price!)

I also really wanted some green plant life on the front of the porch. We’re not quite ready to landscape – and I’m certain it won’t get done until AFTER little man’s birthday celebration – so I decided to get a little crafty with flower boxes.

I bought these black plastic boxes at Lowes for under $8 each, filled them with plants, and hung them just under the railings on each side with screws. I did screw on the plastic first with four screws each before filling with dirt and planting.

If you decide to do planters like this, don’t forget the “thriller, spiller, and filler” method. This means you have three types of plants: a thriller that makes a big pop (here, my spike plant), a spiller that grows OUT of the container (my choice in this project was creeping jenny), and a filler that grows within the planter (I picked white impatiens). My flower and plant choices were based on the fact that my front porch gets partial sun, not full sun, so different choices might work better for you, depending on your space, but you can typically find thrillers, spillers, and fillers in all varieties!

I’m super happy with how it all turned out! I think the porch feels MUCH more inviting and has a lot more curb appeal than before.

I’d love to hear your thoughts or your tips and tricks for curb appeal, so be sure to comment below!

DIY Faux Succulent Wreath

I love a good seasonal wreath – but I REALLY love love love a wreath that can be used in several seasons. Having décor pieces that can be kept up for more than a season – or even year round – makes housekeeping a little easier – and even better if it’s affordable!

If you follow me on Facebook or Instagram (and, shameless plug, you oughtta!), you may have seen my DIY faux succulent wreath featured on my feed a little while back. As I made it, I saved all of my photos and videos so I could share it here with you – but then I got sidetracked with new homeowner projects, and posting the tutorial completely slipped my mind!

So, today, you’re going to get the full run-down of how I made this craft using Dollar Tree supplies!

Here’s what you’ll need:

  • hot glue gun + sticks
  • green floral foam wreath form
  • 3 plastic faux succulents
  • burlap ribbon
  • jute string/twine
  • mini wooden chalkboard
  • white chalk pen

First, you’re going to want to prepare all of your materials. The first thing you’ll want to do is heat up your hot glue gun. As this heats, de-stem your faux succulents. Dollar Tree has a variety of these floral accessories, making it easy to choose the look you want for your space. Once you’ve chosen, you can cut off the brown stems and work with just the plastic leafy sections.

I also went ahead and made my decorative bow with my burlap ribbon. I really liked the black and burlap ribbon they offered at my local Dollar Tree, so I picked up chevron and polka dots and ended up using both. They also had a nice maroon and burlap option.

Next, you’ll want to use your chalk pen to craft a message on your wooden chalkboard. I simply wrote “welcome home” since it was going to be in a doorway. In my home, you can see the back kitchen door as soon as you walk through the front entry way, so I felt a “welcome” message was appropriate. I could have also gone with a more kitchen-themed phrase or a monogram.

Now that your hot glue gun has likely heated up enough, you can begin to assemble your wreath. I started with wrapping mine with ribbon. I simply wrapped around and used dots of hot glue to secure the ribbon in place. I did use both patterns on mine, but to be even simpler, you could use just one pattern of ribbon. I did use some jute where my chalkboard was going because I felt like it might create a sturdier hold.

Finally, you will want to glue on your accessories – the bow, the plastic succulents, and the chalkboard. I spent some time arranging these items without glue first to choose the look I liked best.

Here is the final product! I really love how this turned out and how truly simple it was to put together. The green, black, and natural brown ties in with my home décor nicely, and I love that it creates a nice focal point for the kitchen door.

I’m considering making a similar one for on the outside of the door on my back porch, too. What phrases would y’all suggest for a back-porch wreath? Comment below – would love to hear from you!

Entryway Décor

In our new home, our front door opens right into the living room. However, the previous owners (or, I guess, ONE of the previous owners) continued the kitchen flooring to, apparently, give it an entryway vibe.

To help with the flow of the space, we’ve decided to continue to use the space in that way.

The living room is not huge – it’s sort of a narrow space and, while it fits my furniture well, it does not have room for anything additional. However, I really did want the option of additional seating if possible.

I decided to search for an entryway bench that would allow for functionality – to put on shoes before going out, to drop little man’s backpack or my purse, and to create additional seating space if needed. I also really wanted a piece that would contribute to the vibe in terms of décor. We consider our taste to be a mixture of traditional style, industrial farmhouse, and country chic, sort of like a charming transitional approach to home décor.

I was thrifting with my mom and sister when we stopped in a local antique store. This store, Farmhouse Antiques, has a ton of booths for different vendors – and my sister’s mother-in-law actually has a gorgeous booth there too!

I came across a black bench that definitely has that traditional and country vibe – and I fell in love. I got this beauty for just $47! We had a time getting it into mom’s Nissan Rogue with three adults and other thrifting finds, but we made it work!

After getting this gorgeous piece in my living room, I started to get a lot more excited about styling and decorating it.

I had previously made a monogrammed sign for the entry way, and I thought ahead enough to have taken some photos and videos for y’all. (You’ll notice my old rental house is the setting for this project.)

I purchased the following items from my local Walmart’s craft aisle: an “M” (Jake’s last name starts with an “M” – so when he finally shares it with me -LOL, that’ll be our monogram), a wooden wreath cutout, chalk paint in black and a sage-like green, a shiplap lookalike handing piece, and sponge brushes. I also have my own mini hot glue gun and glue sticks always on the ready in my craft bin.

I first painted my pieces – the green chalk paint was for the wreath cut out and the black was for the monogram.

Then, after those dried, I hot glued them to the center of my shiplap-looking hanging piece. I think it turned out super cute and would actually be a great DIY piece for a lot of various décor themes.  

I also wanted to add in some additional functionality for hanging jackets. My papa – my grandfather on my dad’s side – used to love woodworking. He made these sweet homemade peg hooks that are in my house in a couple of places. This one is a really large one that was perfect for this spot! I had used it in my son’s room previously but thought it’d get more family use in the living room entry way, so when we moved, I brought it in here. Papa passed this fall, so adding something that reminded me of him in this space was really special.

To add some color and softness to this space, I grabbed some pillows, a blanket, and a rug I already had. (Always shop your own home when decorating – you save money and find new uses and spaces for stuff you already loved enough to purchase before!)

I also really loved the idea of incorporating some floral and natural elements into this space, so I grabbed a basket I had bought years back from Dollar Tree and the faux floral bouquet I carried as Maid of Honor in my sister’s wedding. It didn’t hang just right, so I grabbed some twine, braided it, and attached it to the existing basket handle. This hung at a much better length for my tastes, so I added it on the end of the peg hooks.

Here’s the finished space. Oh – and peep that cutie pie dog toy bin I got from Ross for under $10!

How have you decorated your entry space? Any DIY or decorating tips you love? I’d love to hear from y’all in the comments below!

Homemade Mac & Cheese

Jake and I both love macaroni and cheese. There’s something comfortable about cheesy, creamy pasta, and it fits in with my down-home style cooking really well.

In the past, I’ve attempted homemade crockpot mac and cheese but it didn’t turn out the way I’d hoped. So when I had a hankering recently, I made my own stovetop and oven baked dish that turned out a lot better! Jake asked me to make it more often, so I figured that means it’s blog-worthy.

Here’s what you’ll need:

  • 2 tablespoons butter
  • 2 cups shredded cheddar cheese
  • 2 cups of elbow noodles
  • 1 cup of half and half
  • 1/4 cup of flour
  • Salt + pepper

EDIT: When I first published this, I used 4 cups of elbow noodles. I’ve cut that down to 2 cups. It makes a smaller dish, but a significantly creamier, cheesier dish!

Preheat your oven to 400F.

First, boil your noodles on the stovetop. They should be al dente when you pull them off, drain, and rinse them.

As those sit and finish draining, get out a saucepan and put it on the stovetop on medium heat. Add in your butter and let it melt. When it’s a yellow pool instead of a chunk of stick butter, add in 1 cup of your cheddar cheese (just 1 not both!), all of your half and half, and all of your flour. Whisk it continually over heat until it becomes a blended, sticky concoction. Take it off of the heat.

Now, in a mixing bowl, scoop in half of your cooked noodles and half of your sticky dairy mixture. Add a dash of salt and a dash of pepper and stir until well mixed. Then, pour the mixed pasta it into a baking dish (I used a square oven-proof Pyrex).

Sprinkle a little cheese (about 1/3 of the remaining cup) on top. Repeat this same process again and layer on top again. This time, use all remaining cheese and sprinkle on more pepper to your liking.

Bake in the oven for 17 minutes. When you pull it out, the top cheese should be crisping a little.

Scoop out your portion (or two – no judgement here!), and enjoy!

Note: next time, I think I’ll use a little extra half and half to make it even creamier. Adjust to your preferences, as always.

DIY Farmhouse Sign

I’ve been itching to do another simple, creative DIY project, and today I’m sharing the result!

I started a new job at a local elementary school as the bookkeeper. I love the environment and the chance to serve kids and educators, and I’m loving the folks I work with so far, too!

Having a new office was a good chance to change things up. I treated myself to a Rae Dunn wall sign and a few desk items, but I wanted to DIY something for my new workspace, too.

I decided to make a DIY farmhouse-esque sign that would look nice with a gray wall and some black and white decor.

Here’s what you’ll need to make something similar:

  • Drill and bit
  • Hot glue gun and glue stick
  • Black and white craft paint
  • Brushes
  • Stencil
  • Ribbon
  • Twine
  • Large wood circle
  • Small wooden heart

First, I drilled two holes in my large wooden circle. These will later serve as a spot for the twine to tie for hanging purposes.

Don’t you just love a girl using a power tool in the kitchen?! #GirlPower

Then, I painted the wooden circle black. (You could absolutely reverse the colors or use other colors of your choice if you wanted!)

Then, as that dried, I painted my wooden heart white.

As the paint dried on both wooden pieces, I cut my twine, to be used for hanging, and ribbon, to make a sweet little bow.

After the black circle was dry, I tied the twine through the drilled holes.

Then, I added on the stencil. This one has three words you can choose from – thankful, grateful, and blessed – and I just chose blessed for my office. I used white paint and tapped it on lightly.

It’s not perfect, but I think it turned out really cute overall.

I then hot glued on my white heart, after it dried. Then I got glued on my bow as well.

I think the finished product turned out really well! Here it is hanging in my office.

What do you think? Have you DIY’d any wall decor lately?

I have a few other home DIYs, such as my son’s bedroom decor, DIY drink coasters, and many more in the “home sweet home” category on this website!

From Boxed Brownies to Gourmet Dessert

I love chocolate – and brownies are no exception! I’m absolutely not opposed to a box mix, either – in fact, that’s the way brownies happen at my house, mostly due to time and convenience.

But every so often, I want to kind of jazz things up. You’ve been to bakeries or restaurants that have mouth-watering, gourmet brownies on their menu – and they seem like such a special treat, don’t they?

Well today I’m going to share three easy ways to upgrade a batch of box mixed brownies – all super simple and super delicious!

To start, I always get the Aldi brand brownie mix (under a buck!), all of the ingredients required on the box, my Pampered Chef brownie pan, and my Kuppet stand mixer. If you don’t have a friend that sells Pampered Chef, let me know – I don’t sell it but have a handful of friends that do and would be happy to connect you. This pan is an amazing purchase because it makes individual brownies, so each brownie has corners and a soft center! And it’s perfect for baking like I will today, with various toppings.

Go ahead and follow most of the directions on the box – preheat the oven as directed, mix the batter, and pour into the pan.

Pro-Tip: I use an ice cream scoop to portion my batter. One and a half to two scoops fits perfectly in this pan!

Before you put your brownies in the oven, it’s time to add the toppings! I’m going to make three different delicious toppings – one per row of brownies in this pan.

My toppings will be: pretzel pieces, butterscotch ad walnut, and peanut butter.

It’s time to add your toppings! But first, remember, when you are baking with add-in items like pretzels, flavored baking chips, or nuts, you need to lightly coat those items in flour. Coating them in flour before adding them to your baking mixture ensures that they won’t all sink to the bottom of your baked goods! By coating them with flour, they’ll stick to the mixture nicely and bake within the item, rather than falling due to their added weight during their time in the heated oven.

Go ahead and sprinkle your add-in items to the top of your brownies. I’m going to put broken pieces of pretzel on my first row, then a mixture of butterscotch chips and walnut pieces to my second row.

Now, to add the peanut butter! There are even lovelier ways of adding peanut butter, but I’m a fan of a big glob. I think it tastes more like a Reese’s cup if there’s a puddle of peanut butter in the center. I just take a fork, dip it in my al-natural peanut butter, and drop a glob onto the top center of the last row of brownies.

Bake these in a preheated oven (as directed on the original box). I do find that with additional items, I sometimes need an extra minute or two in the oven.

You can serve these warm with a scoop of vanilla ice cream – or just as they are! They are delicious and, quite frankly, next-level either way!

Enjoy!