The new house is continually being worked on and improved, and I’m so so happy. It just feels like HOME. Pretend I’ve inserted a heart-eyed emoji here, y’all – that’s how in love this millennial is with her little brick basement ranch.
We have little man’s birthday party coming up soon – like, in less than three weeks – and I wanted the front of the house to look a little more inviting than it did. Plus, my sweet parents bought us a new front door of our choice as a housewarming gift!
For reference, here’s what we were working with before. Throwback seventies door in a robin’s egg blue, crooked and falling cement steps, small porch light that blends into the brick, and no house numbers.
Jake and his dad, Roger, built up new stairs right away – like within weeks of the house being bought. It was a minor safety hazard, and because AJ is still a little one, we wanted to make sure that the steps were even and comfortable. Plus, with the concrete steps falling down, the top step onto the porch was a BIG step, and if I wasn’t comfortable, my not-quite-three-year-old definitely wasn’t.
Jake won’t mind me saying this, I don’t think, but Roger totally took lead on the steps and worked some magic – they are beautiful, match the existing porch railing, and fit perfectly! We didn’t remove the concrete ones because that is a HUGE mess to do, so Roger built the new steps around them. They’re stable and evenly set and just perfect. Every time my toddler climbs up them, I am so thankful!
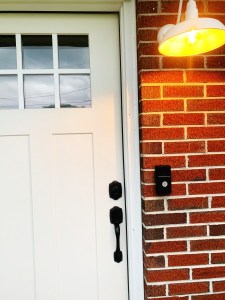
I picked out a set of white goose-necked outdoor light fixtures. Well, technically, I picked out one really expensive one and then Jake found a set that was nearly identical for a lot less and ordered them for the house. (The link to the lights are here, and so far, I really like them.) He installed one on the front porch and one on the back (back porch redo coming later this year, hopefully) as well as installing our Ring doorbell.
Jake and my dad worked together to install the new door – a craftsman-style, fiberglass door that seems to be a family favorite, as my sister and brother-in-law have the same one painted another color at their home. (Also, can I just make a side note here and say that I LOVE that Dad and Jake like working together on projects? And my kiddo has started learning the names of tools, too, so I can just imagine how my heart will explode when he’s old enough to help with projects, too!)
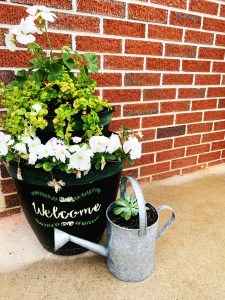
Beside the super perfect new door is the tiered planter I crafted last summer at my rental home – you can check out that DIY by clicking here – and a galvanized watering can I thrifted for a few bucks and planted a succulent in.
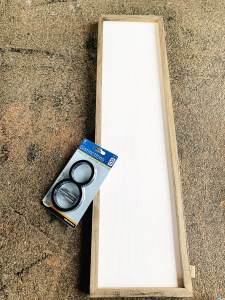
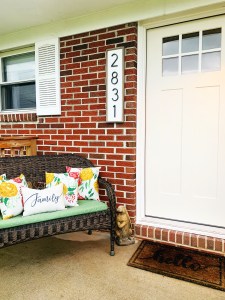
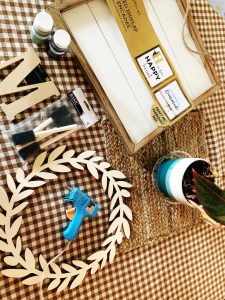
A pet project of mine was to get the address posted on the house. From the street, there’s no way for a guest to easily see that they’re in the right place if they’re visiting, so I really wanted some visible numbers up. Jake and I picked out some metal numbers at Lowes, and I grabbed this large piece of framed wood at Hobby Lobby. I did use smaller screws for the numbers since the wood piece I bought was more shallow, but this turned out so nicely!
I already had the bench, bench cushion, and rabbit statue from Lowes a few years’ back, and the pillows were from Walmart about a year ago. (I definitely recommend their outdoor pillows – they’re about $5 a piece and they’re pretty durable and weather-proof for the price!)
I also really wanted some green plant life on the front of the porch. We’re not quite ready to landscape – and I’m certain it won’t get done until AFTER little man’s birthday celebration – so I decided to get a little crafty with flower boxes.
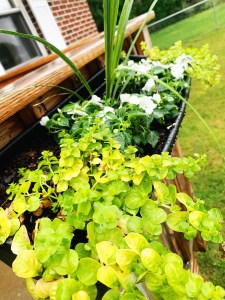
I bought these black plastic boxes at Lowes for under $8 each, filled them with plants, and hung them just under the railings on each side with screws. I did screw on the plastic first with four screws each before filling with dirt and planting.
If you decide to do planters like this, don’t forget the “thriller, spiller, and filler” method. This means you have three types of plants: a thriller that makes a big pop (here, my spike plant), a spiller that grows OUT of the container (my choice in this project was creeping jenny), and a filler that grows within the planter (I picked white impatiens). My flower and plant choices were based on the fact that my front porch gets partial sun, not full sun, so different choices might work better for you, depending on your space, but you can typically find thrillers, spillers, and fillers in all varieties!
I’m super happy with how it all turned out! I think the porch feels MUCH more inviting and has a lot more curb appeal than before.
I’d love to hear your thoughts or your tips and tricks for curb appeal, so be sure to comment below!