Our basement in the new house wasn’t fully finished when we purchased it. A ton of work (done by us and our parents) went into finishing it almost completely (only the laundry room and a back storage room are left to finish in the (distant) future.
The basement stairs (which were completely torn down and rebuilt by Jake and his dad) lead up to a doorway in the kitchen. The stairwell has been painted, a new hand rail installed, and we’re planning to carpet the stairs in the next several months.
Jake and his dad are home appraisers, and they see all kinds of interesting things during work hours – and some of them are really weird, and some of them are really cool. Jake’s dad, Roger, saw a house that had ledge-style shelves at the end of their hallway for family photos. He immediately thought of our stairwell space and showed us a picture.
It’s a perfect suggestion for our space! I’ve kept it in the back of my mind since he suggested it, and recently we made it happen – and that’s what I want to show you today.
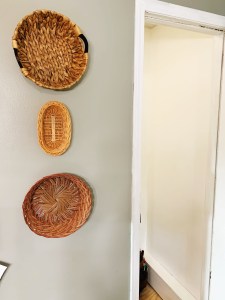
Here’s our space before we did anything – you can see the unfinished stairs here, but just forgive us – we’re working on this house one project at a time.
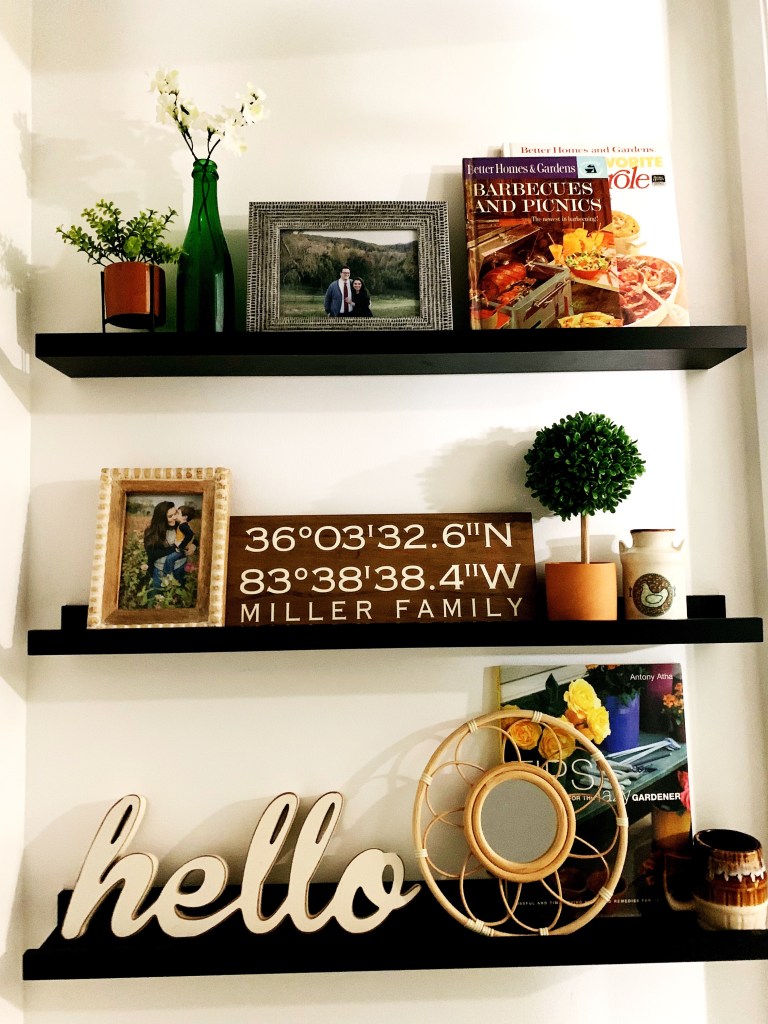
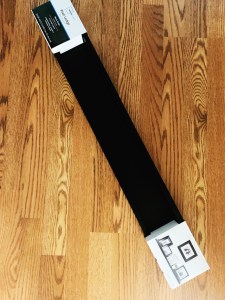
We purchased these ledges from Walmart. They’re the Mainstays brand, found here. We purchased three of these for our stairwell landing.
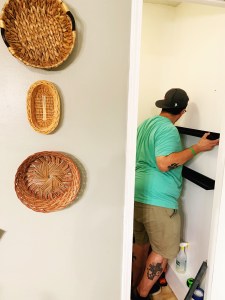
They came with paper stencils to help you measure and install the anchors. Jake put them up – and it took some work because we’re both fairly specific about having the measurements just right and perfectly level.
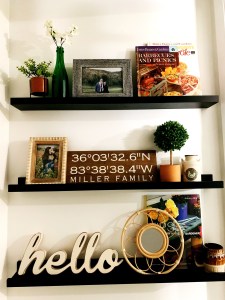
Once they were up, I decorated the shelves. I didn’t go out and buy a bunch of new things for the shelves. I shopped my own home first – I found faux plants, cookbooks, pottery, and this “hello” sign. I also bought two frames from Ross for under $8 each and framed some family photos. I also found this round rattan mirror for $5 at Five Below. When Jake was finishing putting up the final shelf ledge, I gathered the items and grouped them together by the shelf I wanted to put them on.
Then, I decorated! Here’s a time lapse of the process.
It was pretty easy to get the items on the shelf since I had already grouped them together. There was an item or two that I didn’t end up using, but overall, I used almost all of the décor items I had gathered.
I’m really happy with the end result! I’d love to hear what you think – or how you decorate similar spots in your home in the comments!
As I was cleaning earlier this week, I realized that I have shown snippets of little man’s big boy bedroom in the new house, but I’ve never given you all a true tour! Time to correct that, y’all.
As I show off his big boy bedroom, I’m also going to point out some tips and tricks I’ve discovered to help me keep the space clean and to make it functional for a three-year-old.
Before I go through each area of the room, I wanted to give you an actual video tour. So here you go!
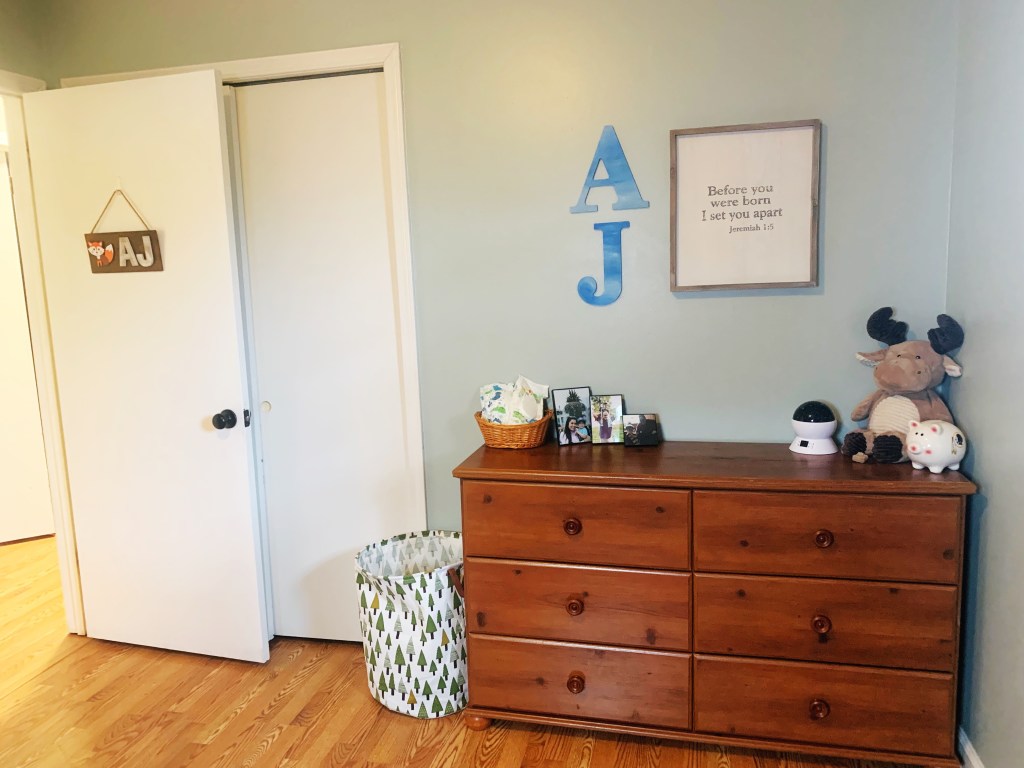
As the video shows, when you first enter, I have a sign with his initials and a fox to match his woodland bedroom theme. If you missed it, here’s the link to my tutorial for this easy DIY décor.
Then, immediately behind the bedroom door are two sliding doors to the closet. I typically keep these closed, but I did take an inside picture to show you all a storage hack I’ve been using. While I have a laundry basket full of extra linens on the left (and some stored in the upper left corner that aren’t spotted here) and your typical hangers (red to match, found at Walmart in baby/kid sizes), the hack that works best for me is the hanging organizer. I found this at Walmart for under like $5-7! Technically, I think this is for sweaters, but it works perfectly for seasonal stuff or occasional use stuff that I don’t want to take up dresser space with. In each space I have things like summer/beach hats, swimming items (ear plugs, baby sunscreen, trunks, and swimmer diapers), winter hats, mittens and gloves, bibs (we still wear the terry cloth ones on spaghetti night), and washcloths. By the way – these washcloths are the “growing” ones from Dollar Tree – they come wrapped in a small circle or square, you toss them in the tub, and they “grow” or expand into a character themed washcloth. These have been great potty-training prizes for little man, and I store them here on the bottom pocket of this organizer so he can easily grab one of his choice before bath time.
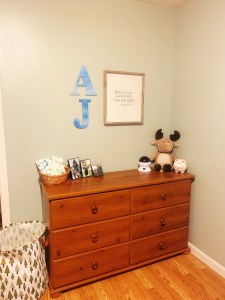
The dresser is filled with his clothes – and sometime in the future I’ll have to share my dresser organization tips – but the décor around the dresser is what I really wanted to show you all. The initials were a gift from my sister – when she and my mom’s best friends (loving dubbed my “extra mommas”) threw my baby shower, my artist sister painted these blue ombre initials. The Jeremiah verse hanging was from AJ’s nursery when he was first born – the J in his name stands for Jeremiah, and this is the verse I prayed over him during my pregnancy. When my divorce was finalized, I was adamant about getting these wall hangings because they were so sentimental to me. As a side note – and other divorced mommas will get this – splitting up households is NOT fun or easy, and it takes some bartering, but I’m such a sentimental person that I really tried to split up things that would have sentimental value to each parent – for example, my ex-husband’s aunt and uncle had built AJ a toy chest, so I made sure to communicate that the toy chest belonged to him since it came from his family and they would want to see AJ enjoy it when he was with his father.
The moose stuffed animal was a first Christmas gift from Santa, the light is a night sky rotating lamp from my parents on AJ’s third Christmas, and the photos are of AJ with me, my father, and Jake respectively. The basket contains some wipes and pull ups – we’re potty training and he’s doing GREAT through the day, but still needs pull ups at naptime and bedtime. I thought a basket made it look a little neater.
In the larger picture, you can see the laundry basket I picked for AJ. It features a pine tree pattern that I thought matched the woodland motif really well. You’ll see that design shared on his shoe basket and his stuffed animal basket too – I find that carrying a pattern in different spots of a room helps it feel really cohesive. Here’s the laundry basket I ordered on Amazon.
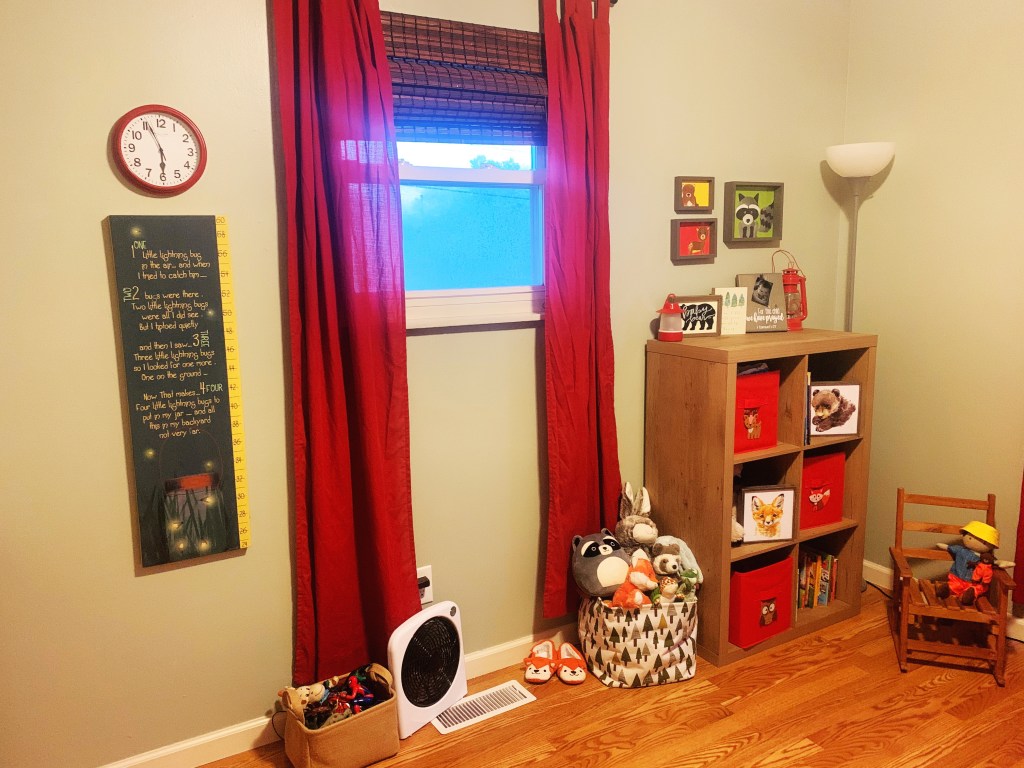
On the next wall, we have one of his two windows. I framed these in red for two reasons. #1: It’s his favorite color and he asked me for a red room at the new house when he learned that we were moving. I was NOT painting the room red – while it might work in some spaces, the house I bought in my first marriage had a red room and painting over it was ridiculously hard. I want to avoid that for the future if possible. #2: Remember how I said that I really fought for some nursery items that were sentimental to me? Well a very sweet woman at my church quilts – and she’s SO talented. She made my little man a quilt for my baby shower that had brightly colored forest animals on it, and I absolutely wanted that quilt in AJ’s future room. She’s a friend of my family from the church I grew up in, so I asked for that quilt. I am so grateful to have it for my kiddo in this room, and red matched it well.
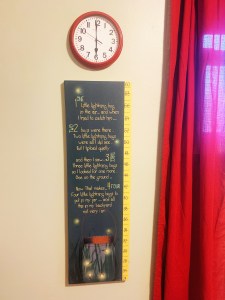
Tying into the red accent color, I grabbed a red framed clock from Walmart and paired it with this adorable firefly growth chart that my parents bought for AJ from Mast General Store. If you’re not familiar with Mast General Store, you should be! Such a cool place.)
I oddly have a picture of a fan and a little burlap basket. But there’s a reason, my momma hen friends! This extra basket has been a really helpful hack for me! When little man brings his toys upstairs from the downstairs playroom, it is SO nice to have a basket in plain sight where he can gather everything together. This allows him to “pick up” his own room, which is a huge help and teaches him the importance of tidying his spaces.
Also, this fan is awesome because little fingers can’t get stuck in it. I think I got it at Walmart.com and it was fairly inexpensive.
The next thing in this corner of the room is my little man’s bookshelf. It’s a Better Homes & Garden’s cube shelf. I had these mainstays bins and added on wooden pre-painted animals. You can see the tutorial for this DIY here.
The brightly colored paintings on the wall were done by a friend – she was painting a lot as a hobby and stress reliever, and I bought these frames, showed her my kiddo’s quilt, and asked her to paint some animals for his room to match. These were also in his room at my rental before we bought this house, and they compliment the theme perfectly!
The fox and bear artwork on the shelves themselves came from Walmart. They also had a hedgehog and a rabbit, but I let AJ pick himself and he choose the bear and the fox.
The mini rocking chair was a Goodwill find that I got when we were living with my parents before I got my rental, and now that he fits it well, he loves sitting in it! He does have a “boy doll” – a soft cloth doll from Manhattan Toy that we adore. He’s a little fisherman that has his own stuffed bear! I love the idea of having gender neutral toys; I feel that it’s just as important for my son to learn to be tender and caring as it is for him to be strong and tough. Everyone needs a healthy dose of both, so I love gender neutral toys like soft dolls, stuffed animals, play kitchens and food, et cetera that helps kids identify the various facets of their personalities and callings.
On the final walls, you see the second window, a blanket ladder (which I score for $10 at my local Dollar General!), and bunk beds. The bunk beds were my sister’s when she was growing up and she and my parents decided to gift them to my son for his woodland room. I think they’re a perfect addition! And I love how they look with the quilt – which does have a matching crib-sized quilt that a work friend of my mom’s made for little man when I was expecting. When we moved in with my parents after I separated from my husband, my mom already had this at her house for AJ to use and now they match nearly perfectly!
I did get the red comforters from Walmart. They were the Mainstays brand and came with the gray sheet sets, and they were very affordable!
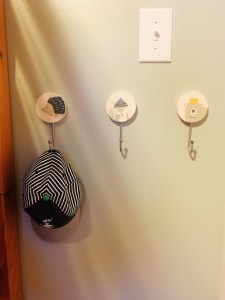
Jake helped me put up these new hooks – they have woodland animals wearing hats and accessories! They are too cute! A friend sent me a picture of these at a new local shop in Dandridge, Tennessee, because she knew that my son’s room matched the theme. I love these so much – and shopping local is so important to me. The brand is Primitives by Kathy, and I love a lot of their other stuff, too.
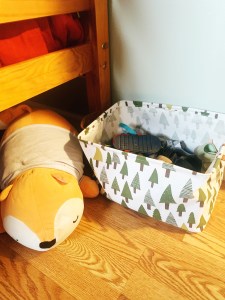
The final photograph in this section is his shoe bin (again, matches the stuffed animal bin and the laundry basket) and his large cuddly fox. The fox was a gift from a friend for AJ’s first Christmas – and he used to cuddle this so much! Now that he’s bigger, he doesn’t crawl on it and cuddle as much, but I think it’s still so sweet and adds to the room.
The shoe bin is so helpful to have. I can ask little man to pick out his shoes by himself or put them away by himself, and because the bin is noticeable as soon as he walks in the door and it’s on the floor, it’s easy for him to access. I love things that make it easy for him to learn to be independent in his space!
So that’s little man’s “big boy” room in the new house. What do you all think? What kid’s room motifs do you love or have in your home? I’d love to hear from you in the comments!
Y’all, easy recipes are my FAVORITE. Let’s make it taste homemade, but EASY. (Anybody remember the Staples “easy button?”)
One dish that I can save some time on is mashed potatoes. Sure, you might be like “duh, instant,” but here’s the deal – I don’t like instant mashed potatoes. I like homemade, creamy, lumpy mashed potatoes. I want REAL bits of potato, please!
So here’s my time-sensitive solution. Instead of spending time peeling and boiling potatoes, I use one small packet of instant potatoes and one can of whole potatoes. These make mashed potatoes quickly, and the whole potatoes are already softened from being in the can, so they heat up really quickly – perfect for mashing.
Here’s what you need to make this homemade mashed potato recipe DUPE into a LOADED situation:
1 Can small, whole white potatoes
1 Packet of instant potatoes
Butter
Salt
Water
Sour cream
Bacon bits
Shredded cheddar cheese
First, use a strainer to drain your can of potatoes. I found this can-sized drainer at Walmart in the utensil aisle for under $5. It’s perfect for draining potatoes (or other veggies), letting clean water in to rinse, and then draining again!
Then, pour the drained potatoes into a sauce pan. Run some clean water in the pan too and heat. I add a dash of salt too.
Once these have been heating in the water on the stove top for a bit, test with a potato masher (or a fork) to see if they’re softening. When they’re softening enough to break apart with a push of your utensil, they’re ready. Lower the heat and mash away. (I leave some lumps so it has that real-potato texture, like my Gram’s homemade mashed potatoes always did.)
Add butter, salt, and instant potatoes. Stir together over low heat. Then, I add a dollop of sour cream to keep the mixture creamy.
Once the potatoes are mixed together and look like the texture you enjoy, add in bacon bits and shredded cheddar cheese to your liking. I add another touch of butter, too, but that’s just because I cook with butter like a real Southerner.
Mix everything together so the cheese and bacon are well dispersed throughout. Then, as you serve, sprinkle some final cheese on top! Enjoy with your favorite dinner dish!
The new house has a huge rec room in the basement. Well, we created a huge rec room in the basement. When we bought it, it was basically unfinished floors with mostly finished walls. We used the existing wall structure but really turned it into our own space.
If you’ve been following for a bit, you know that Jake works from home, so his office is important to have completely done by the time we’re married and by the time he’s fully licensed in appraising (he currently is training under his dad in the licensing process). I also work from home part-time and in my company’s office the rest of the time, so I ended up needing a designated at-home work area. You can see my office remake from an existing basement closet in this previous blog post.
What you haven’t seen yet is that the way we finished our rec room allows us to utilize it as multiple spaces: a TV space, playroom space, a bar cart and mini fridge space for snacks, and a work out space.
I’ve been doing in-home workouts since the pandemic started, and it’s been so good for me. I’m admittedly not working out quite as much as I’d like, but the convenience of working out at home so I don’t miss time with my little one when I have him is awesome, and I think it’s made working out a less cumbersome experience for me. No gym fees, no finding time in the day, no missing out – I can even do laundry while I’m working out if I do it from home.
So we made sure we had a corner for fitness. Jake’s parents gave us their old treadmill and a yoga mat. I also already had my own light hand weights, yoga mat, resistance bands, and light-weight kettlebell.
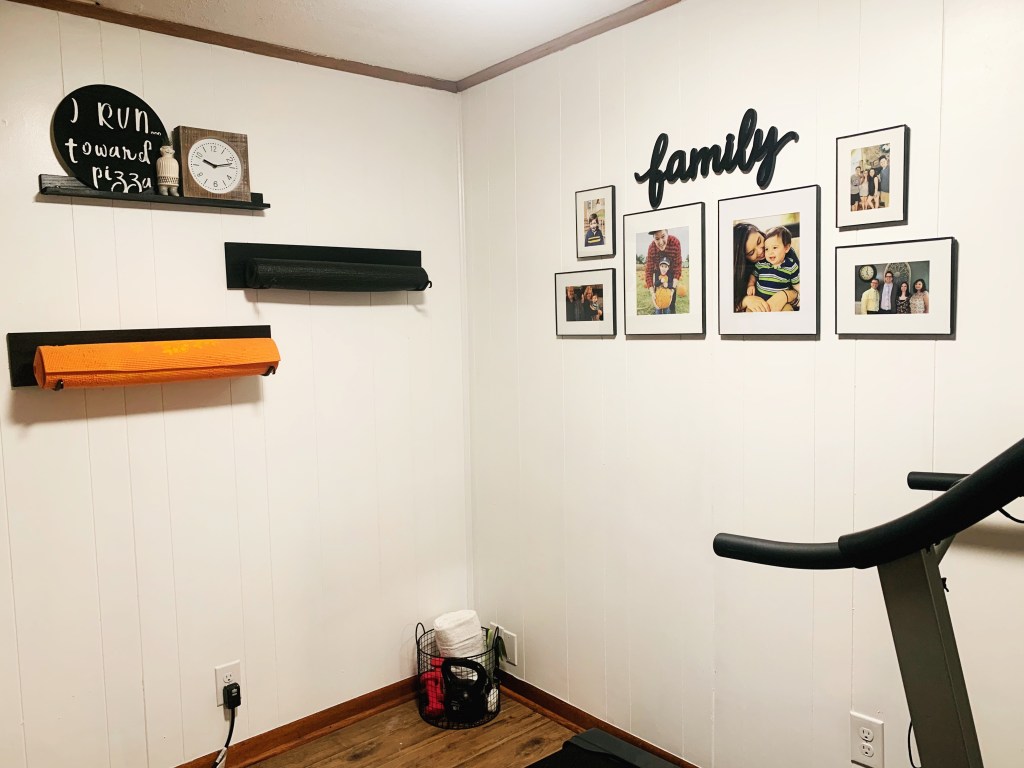
Here’s the BEFORE picture of our work out space.
Of course, the floors and paint were already done from when we did the basement rec room as a whole. Fun fact: I was going to paint the panelled walls gray and even already had the paint, but as we were priming the paneling, I realized the white really brightened up the space and kind of made me forget that we were in a basement, so I changed gears and went with a bright white instead!
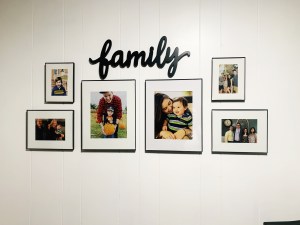
Here’s the family photo collage I had already put together. I had a similar set up in my rental home, but it had different pictures. I switched things up to include Jake’s family and to update some of the photos to more recent ones.
I knew I wanted to organize the space and finish decorating the walls, but I wanted the additional décor to be functional, too. I decided to find a way to store my rolled-up yoga mats.
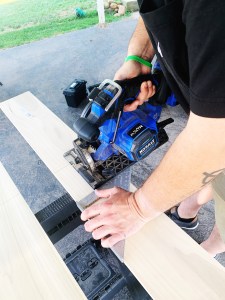
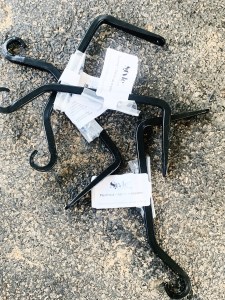
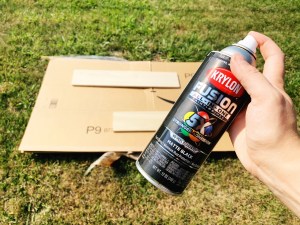
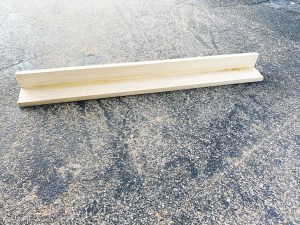
At Lowes, I bought two pine boards that were about 6 inches wide by 48 inches long and ½ inch thick, four metal plant hooks, and matte black spray paint by Krylon.
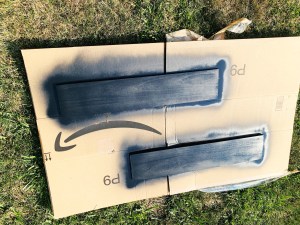
First, we cut the boards down to 28 inches long. Then, we spray painted them black, let them dry, and then added the plant hangers. But here’s the catch – we hung the plant hangers on the painted wood upside down. This is so they act as holders for the rolled yoga mats! Basically, the painted wood acts as a backing board to the upside down hooks, which keep the yoga mats from rolling. The backing boards are 28 inches long, and the mats are about 24 inches wide, so I brought the hooks in 3 inches on each side so they’d hold the mats just right.
Since I only have two yoga mats, I only needed two completed hanging units. However, I really prefer things in odd-numbered groupings if possible, and I still wanted a decorative element to the wall. So I decided to build a shelf that matched the mat holders.
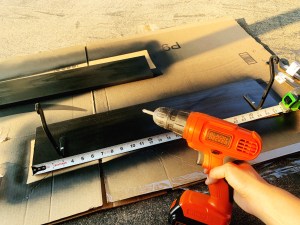
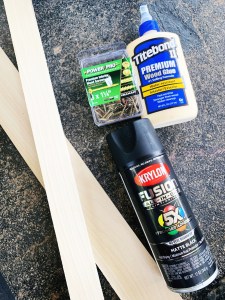
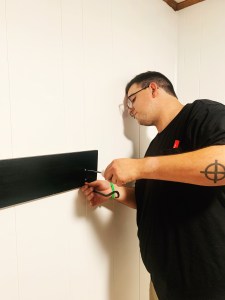
During the same Lowes trip, I purchased more Krylon matte spray paint, a 24 inches long by 3 inches wide board, and a 24 inches long by 2 inches wide board. This time, I waited to spray paint – instead, Jake and I assembled this shelf first. The skinnier of the two pieces would act as a backboard to attach to the wall, and the wider of the two pieces would be a ledge on which I could hold some decorative items. We assembled this shelf by drilling pilot holes, drawing a line of wood glue, sticking them together, and screwing the two pieces together with a cordless Black and Decker drill. Then, I spray painted the entire thing except the wall-facing back.
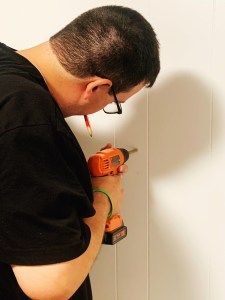
Once the shelf and two racks were dry, Jake helped me get them up on the wall. I found exactly where I wanted them to be placed, and Jake drilled pilot holes, inserted anchors, and drilled the newly-made wooden storage units up.
Then, I decided to decorate!
While the orange mat is from Jake’s family, the black mat I purchased for myself months ago – it was just $5 at Five Below – and I definitely recommend checking out their site or their store that’s most local to you for simple at-home work out items.
On the top shelf, I placed a clock I purchased for $10 at my local Dollar General, an air plant in a pot shaped like a little man that I got at my local Lowes, and a sign that I made myself. The sign says “I run… toward pizza” and I made it using a thin round piece of craft wood, white and black acrylic craft paint, and a set of alphabet stencils.
I stacked these together and am really happy with the way it turned out!
During the same Dollar General trip as the clock purchase, I grabbed a great deal on the wire basket – just $8 for this beauty! I filled it with my other work out items – my kettlebell, hand weights, a towel, and my resistance bands.
This work out corner ties in perfectly with our wood, white, and black décor in the rest of the rec room, and it turned out so great in just one afternoon and evening!
Do you work out at home? If so, what’s your space like? I’d love to hear from you in the comments below!
It’s almost the Fourth of July! As the holiday approaches and the temperature in Tennessee continues to rise, it seems like the perfect time for a little backyard refresh.
When we purchased the house, there was an old spot where a fire pit had obviously been. There was no ring, but there were remnants of partially burned logs and ashes, and you could tell it was a spot where they may have had a backyard bonfire or campfire several times over.
Jake’s backyard dream has always been to have a really nice area to entertain friends or family. In my own childhood, the backyard had been a center for family time and a play spot for us as kids.
So we both have this vision of a really inviting and warm backyard. This house had a really plain backyard with a lot of potential when we bought it. There are really big, established trees to provide a good source of shade, which is perfect for Tennessee summers. With a spot already having been broken in for a fire pit, we knew that adding our own fire pit would not be too challenging. And there was a perfect corner for us to add swingset for a Little Man.
The yard is also fenced and big enough for Flash, who spends most of his day outside when the weather cooperates.
The back porch is something we hope to refresh in the future but it has good bones and serves a good purpose.
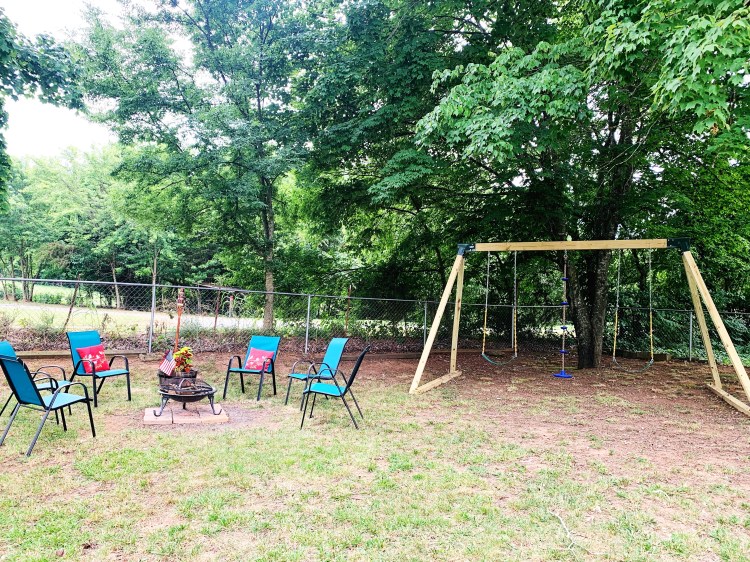
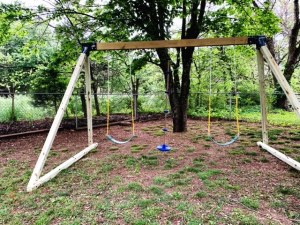
So in May, leading up to Little Man’s birthday, my parents and Jake and I went in together to build a swingset. It’s important that you know that we added this because it ends up being in a corner of this little refreshed area of the yard. Check out our finished swingset below. In the future we hope to add other play equipment is my little one gets older.
So as we are spending more and more time outside, and as the days are at their longest point right now, I really wanted us to have a backyard that felt comfortable and inviting. Our one day dream is to have a crushed gravel fire pit, lined with landscaping timbers, and complete with a picnic area and the fire pit area. However, we want to be budget conscious now as we continue to work on various aspects of the house including inside and front of the house.
So for now we have a more simplistic fire pit area.
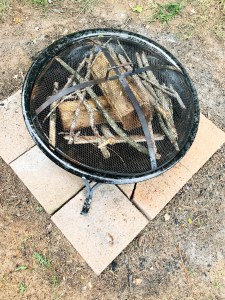
We first cleaned up all of the old ash and half burned log, and we really just tried to clean up that area so we had a blank canvas to work with. Jake’s dad had given us a used portable fire pit back when I was at my rental house. Since the fire pit area at the new house didn’t have an actual ring, we thought this would be a great fix for right now until we get to figure out how we want to actually build a stone fire pit in the future. There were already some landscaping steppingstones at the house when we purchased it. They are a little mismatched, and a few of them are chipped or broken, but we were able to piece together a diamond of stone to put our portable fire pit on top of.
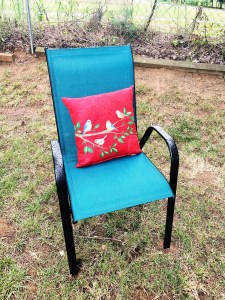
Then our local Walmart had a sale on outdoor chairs. Everywhere I looked for outdoor chairs, they were seeming to cost at or over $20 each. But I spotted these black and teal chairs our local Walmart store with a tag that said $10 each on them. When we went in and asked about it, the sales associate was super helpful even though the lawn and garden section was about to be closed, and he got his manager to unlock the chairs and get us the six that we wanted. The manager explained that this store was having the sale because corporate had sent more than anticipated, and they needed to move them out. (So if you’re on the east side of Knoxville, there’s a deal you should catch!)
I positioned these around the diamond fire pit area in a circular shape and added some outdoor pillows I had from years past – I’m sure these were in the $5 outdoor pillow bin at Walmart, which where I always look for outdoor cushions!
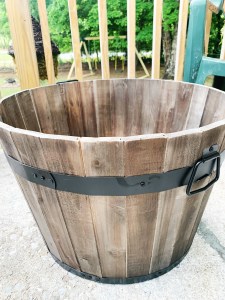
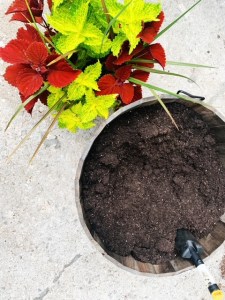
I’ve been on the lookout for a wooden barrel planter for a while now. These things get kind of pricey, and, I guess with the price of lumber right now, that shouldn’t be surprising. And while Lowes has plastic ones l for about $15 bucks, I don’t really love the look of faux wood in a fire pit area where you’re going to be setting it next to authentic wood. Having said that, I think those are a great option if you can’t find an affordable one or if you’re using a heavy plastic material in your lawn furniture.
I thought for sure I was gonna end up needing to get the plastic faux wood planter, since the smallest authentic wooden planter at Lowe’s was over 30 bucks, but I stumbled upon this wooden planter at Ross for a great price! It’s even bigger than the ones they had at Lowe’s, which were priced higher.
Jake has always been a fan of tiki torches for a fire pit area. I think it’s because he likes Survivor and it gives him that whole “you’ve been voted off the island” vibe – but I have to admit that getting one and using the bug repellent filler does seem like a smart idea. So while we were at Lowe’s for a gutter project that is not nearly as fun as decorating the backyard, we picked up a nice dark-stained wood tiki torch.
I also use this opportunity to grab some plants. I typically like to buy my own variety of plants and create my own arrangement in my planters, but with the size of this large wooden barrel planter, I decided it be easiest and most affordable to just grab one of these ready to go filler kits from Lowe’s for just under 15 bucks. This one features coleus and other plants that need a medium-level of sun, perfect for the fire pit area that does receive shade from the nearby trees but also gets some direct sunlight in points of the day. I do recommend these filling kits if you have planters that you fill each year – they are a great price and they already pair plants that do well in the same type of lighting. Definitely gardening at it’s easiest!
Another thing I bought at Lowe’s was an American flag for under two dollars. These are out because of the upcoming holiday, but we also do have a larger flag on the front of our house, so I thought it was a nice tie in to the rest of the outdoor space. We also bought two more flags to stick in my flower boxes out front for the holiday because, at that price, you could definitely afford to be a little extra patriotic for Independence Day!
I already had dirt at home, so when we got back to the house, I got straight to planting. We filled my barrel planter 2/3 of the way full putting soil. And I added the plants from Lowe’s and filled in with more dirt. Then Jake and I – because I wasn’t bright enough to just do this planting down at the fire pit and instead it on the raised back porch – carried the heavy planter down to the fire pit area together. Here I added our tiki torch and our flag.
And now for only about $100, we have a great backyard space to sit while a little man plays on the swing set or to have an evening fire and makes s’mores.
I am so pleased with this little corner of our home! We will be using it a lot this holiday weekend. Comment below to let me know how you’ve decorated your backyard on a budget – I’d love to hear from you!
As I mentioned in last week’s blog post, our new house has an office for Jake and a designated playroom area for little man, but there wasn’t a clear space just for me. When Jake realized that I didn’t have my own designated space, he was concerned and wanted me to have a place to write, since that – and this blog – are kind of my set aside hobby for myself. I suggested we revamp the closet beside the basement stairs – located conveniently beside the play area – into a nook that would fit my ladder desk. This wasn’t an immediate priority so we have been using the space for storage in the meantime as we’ve worked on more pressing projects, like finishing the rest of the basement into useable family and playroom space, remodeling the kitchen, and other more urgent spaces.
Fast forward a few months, and I’ve accepted a new job that started mid-May. I committed to work in-office two days a week and remote from home three days a week… which means I need a spot. So my office nook jumped up the priority list A LOT.
And Jake did NOT disappoint, y’all.
I had a vision from the beginning, and I described it, made a list of supplies I knew I wanted and needed, and drew some of it out for Jake. This dude, y’all – he is a champ. He literally didn’t know at least a good half of this stuff until we bought this house, and then he absorbed everything our dads taught him as they helped with our initial projects. He did this entire closet-to-office redo himself – I mean, I guess I helped, but the blood and sweat was all him! I’m so thankful for my handy fella.
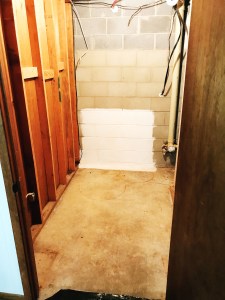
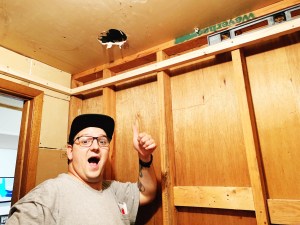
Here’s the before photo. I mean it when I say that this closet was nothing special – it already had a door, some (poorly done) framing, and power to a ceiling light, but otherwise it started out as a completely unfinished space. (The white paint you see was already done by Jake and his dad when we initially bought the house – it was meant to seal off any potential water issues, since the outside of that wall is also where the backyard spigot is located.)
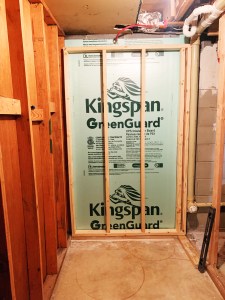
The first thing we did was make a Lowes trip – or 73. Seriously, when you buy a house, no one tells you that you’ll know Lowes employees by their first names. I had found some paneling that I really liked for the in the office. Although we could have drywalled the space, I didn’t really want to have the expense of drywall and mud, then primer, and then paint. Paneling is a much quicker process, and nowadays, there are so many good options for paneling! I found sheets of this white-washed oak-looking paneling for under $16 a piece for an 8’x4’ sheet. We bought 7 sheets after having measured out the space and accounting for some potential errors.
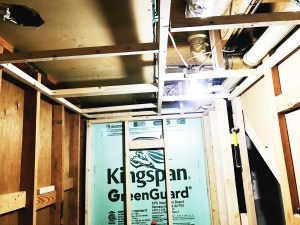
We also bought the necessary 2”x4”s and other supplies. When they say lumber is up over 300% right now, they aren’t lying – it’s outrageous! But luckily, we had some lumber at home from past projects that we could use and the sides of the closet were already framed in and usable for this room redo. Jake had some wall insulation already for the back wall, so we only needed one more sheet of the green foam.
After the Lowes trip, Jake got started right away with building the framing for the back wall. After he built the frame and we carried it in and confirmed it fit and was level, we inserted the foam insulation and the framework. We did have to borrow a pistol-grip drill by Dewalt from my dad to drill the wooden framework to the concrete floor using tapcons and concrete screws.
We also had some interesting pipes to work around in this space. This closet butts up to the under-the-basement stairs area and that area is attached to the laundry room – and our bathroom is just above it. So it’s pipe city, y’all. We had to build a bump out in the back right corner of the office nook to accommodate for a large pipe, and – as you’ll see in a bit – we had to bring the ceiling down to account for the bathroom pipes above. The build out used the same tools and supplies as the back wall. We also did gap-fill some drainage pipes that went outside from this back wall.
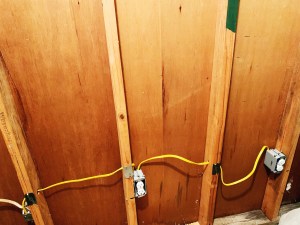
Jake also added two outlets on the long left-side wall for me. This wall is where my desk goes, so I needed outlets. He also replaced the old light switch, replacing the faded almond-colored switch and cover with a nice white one to match the new outlets.
Next, Jake and I talked extensively about my idea for the ceiling. It morphed some as the project went along, but essentially, I knew that we needed to be able to have later access to the pipes below the bathroom that would live in this newly built ceiling in my office space. But I needed a ceiling so that I could have a real light fixture instead of a lightbulb hanging down between exposed bathroom pipes.
Jake first lowered the overhead junction box for the light. He brought it down to the level that the ceiling framework would be so we could insert a flat ceiling light with long-lasting LED so there was more headroom clearance and a less frequent bulb change. This is the light we bought.
So, I suggested we build a framework using mostly furring strips just under the lowest pipe, then attach some already painted white luaun board for the ceiling boards themselves. We built the frame work as a large rectangle around the room, then added a center furring strip and pieces from the center rod to the sides for extra stability.
Then, on the right side of the ceiling, Jake had to do some unplanned plumbing work. We had discovered a minuscule drip on one of our copper pipes to the bathroom sink, so Jake cut the water line momentarily, cut the pipe, replaced with PEX, and used SharkBite couplings to attach the new piece to the old. We did have an injury – Jake cut his hand pretty dang good on one of the pipe ends wrestling with the SharkBite, and he’s probably going to have a nasty crescent-moon shaped scar on his hand beside his pinky finger.
Before adding in the ceiling boards and the new light fixture, we decided to go ahead and do the floors and walls.
We already had flooring from when we had floored Jake’s office and the family rec room and play area. We found it at a local salvage place for really cheap – and we bought everything they had in this pattern because they had just enough to do our space and have a few pieces for any future touch ups or needs. The flooring is vinyl click board, so it snaps together in place nicely, and Jake installed it by first putting in a thick black plastic barrier that my dad gave us, then inserting a vapor-barrier underlayment, and then adding the click boards piece by piece. We did spend a little extra on the vapor-barrier, but it was important to us when we were doing the rest of the basement rec room because we wanted to protect our basement from any additional moisture – being underground already provides more access for mustiness or moisture, and we wanted to avoid that at all costs. Luckily, that cost was expensed to the larger basement projects, and we just happened to have enough to use in this office nook project, too!
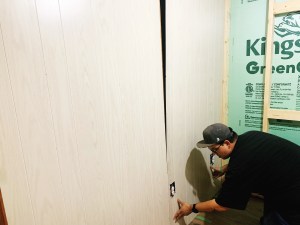
Next, we measured all of our walls – which were admittedly a little wonky. Remember, we used most of the existing framing for this project, and the left-side wall was NOT perfectly straight. So we did specifically measure each and every section to fit in the paneling as best we could and to make sure we left room for the little cutouts for things like the outlets. As a fun side note, the water heater for our house is under the stairs, which is the right-side wall of this office nook – so we also cutout a miniature doorframe on the right-side wall so we can access the heater when needed – you’ll see that in a moment.
To put up the paneling, Jake again used the brad-nail gun.
Then, we returned to the ceiling, now that much more of the room was complete. Jake was able to use one long skinny piece of luaun board on the left side of the office, where there were no pipes above that we’d need to access in the future – and we used a power brad-nailing gun to install it and attach it to the framework we built.
We sort of had to piece together the right side of the ceiling with smaller pieces since the pipework was on this side of the room, and we used screws instead of brad nails, so that we can easily unscrew the ceiling if we need to access the bathroom pipes in the future.
Then we added the new light fixture!
Finally, Jake added in the trim work. We used PVC trim in the entire space – the ceiling to join the walls and ceiling boards, the corners and access panel section, the floor trim, and the quarter round. Jake installed these using the nail gun again.
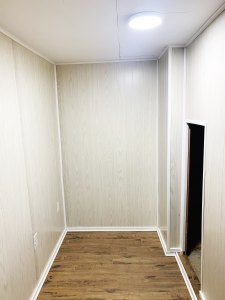
We still want to caulk in some areas to really finish the look, but overall, the space is complete and usable – and I love it!
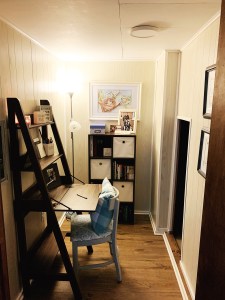
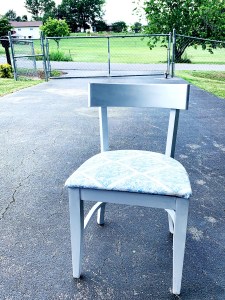
I decorated with a lot of light, cool-tone colors to make for a relaxing work environment. I incorporated my existing ladder desk from Walmart with a matching cube-shelf in the wood tone “canyon walnut” and with ivory bins. I also got my standing lamp in the corner from Walmart for under $15. The chair was featured in last week’s blog post here – and it was under $10 at a thrift store, and I totally refinished it to match the room! The bird nest painting is one gifted to me when I was expecting my little one and it’s an original by my artist sister, Samantha L Doyle (here’s her etsy shop), and my college diplomas are framed on the right-side wall.
I absolutely love my new workspace – and I’m so thankful to my best friend and fiancé for helping me make my vision a reality!
What do you think of this renovation – from storage closet to office nook? Comment below – I’d love to hear from you!
If you follow me on social media, you know that the past few months have been a total whirlwind. I’ve changed jobs, we bought a house, are DIY-ing our way through a fairly significant refresh or remodel of the house, and Jake proposed a couple weekends ago. It’s been BUSY over here, y’all.
The house was a together purchase with the long-term plan of continuing to build our lives and our family together. We’ve been working on it since we purchased it in December – with a TON of help from our families, particularly our dads – and things are really coming along! (Don’t worry, we’ve taken pictures as we’ve gone so we can share more as projects and spaces get completed – and you’ve seen a little as we’ve done them, like the Front Porch Refresh or the Entryway Décor post, and on social media, such as here and here.)
When we bought the house, we envisioned Jake’s future home office in one of the basement rooms and little man’s playroom space in the larger rec room/den-like space. What Jake realized is that I didn’t have a space that was designated for me. It honestly didn’t matter a ton to me because we were nearly completely overhauling the kitchen to be the kitchen I’d dreamt up, but he felt like giving me some kind of space to write and to call my own was important. (Because he’s sweet and thoughtful like that. Insert heart-eyed emoji here.
So I suggested that we turn the large storage closet next to the basement stairs into an office nook for me. It’s not huge, but it’ll fit the ladder desk I had in my rental home (see here) and even a storage shelf. This was going to be a project for way down the line, but when I recently accepted my new position at a local nonprofit, I agreed to work from home 2-3 days a week. So the home office nook has taken a leap way up the priority list now. And it’s in the works – so you’ll get to see that soon!
Even though, when we bought the house and started revamping it, we didn’t plan to get my office going for a while, I couldn’t resist buying a wooden chair that needed some love. I found it thrift store shopping at a local KARM store for $9.99. (If you aren’t familiar with KARM – especially if you’re in the East TN region – check out their mission here.)
Here’s the before picture. I thought it was a pretty good find for under ten bucks!
While it’s not super unattractive, I knew it didn’t quite match what I wanted in my space. So I decided to DIY a makeover. While everyone else was out sunbathing in the heat this Sunday after church (seriously, I got so many snapchats of friends in bathing suits – what y’all doing out there?!), I was being a #GirlWithPowerTools.
Here’s the step-by-step tutorial of my DIY chair revamp!
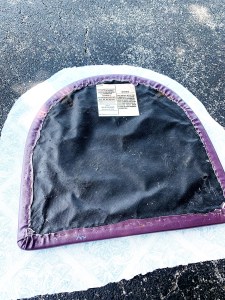
Before I started, I did make sure to lay out a tarp. Since I planned to repaint the chair with a spray chalk paint, I knew I needed to cover my driveway to protect it as much as possible.
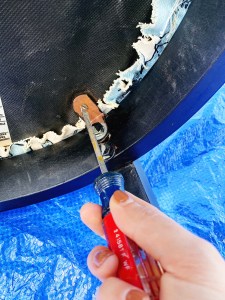
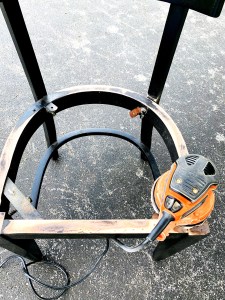
Then, I laid the chair down and used a screwdriver to take off the seat. Mine was only held on by two L-brackets, so it was easy enough.
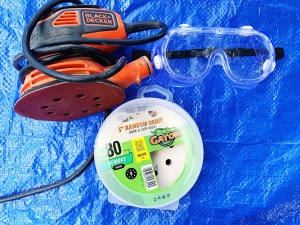
Then, I grabbed the oh-so-pretty safety goggles. They’re ugly as can be, but my dad always instilled in me that a job site is worthless if it’s not safe, and now Jake won’t let me do anything without safety measures in place too. I also got 80-grit gator paper for the Black + Decker sander.
I sanded down the chair taking as much of the black paint off as I could. I didn’t bother wrestling with the part that would be hidden when I reattached the seat, but I removed paint from anything that might be seen when the chair would be assembled and in use. The sanding took a bit, and the sander does shake my hands a lot, so I took some breaks (mostly for Diet Coke, honestly) to let me hands rest some, but the original paint did come off fairly easily with the 80-grit paper.
Once the paint was removed, I wiped the chair down with a rag to remove any dust. Because the prior paint was black, I had black dust all over my clothes, my face, and my chair. (Jake said I looked like a coal miner, haha!)
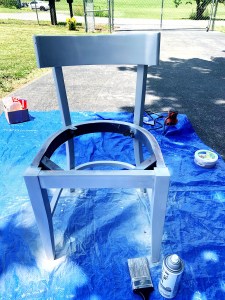
I then used this Rus-Oleum Chalked spray paint in the color aged gray. I’m not a first-class spray painter, if I’m being honest, so it’s not perfect, and in the few places that I sprayed too heavily, I used a paint brush to keep it from having any drips. Overall, I think the paint turned out just fine, and I do like the finish of the chalk spray paint, so I definitely recommend it for a simple DIY like this one!
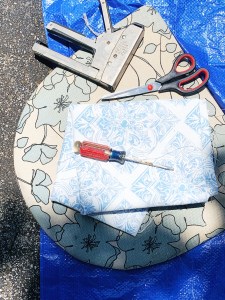
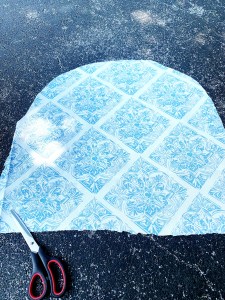
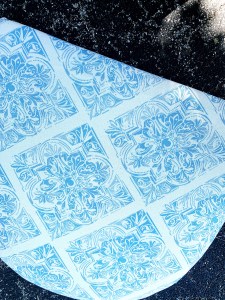
While the paint dried, I filled my time by recovering the seat. I wanted something light and clean, and I found this really cute fabric at JoAnn’s Fabrics.
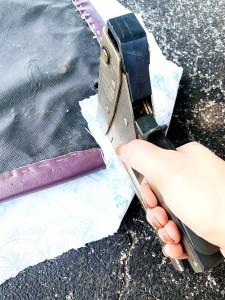
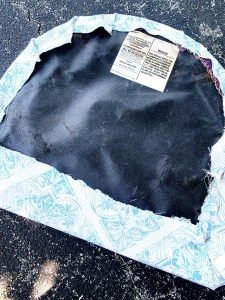
I pried the existing fabric off, pulling the staples out using a flathead screwdriver. Then, I cut a piece of my new fabric to match the shape of the piece I took off. Next, I flipped the fabric to face down (the back facing me) and set the seat, cushion down, on top of it. I used the hand-held stapler to staple down the pieces. I did have to do some folding and stapling together to make it fit right, but it was fairly straightforward.
Next, I screwed on the seat to the now-dried painted chair frame. I just used Jake’s Black + Decker drill and some new screws to reassemble. Since my chair only had two L brackets on the back, I added one on the front for added stability, too.
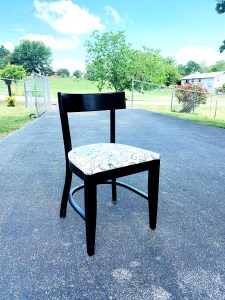
Here is the finished product!
What do you think? I can’t wait to show you all this chair in my finished office nook soon!
People say charcuterie boards are just grown-up lunchables… and as a true 90’s kid, I am 100% okay with that!
Before I jump into how I make my at-home charcuterie boards, let’s get one thing straight – the pronunciation! In every conversation where these come up, people STRUGGLE to figure out how they’re supposed to pronounce it.
Here it is phonetically: SHAR – CUTE – AH – REE.
I have to forget the spelling and think through the phonics every time I say it, too. And my dad calls it a “shark eatery” board… so it’s just an everybody struggle!
So, at-home boards have become a favorite of mine and Jake’s. We probably have them like once every 7-10 days. I’m a fan because they’re not really a junk food snack and they end up having some good and healthy items on them, so I don’t even feel guilty indulging.
As a side note, while I think the boards look really nice, I don’t spend an arm and a leg on them – instead, I typically purchase all of my items at Aldi for really good prices!
Here’s what I use:
fruit
snack meat
sliced cheese block
mixed nuts
crackers
pretzels
I always have a cutting board or tray handy to put this all together on, too.
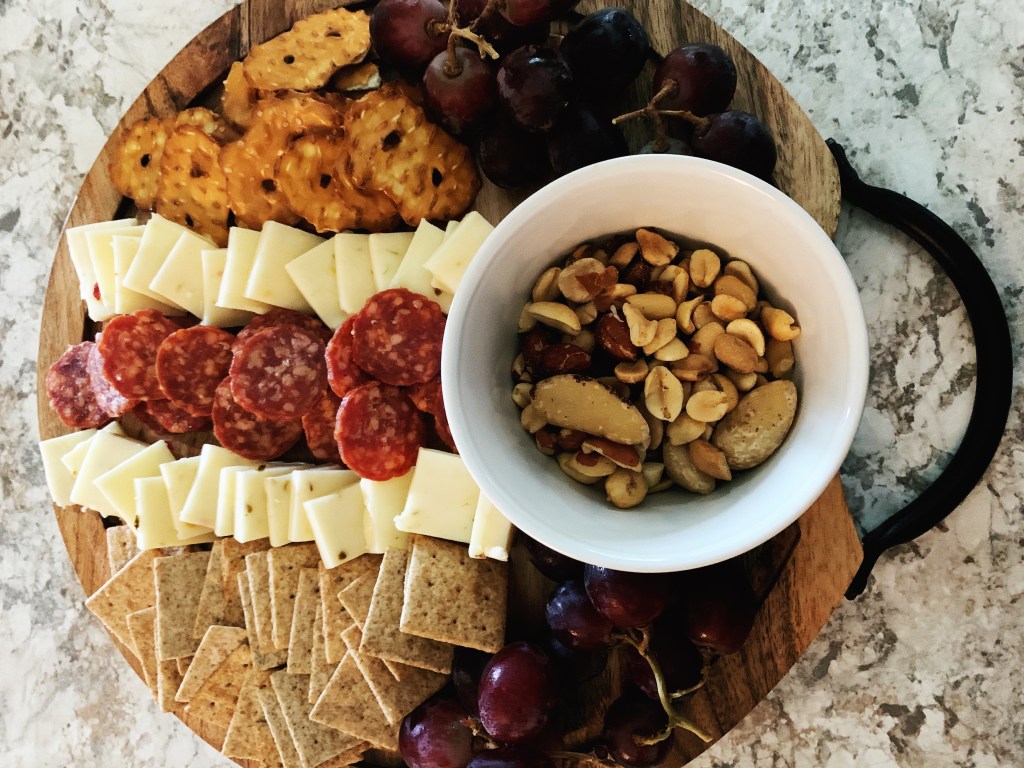
First, I put my mixed nuts into a small ramekin or bowl and place that where I think it looks nicest on the tray or cutting board. I do mixed nuts because we almost always have them, but you could do trail mix or something similar, too.
Then I rinse off and prepare my fruit of choice. On this board, I used grapes. I think grapes are the perfect bite-sized fruit to complement the sharpness of the cheese on the board, but I also have used apple slices! (In our house, we particularly love green apple because it adds a touch of tangy-ness to the snack.)
Next, cut up your cheese. We love pepper jack and Colby jack cheese in this house but you can use anything! And if you’re in a hurry, you can grab cheese that is already cubed or even a cheeseball instead.
Next up is your meat. I often have pepperonis on hand and will use those. But you can use any deli meat or summer sausage – or, at Aldi this week, I found these spicy dried salami bites which worked perfectly. They were also SUPER good, if you like spicy snack meat.
You’ll notice that I’m particular with my placement. I just have a thing for food presentation and that’s not at all required to have a great board – but if you’re going to have guests watching a game or trying some new wine with you, I think being intentional with your presentation is always a great touch!
Next, it’s time to add your carbs! Pretzels and/or crackers are perfect for adding to cheese and meat. I like to do both if I have both handy. I’m a big fan of wheat thin-styled crackers and I especially love pretzel thins, so this time I added both to my charcuterie board.
Here’s the finished product – and I should have taken a picture of Jake’s happy face when I brought it down to the basement for him!
What do you add to your snack boards? Comment below – I’d love to hear from you!
I’ve recently pulled one of my old recipes back out to the forefront of my kitchen. My cheese + barbecue smothered chicken was a dish I made often when I moved into my first apartment and then was married to my first husband.
I hit a rut recently, making a lot of the same dishes again and again, so I started trying to think through dishes I made previously. When this one came to mind, I thought it sounded like something Jake and I would really enjoy.
My assumption was correct, and Jake loves this dish, so I thought that meant it was time to share on the blog!
Here’s what you need:
chicken breasts (thawed)
olive oil
onion flakes
barbecue sauce
shredded cheddar cheese.
Preheat your oven to 375 F.
As the oven heats, you’re going to want to clean your chicken up some – if the breasts aren’t thinly sliced, you’ll want to cut them into more manageable sizes. I also clean off some of the fat and such during this step.
Spray down a baking sheet. Spread out your chicken, then drizzle on your olive oil. Next, sprinkle on your onion flakes. You’ll see that I leave a tender-sized piece or two plain on my baking sheet – my little one hasn’t decided to like condiments yet, so I have to cook some plain for him.
Bake the chicken, as is, for 25-30 minutes at 375F.
When the chicken is done in the oven, pull it out. Drop a dollop of barbecue sauce on top of each piece (unless you’re making some plain for your picky eater, too!). I always swear by Sweet Baby Ray’s – it’s a staple in our house!
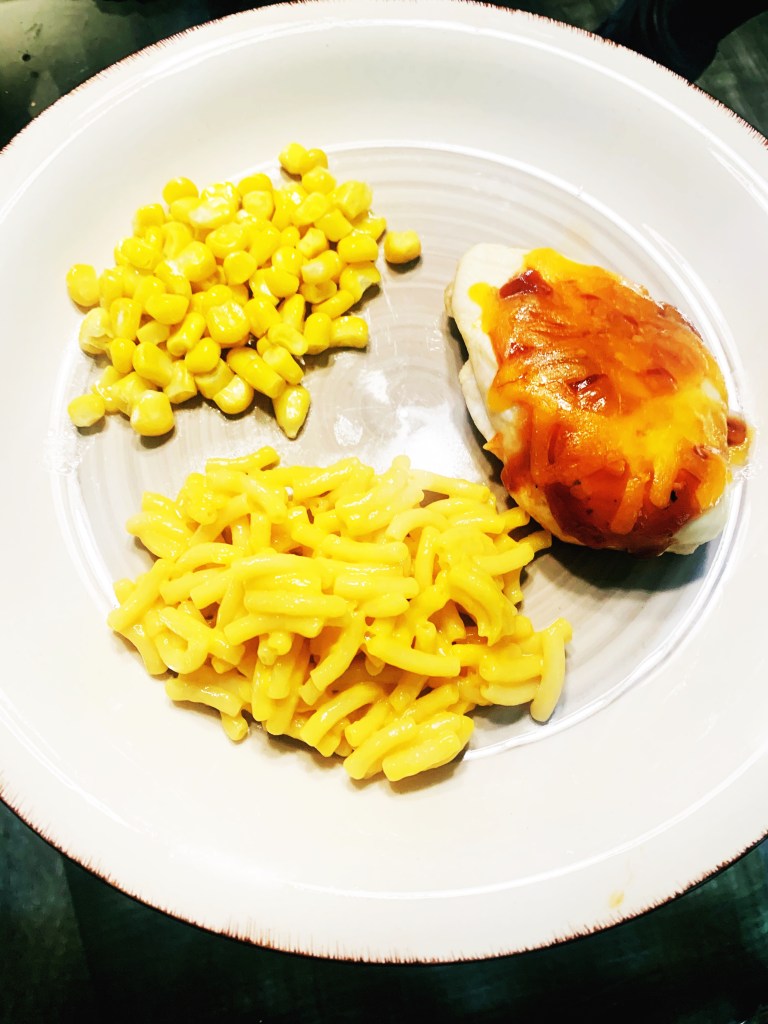
I spread on the sauce so it’s over the top of each piece of chicken. Next, sprinkle some of your shredded cheese on top of the barbecue on each piece.
Stick this back in the still-heated oven for about 3-5 minutes.
Serve and enjoy!
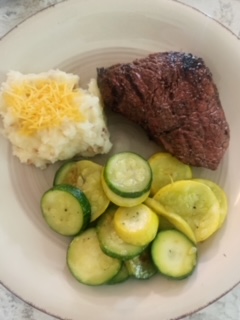
Also, you’ll note that I served this with super basic sides – boxed mac and cheese and corn. That’s because I’m a working momma and although I love to make everything homemade, some nights it’s just a victory to get a meat dish with two sides on the table. We love that real life here, y’all. 🙂
Okay, fellow momma hens…! Who can relate? MY BABY IS GROWING UP TOO FAST!
I am SO shocked at how BIG my little one is. He turns three today, and I canNOT believe that the gummy-bear-looking baby from my sonograms is now a small child. Where did my baby go?
I didn’t believe my own parents when they said kids grow in the blink of an eye, but here we are, on my little guy’s third birthday, and I am in shock. Will I cry all day? Maybe. No judgement, please – you either have or will cry over a special little one yourself!
This past Friday, I threw my kiddo a backyard birthday party to celebrate this new year of life. The theme? Hot Wheels, of course. Because what former Barbie-obsessed, lipstick-wearing little girl didn’t dream of being a boy mom and playing with race cars? (Seriously, this life is nothing like I expected but full of way more joy than I could have dreamt.)
I’m a big fan of backyard, home-made parties. They aren’t perfect – there are pictures within this post of crooked tablecloths and imperfect cupcakes and handmade photo props – but they are full of intentional effort and love. I so enjoyed thinking up this sweet party especially designed for my boy, and every purchase, every craft, every cooked or baked item – it was all full of love from beginning to end.
Before I show y’all the pictures, I have to give a HUGE shoutout to the best guy on the planet – my Jake. This dude isn’t officially a stepfather yet, but YIKES has he put in the hours and the heart. He goes 100% on everything, and I didn’t know a partner could or would match my effort in every way, including in hosting my son’s birthday party. Jake was a champ – cleaning some of the house, doing yard work, setting up tables and a banner, being the pinata master, and blowing up balloons. He is my hero. (If I wasn’t in love before, I was by Friday night – seriously, even with the “oh my gosh, we have negative three minutes to be ready, get out of my way” vibe at 6:33 PM. He’s dreamy.)
So, onto the Hot Wheels party!
We ordered Hot Wheels branded invites, race car checkered cupcake flags, and a race car checkered banner online.
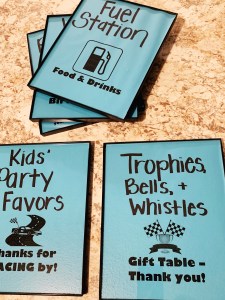
For each of the stations or activities, I brainstormed cutesy car-themed or race-themed titles. I printed them on blue paper and fitted them to format frames (the frames were around a buck a piece at Walmart, and I knew I could save and reuse them with different inserts for future parties). The titles were things like:
Kids Party Favors: Thanks for RACING by!
Fuel Station: Food & Drinks
Trophies, Bells, & Whistles: Gift Table – Thank you!
Pit Crew: Stick a Car to the Track
Winner’s Circle: Take a Picture with the Birthday Boy
For food, I really wanted everything to be finger-friendly and kid-friendly. I prepared PBJ triangles, roast beef rolls, ham and cheese sliders, a pepperoni and cheese tray, a veggie tray with my cheesy bacon ranch dip, watermelon slices, individually bagged popcorn and individually bagged veggie straws, and cupcakes. We had juice bags and miniature waters to drink.
I thought the PBJ sandwiches were a good idea in case any kids (including the birthday boy) didn’t want ham sliders or roast beef rolls. I just made about 8-10 PBJ sandwiches, cut off the crust, and cut the remaining sandwich in half diagonally.
I decided on individually bagged sides – the veggie straws and popcorn – for two reasons: I liked the idea of limiting fingers in a large bowl and we had gluten allergies on our guest list, so having gluten free choices like popcorn, cheese and meet, veggies and fruit, seemed like a smart move.
For the cupcakes, I went with a basic yellow cake with chocolate icing. I added the cute race flag picks – two to each, crossed like on race day emblems – and I thought they looked really darling. I found the blow-up, number three cake topper at Five Below, and I thought it was an awesome addition. Jake picked up really cute candles and I added three on one of the cupcakes in the blue and orange that are traditional Hot Wheels colors.
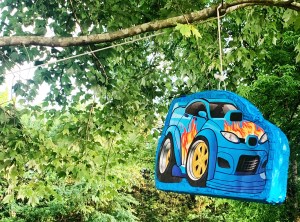
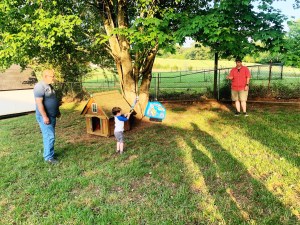
Jake stuffed the pinata, from Amazon, with dum dum suckers – a treat that I knew most of my son’s toddler friends are allowed to have occasionally. Jake was also the pinata master of the evening – he put it up, pulled it down, and made sure the kids took turns. I love this picture of the birthday boy at bat – my dad, Pop-Pop, is helping him with his swing and Jake is manning the pinata – all my favorite guys in one picture!
For activities, I had snagged two smaller, thick, black poster boards at Hobby Lobby for under two bucks each.
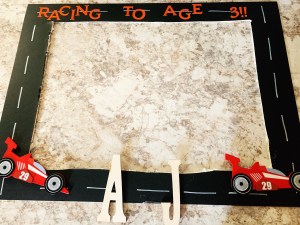
I really love adding a homemade photo element to my backyard birthday parties, because I think it helps you remember to take photos. (Of course, I somehow didn’t get a single posed picture with the birthday boy this year, which completely bums me out, but I did get some cute ones of others with my little one, that I’m sure we’ll look back on fondly when he gets older.) For this photo prop, I made a frame. I cut the middle out (albeit a little sloppily), drew on road dashes with a white paint marker, used orange letter stickers to spell out “Racing to Age 3” on the top, attached my son’s initials to the bottom, and added wooden chipboard racecars from Hobby Lobby to the bottom corners. I think it turned out fairly cute overall! (And here’s a sweet picture of my mom and my little one posing after presents were opened.)
I used the second posterboard to make a sort of kids’ guest book. The birthday boy’s friends attached stickers of race cars to a “road” and had their parents help write their names next to their car.
With us finally having other kids at a birthday celebration (COVID got us last year, and the year prior we only had one other little one at our party), I did goody bags. Jake and I had so much fun picking out hot wheels specifically for each kiddo on the guest list, and then I bagged up chocolate-covered donuts and tagged them as “spare tires.”
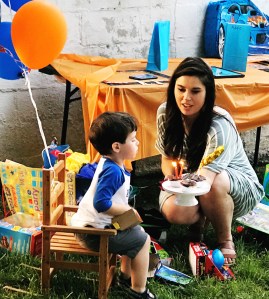
For our present-opening spot, I had Jake blow up several blue and orange balloons and a Hot Wheels-specific balloon. We tied them to little man’s wooden rocking chair and had him sit in it while he opened his gifts. While this was probably my favorite little spot of the party, I am most proud that I only had to tell him once, before the party started, that we say “thank you” for every gift we open. He did a great job being appreciative and grateful, and it warmed my momma hen heart.
We had so much fun celebrating our sweet kiddo this past Friday, and I hope you’ve enjoyed a little dive into my Momma Hen Life in today’s blog! I’d love to hear about your own backyard parties and kid-themed events, so be sure to comment below!