Today, I’m sharing a recipe I’ve been making for over a year – and one that my boyfriend absolutely loves. They are so easy – but so good! Jake, my dad, and my brother-in-law all enjoy these.
These are roast beef and cheddar rolls – and they are the perfect finger-food item for watching a big game, having an at-home movie night, or going to an event (after COVID, that is).
Here’s what you need:
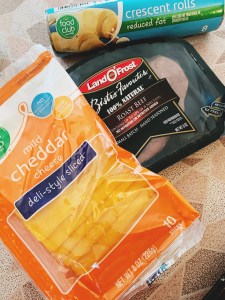
Thin-sliced deli roast beef
Cheddar cheese slices
Canned crescent rolls (however many you have is going to equate to how many rolls you make)
Preheat your oven to 350F.
Slice your cheese slices into strips – I typically try to get about 5 strips out of each slice. Open your roast beef and your crescent rolls, and go ahead and spray your baking sheet.
Roll your crescent dough out into flat triangles. Add 1-2 slices of roast beef, laying it flat, and then 1-2 strips of cheddar cheese. (Your choice here just changes the ratio of meat & cheese to bread, so do 1-2 pieces per roll as you think you’ll prefer.) Then roll up into traditional crescent shape.
Lay the rolls on your baking sheet, leaving room for them to puff up as they bake. Bake for 11-13 minutes until the dough looks cooked, the cheese is melting and bubbling, and the edges of the roll are a nice golden color.
My dad says he’d like these with a nice spicy mustard or a horse radish to dip – so I’ll probably add that to my next finger food assortment, too!
Enjoy! I hope these can be used and enjoyed for your New Years Eve plans or other upcoming events!
Christmas is THIS WEEK! It’s my favorite holiday, and I couldn’t be more excited.
When I was a kid, my parents hosted a Christmas Eve open house, and all of our family on my mom’s side, that lived in-state, would come over for dinner, dessert, and presents. We always got to stay up really late, play with cousins, and have a ton of fun!
I remember that my uncles would sometimes bring a date – and my parents never really knew if they should expect someone or not, so they decided to keep some gifts on hand. One year, they decided to go to the Lennox Store after Christmas and buy several Christmas ornaments, which ended up lasting a handful of years thereafter. They were glass trees, sleds, Santa figures, and other holiday symbols. Mom kept them in a closet and would wrap one or two up in case a date was brought – it was important to her as a hostess to have a gift for everyone to open.
As I thought about those Christmas Eve parties, I realized it’s really a very gracious step to take as a hostess to have an extra gift or two on hand. And if you’re going somewhere else for Christmas, it might be good to take a little “thank you” gift to your host as well.
So, whether you just forgot a neighbor or coworker on your shopping list, need a hostess gift for the dinner you’re attending, or want to have an extra gift stashed in case your family member brings a new beau, here are three easy, sweet, & affordable gift ideas! (And yes, all of these can be accomplished at Dollar Tree or Walmart.)
#1: Festive Mug & Cake
It’s easy to grab a festive mug or two at your local dollar store or big-box store. They’re affordable and often have fun holiday sayings or images! If you’re out and about for your last-minute shopping, these can be a great gift to give.
If you add a dessert with it, even better! Dollar Tree has single-serving mug cake packets in various flavors, which makes a fun addition to your gifted mug – and a little different than the typical coffee or cocoa.
#2: Rudolph Candy-Filled Canes
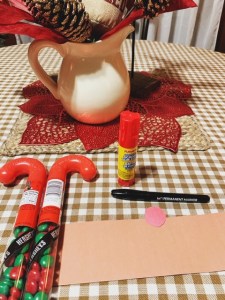
This is a perfect gift for a candy-lover or kid on your Christmas list! All you need is two candy-filled plastic canes, scissors, tape, glue, a marker, and red & brown construction paper.
You’ll want to tape your candy canes together, with the rounded tops pointing out, by wrapping a piece of clear tape around the labels. Then cut a strip of brown craft paper. Fasten the strip of paper on to the labels, too, to hide the nutritional facts (or non-nutritional facts?) and glue it down. Then add on a red circle for Rudolph’s nose, and draw on two eyes! The candy canes should make his antlers, giving you a complete Rudolph treat!
I think these are perfect gifts for the children in your neighborhood, for your kids’ friends at church or school, or for your extended family’s children at any holiday get-together.
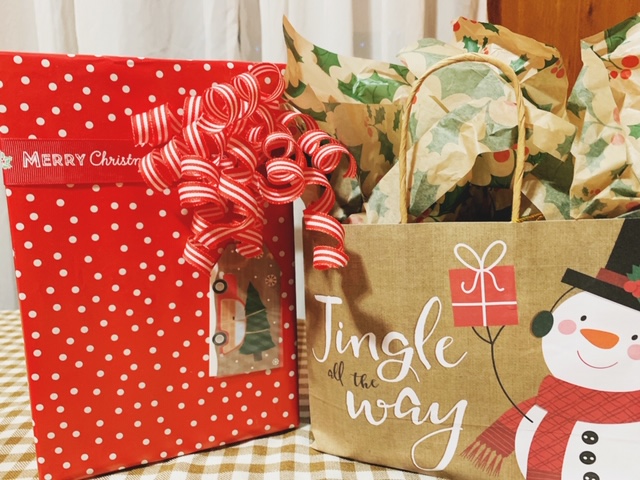
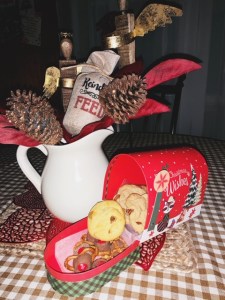
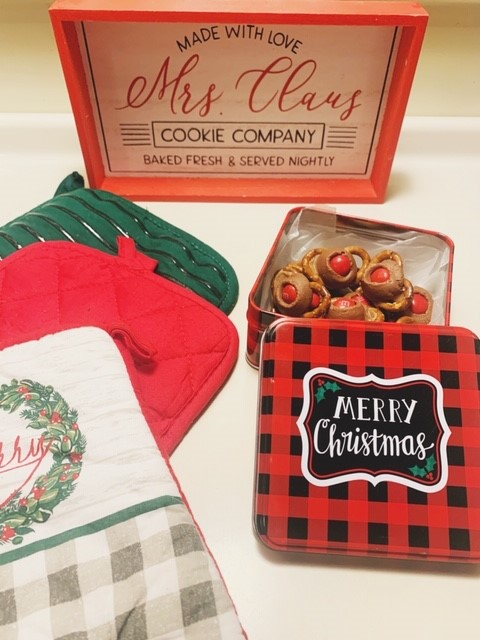
I found this cuter-than-can-be festive mailbox container at Dollar Tree, and I think this makes a neat giftbox for any baked goods you might giveaway! Of course, you can always get seasonal tins, baskets, or bags, too.
During the holidays, I love to bake – but as a single and working mom, sometimes baking can be a little overwhelming! I tend to really like to make simple recipes that can be fun and delicious without taking up too much time, making too much mess, or causing too much expense.
Today’s recipe is world’s easiest Christmas candy! You may have seen something similar on Pinterest or from a family member, but I have a slightly different take on these pretzel candies that I’ve seen my mom make for years now.
Here’s a hint: instead of square pretzels, I use the traditional pretzels and ONLY red M&Ms to make my candies look like little reindeer!
Here’s what you need:
Mini Pretzels
Red M&Ms
Rolos
Preheat your oven to 350F.
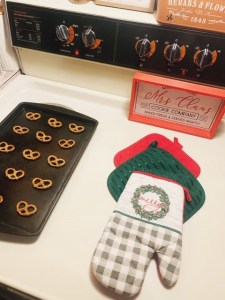
Lay your pretzels out on a baking sheet spaced out enough so that you can get a small spatula between them later when they’re done.
Set an unwrapped Rolo candy on the middle of each pretzel. Place in the oven and bake until the chocolate just starts to melt.
When the chocolate has just started to melt, they’re ready to pull out of the oven. Then you’re going to place a red M&M in the center of each Rolo. As you push down, the chocolate and caramel Rolo will squish down just a little too.
The pretzel should make a set of antlers, the chocolate a little snout, and the M&M a perfect Rudolph nose!
Before you take them off of the pan, you’ll need them to harden. Place the pan in the fridge for about 7-10 minutes. Then, use a spatula to pry them off of the pan. You can wrap them in a cute tin, as pictured, or bag them up in a treat bag for a nice gift for your neighbor, coworker, or holiday hostess!
With the holidays right around the corner, it can be really challenging to give something meaningful to every person you care about. If you work in an office, for example, you may have a lot of coworkers and while you may want to do something special for them, your budget may not let you buy them each an individual gift. There are tons of solutions to making someone feel thought of during the holidays without spending a lot of money, so that you can save the more individualized (and potentially expensive) purchases for your family and closest friends. As a single mom, I know my list gets prioritized and my budget is something that’s important for me to stick to.
Today, I’m going to share my Santa Terra Cotta Treat Pots! These are so simple to put together, but they are really a cute little gift in this festive time of year.
Red craft paint (I used a deeper red, almost maroon)
White craft paint
Gold or silver sharpie paint pen
Sponge brushes
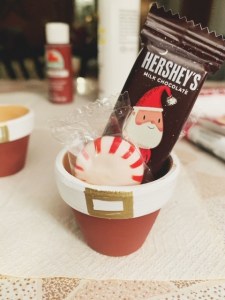
Fillers (I suggested themed candy – I used mini Hershey Santas and peppermints)
First, I always put down a napkin or paper towel beneath my craft paint projects, just so I don’t have to scrape paint off of a countertop or table – it comes off super easily, but better safe than sorry! I use a paper plate or bowl for my paint as well.
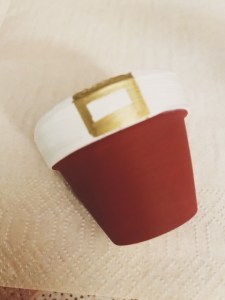
Using the larger of my two sponge brushes, I swept on the red paint onto the bottom of the terracotta pots. The paint should go all the way up to the rim under the top, as pictured below.
Then, once that craft paint has dried (and if you’re doing several of these, the first will likely be dry by the time you finish the red paint on the last), you’re going to get cracking with your white paint. I used my smaller sponge brush to paint on the unpainted rim. This should essentially make a belt for “Santa!”
After all of the paint is dry, use your gold or silver smaller-tipped paint marker to draw on a open square, making Santa’s belt buckle.
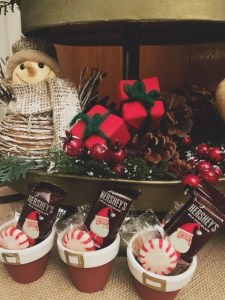
After all of your terra cotta pots dry, you can begin filling them with your treats! This year, since my terra cotta pots are small, I decided to use peppermints and mini Hershey Santas in each pot. I think my work team members are going to love this little festive Christmas treat this year!
What are some small thinking-of-you holiday gifts you assemble for your colleagues, church friends, kids’ teachers, or other friends? Comment below – I’d love to hear your ideas, too!
It’s CHRISTMAS TIME, y’all! Christmas is my favorite holiday, and I am always so excited to get this season going. From the music to the decorations to the worship aspects of the season, I love it ALL.
Today’s blog is really just to show you all how I’ve decorated my home for this special time of year. 2020 has been wild, but it can’t steal my holiday-loving heart. So, without further ado, welcome to my home and enjoy!
We’re going to focus on the main living space in this blog, so my open concept dining and living room in my rental home.
Between my kitchen and my dining space, there is a long countertop with storage on each side (closed storage facing the kitchen and open shelving facing the dining nook and living room).
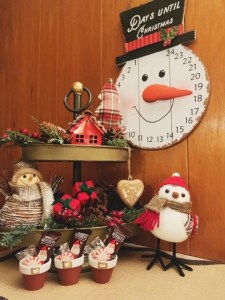
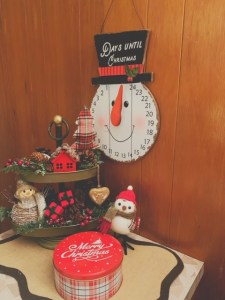
If you’ll recall from my Fall Décor post, I did purchase this tiered tray from Amazon. For Christmas, I used a lot of what I already had as décor in previous years to make it festive – the twig snowman my mom had purchased for me years ago at Kirklands, two little wrapped presents that are roughly 1×1 inches, a red house that was actually an ornament from Old Time Pottery purchased last year (I just ripped the hanger off), and a wooden heart ornament from Cracker Barrel last year. I purchased the standing fabric tree and the bird from Walmart (their Holiday Time collection has grown a lot in terms of quality and cuteness in the last few years, in my opinion). Once I had those items placed where I liked, I back filled with pinecones I already had from many years previous. I added a festive cookie tin from Dollar General and a holiday countdown sign gifted to me from my mom to round out this little décor spot.
For my dining table, I took a fairly simple approach. I left my usual gingham tablecloth and the jute placemat I purchased this summer or fall at Walmart, then layered on a red plastic poinsettia tablecloth on top for a pop of Christmas color. I used a white pitcher I already had from Old Time Pottery, filled it with gold-glittered pinecones and red leaves, and then placed it in front of two wooden and gold angel stands that hold votives. Last holiday season, my boyfriend Jake purchased these for me at a craft fair.
My corner chair has a “Merry & Bright” pillow on it from Target last holiday season. For window décor, I simply draped a strand of red wooden beads at the top and added wooden heart ornaments from Cracker Barrel a few years ago at either side.
As you continue to look around the open concept living space, you turn to the big picture window. I love this window – and the view is incredible: just acres of rolling farmland (with cows!), a church, and mountains in the distance. I live in a beautiful part of East Tennessee.
Because the window is placed to see the gorgeous landscape but also the two-lane highway from a distance, I place my tree in the center. This lets me see the lit tree as I come over the crest of the hill on my way home each evening. (I also have two light-up holly leaves in each of the top corners of the window for effect as well, but you can only see them from the outside.)
I used to have a larger, wider 6-foot tree, but it was prelit and last year it really got me riled up when my lights didn’t work. I made due by stringing up separate lights over the nonworking lights, but this year I didn’t want to fool with that nonsense, so I used a 6 foot alpine tree I had ordered for front porch décor last year.
This skinnier tree actually looks great in my space and ties in nicely with my Christmas motif, which is sort of self-described as “country charm.” The fact that the branches start higher up actually allows for taller giftbags and wrapped boxes, too.
I used a brown burlap bow with red lacing (bought at Walmart last year), red wooden beads, and lots of wooden and metal ornaments. The star on the top of my tree has a stained-glass look without the weight or expense of actual stained glass, and I found it at a local thrift shop a few seasons ago.
Flash the dog (who is, I’ve found out, both basset hound and beagle) seems to like it fairly well – and he hasn’t even eaten an ornament or bow yet!
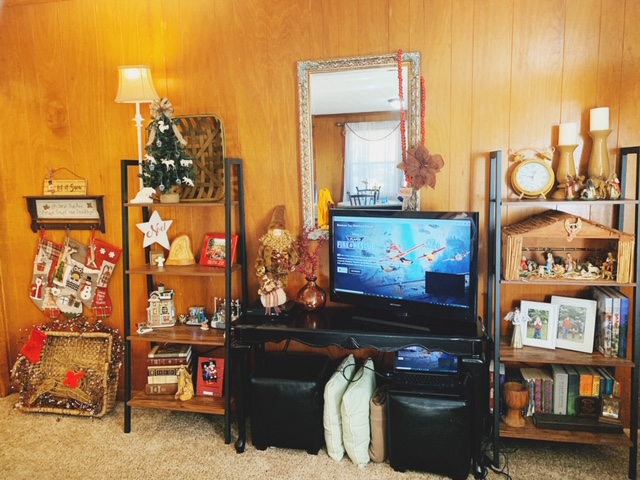
You may remember in my fall post that I got new shelves for my living room. These made decorating the living room even easier this year! (Please ignore that my toddler was watching Planes: Fire & Rescue while I photographed everything…!)
I found a festive red bead looped garland at Walmart and had a brown poinsettia pin from years past that I hung on my mirror. On the repainted sofa table that I use for my television (see my fall blog for details), I added a golden and brown woodland Santa that had been passed down from my gram before she passed with an amber vase (only $4 at my local TJ Maxx) holding a few red berry springs I had on hand.
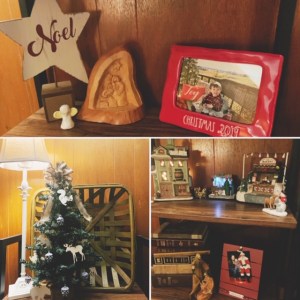
On the left shelf, I staged a mini tree on the top shelf. The tree features a rustic bow, mini pinecone ornaments, and mini wooden forest animals – all of these items were from Walmart last year, and the tree itself was from Old Time Pottery several seasons ago. The second shelf features a 2019 holiday photo of my little man in a Rae Dunn frame from my friend Kayla, a “noel” wooden star from Walmart last year, a ceramic angel from some youth students a few years’ back, and a hand-carved wooden nativity from a church family member gifted to me two seasons ago. I have a love of nativity scenes, and this was the most thoughtful gift, so I am so honored to display it in my home each year. On the final two shelves, I have my Christmas village (last year I completely started over on collecting it after my divorce, when I didn’t get the pieces I had found for several years) and then another nativity scene and a picture of my son, myself, and Santa from 2018.
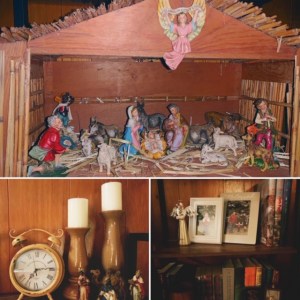
On the right shelf, I have the wisemen on top. I attended a Christian college for my BA degree, and my New Testament professor, Chad, shared with us that the wisemen actually didn’t visit Jesus until long after he was born – he was likely crawling or even walking before they arrived. Chad shared that he often moved his mother’s wisemen away from the manager scene during Christmas visits, and the funny image has always stayed with me. To honor the reality that Jesus was visited (and worshipped and acknowledged) beyond Christmas morning, I put my wisemen on a different shelf than the manager scene. The next shelf down, though, is the nativity set. This set is precious to me – it was my paternal grandparents’ holy family display for all of the years of their marriage. It’s a Fontanini nativity set, and my papa built the actual stable himself. This year it was especially meaningful to put it on display, as my papa passed in early November. The final shelf features an angel mother holding a baby (a gift from my sister the year I was expecting my son), and two family photos of my toddler, myself, and Jake.
On the far left of the shelving display, I hung up a stocking holder. I found this shelf and hanging display a year or two ago at Old Time Pottery, along with the “let it snow” sign. The stockings are from Walmart, as are the stocking initial tags. My mom gifted me the woodland garland and the gold reindeer, so I added them into my existing basket, along with Flash’s red mini-stocking and the red bow to add pops of festive color.
As you can see, my Christmas décor theme is traditional with a little bit of rustic or country charm. Have you already decorated for the holiday? How would you describe your style? Comment below – I’d love to hear from you!
Its Thanksgiving week! That means good food is just TWO DAYS AWAY. Are y’all as excited as I am?
I know that this holiday looks a lot different than it has in years’ past, thanks to the pandemic. However, I still think that Thanksgiving is an amazing opportunity for us to focus on the silver linings – despite COVID-19 and the many hardships that it has brought along with it, we each have things we can be grateful for – so my challenge to you (and to myself) is to spend Thanksgiving day focusing on those blessings and bright spots!
This year, I’m hosting Thanksgiving for my family. Don’t worry – we’re sticking to the rules and keeping it small. Just my little guy, my parents, and my sister and brother-in-law.
We have to do our dinner a little late, since my son spends Wednesday night and the first part of Thanksgiving Thursday with his dad, so he gets to me at 4 PM. So dinner is going to be closer to 5:30 or 6 PM at my place.
I’ve already been thinking about my table set up and my dishes. My sister and mom are each bringing some sides, so I’m preparing a few sides and the main dish – the crockpot turkey breast.
Today, I want to share my favorite easy dish: sweet potatoes! If you’re hosting this year, just having your immediate family eat together, or are going to another home and need to take a dish, this is a must have – and it’s SO easy.
This is sort of a mixture of sweet potato casserole and straight up sweet potatoes. It’s not mashed or whipped like most casseroles and it doesn’t have marshmallows, but it’s also not whole or individual baked sweet potatoes.
Here’s what you need:
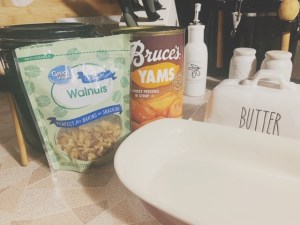
1 40-ounce can of yams/sweet potatoes
1/3 cup of brown sugar
1/2 cup of raw walnuts
2 tbsp of butter, cut into slices or cubes
Don’t forget – on a holiday when you’re feeding more than 2-4 folks, you’ll need to double or even triple this recipe. I’m sharing what I did for dinner last week, which was about 1/3 of my usual for holiday get togethers.
First and foremost, preheat your oven to 375F.
Then, open your can of yams, drain the liquid, and rinse lightly, re-draining. Then, spray a glass baking dish with non-stick spray, and pour your sweet potatoes into the dish, covering the bottom completely. Drop your walnuts on top of the yams, spreading them about evenly. Add in butter in the various sections of the dish – I usually add two in the middle and one on each end. Finally, sprinkle on your brown sugar fairly evenly over the entire top of the dish.
Bake at 375F for about 25-30 minutes. If you’re doing a LOT more – like 2 or 3 times this – you’ll want to up it to like 35-40 minutes, but keep an eye on it. You want your sweet potatoes to be soft, the butter and brown sugar to be melted, and the dish to be visibly steamy when you pull it from the oven.
Enjoy!
As you’ll see below, we enjoyed this dish last week at dinner – along with some of the Avengers assembled at the table. (#BoyMom, amiright?)
As a kid, I used to sneak books into bed and read in the dark after bedtime. I guess reading Babysitters Club really was a thrilling experience. My parents found out and extended bedtime so I could read later into the night with a light on, so that they didn’t have to pay for glasses later on top of the braces I already had. Ha!
I really think my love for books and for academia started with board books. I attribute my vocabulary and my schoolwork to my parents never saying no when we wanted to read another story before bed or when we wanted to visit the library in the summers.
My goal with my son is to make sure he has access to books all the time, and I’m really fortunate to have family and friends that support that too as they buy birthday and Christmas gifts for him.
I’ve got two lists for you this week: 5 classics that you shouldn’t go without on your kiddo’s bookshelf, and 3 modern additions that you should purchase for their collections, too!
5 Classics
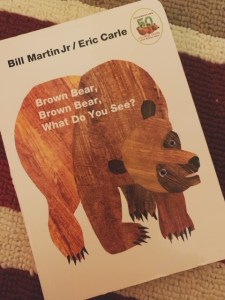
#1: Brown Bear, Brown Bear, What Do You See?
I completely attribute my son’s early ability to name more than primary colors to this book by Bill Martin Jr and Eric Carle.
We have the board book, and we read this every single night that I had custody for nearly six months straight – and we practiced both our colors and our animals by letting him go through each animal’s name and color on the final page. This one is absolutely a must-have for any toddler.
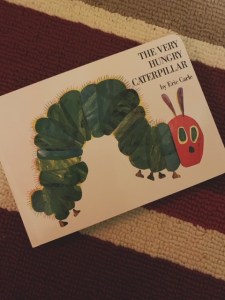
#2: The Very Hungry Caterpillar
This is another Eric Carle board book that we have in our reading corner, and my little LOVES the colors. It was a gift at one of my baby showers, and it was a perfect addition to the bookshelf. Not only does combine an understanding of nature and science, but also the colors and artwork that are charming and compelling for my son’s age range.
#3: The Little Engine That Could
My son LOVES trains, so this book by Watty Piper is perfect for him! The can-do message is motivational and inspiring, and now that we’ve transitioned from Brown Bear (listed above), we’re reading this book most nights before bed.
We received this as one of our Imagination Library mailings. If you’re not from East Tennessee, you might not be familiar with Dolly Parton’s Imagination Library. Let me just say that Dolly Parton is a gift to East Tennessee, and her efforts to promote education are absolutely admirable. We’re so thankful that my kiddo can be a recipient for books from Dolly’s program. To find out more, check out her program here.
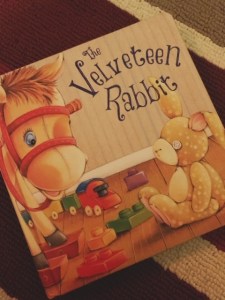
#4: The Velveteen Rabbit
The Velveteen Rabbit is an absolutely classic. I found this modern children’s adaptation at my local Ollie’s Bargain Outlet, and I couldn’t pass it up. It’s a sweet story, and this version has warm images in kid’s colors to stay visually engaging for your toddler audience.
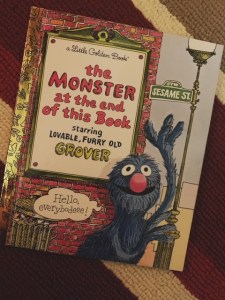
#5: The Monster at the End of This Book
My favorite Sesame Street monster as a kid was Grover – and this book was one we had on our own shelves! When I found it at a local store, I had to get for my son, and he loves it just as much as I did.
Spoiler: the monster is silly old Grover himself – but we have all kinds of fun discovering that when I use my own silly Grover voice throughout the book. My son recalls the pages and says some of the phrasing along with me, so it’s extra fun as he continues to grow older!
3 Modern Additions
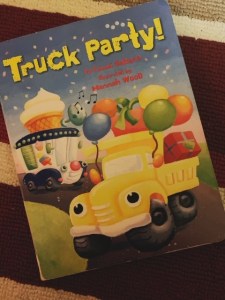
#1: Truck Party
I grabbed this book at a local Goodwill, and it was one of the best $.99 purchases I’ve made! Before he was even two years old, my son could repeat whole lines. If your little one is a truck or transportation fan, they will LOVE this book by Tammi Salzano!
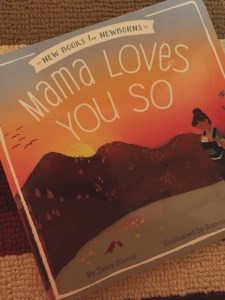
#2: Mama Loves You So
Terry Pierce’s newborn board book was sitting on a TJ Maxx shelf when I was shopping for my son’s first Christmas; it was meant to be. This book is so sweet. It highlights animals and their mamas, and the illustrations by Simone Shin are absolutely gorgeous. If you are having a new baby – or if a friend is – this is a must have.
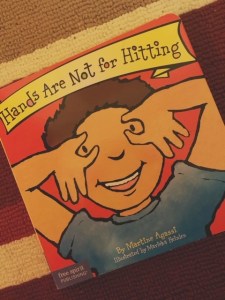
#3: Hands Are Not for Hitting
My son’s sitter shared that he was using his hands to hit or push some, and he had begun to hit me on our custody switch days, so I was concerned. I brought up the issue with the pediatrician at a previously-scheduled appointment, and she suggested this book by Martine Agassi.
I didn’t know how much it would help, but I am SO thankful I purchased it on Amazon! This book details how hands are not for hitting, but they are for high-fives, for playing, for building… It follows the little boy on the cover through lots of activities you CAN do with your hands. Now, on the way to the sitter’s on every morning I have custody, my son and I talk about how are hands are NOT for hitting, pushing, pinching, or taking, but ARE for high-fives, hand-holding, clapping, and playing kindly.
What books would you add to the list? I’d love to hear your recommendations in the comments below!
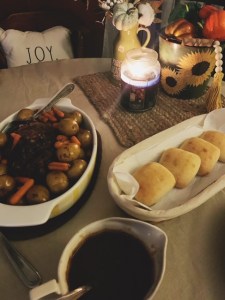
If there’s one dinner that is always going to be well received in my house but takes minimal work, it’s a roast beef dinner – made easy by the crockpot! With the evenings getting cooler and fall weather really settling in, I thought this was the perfect dish to share with you this week.
Here’s what you’ll need:
2-3 lb chuck roast, thawed
1 bag of small yellow potatoes
½ bag of baby carrots
Olive oil
Salt
Pepper
Italian seasonings
1 can of brown beef gravy
Dinner rolls of your choice
To start, plug in your crockpot and fill it with the beef, potatoes, and carrots. I have a smaller crockpot (I caught it on sale at my local Bargain Hunt for $11 last year, so I’m not complaining!), but that I means my roast is always a Jenga-kind of game to get all of the ingredients in.
Once they’re in, add a steady drizzle of olive oil. Then salt and pepper and add in Italian seasonings. A few shakes will do!
Turn your crockpot on high for about 4 hours.
At the four hour mark, you should be almost done. Turn the heat dial to low for 1-2 more hours.
After another 1-2 hours on low, you’re ready to serve! Your kitchen will be smelling like dinner already, so you’ll know it’s time. You can also cut into the meat to make sure you’re content with how cooked it is.
Before I serve, I like to warm rolls in the oven (I used Sister Schubert’s yeast rolls this time around) and heat up my gravy.
I like to serve it on the table, so I put my roast – including carrots and potatoes – in a serving dish and set the table. Now you’re ready to enjoy!
The holidays are the perfect time for some homemade baked goods! But I have good news: you don’t have to be an expert in the kitchen to whip up some seasonal sweets.
I have a butterscotch walnut cookie recipe that you’re sure to love – and that will taste more homemade and complex than it really is.
Here’s what you need:
1/3 – 1/2 cup butterscotch chips
1/3 – 1/2 cup chopped walnuts
1/2 cup cooking oil
2 large eggs
1 box yellow cake mix
Preheat your oven to 350F.
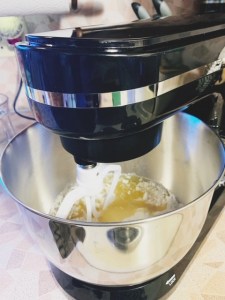
Then, add your cake mix, eggs, and oil to your mixing bowl.
My sweet boyfriend just bought me this stand mixer from Kuppet. Because I’ve not had it long, I’ve only made cookies in it so far, but I already can tell that I love it! It has multiple attachments for various batters, and that makes a huge difference in how much air gets into your mix.
I whipped this cookie dough up using one of the slower settings.
Then, after mixing my cake mix, eggs, and oil for a few minutes, I added my walnuts and butterscotch chips and mixed for just about 20-30 seconds so they were evenly dispersed.
Roll your cookie dough into ping-pong sized balls, and spread them out on a cookie sheet. Bake for 10-11 minutes.
Enjoy! I hope you love how the sweetness of the butterscotch gets complimented by the crunch of the walnuts.
It seems that all is lost – we can’t safely trick or treat on Halloween! Don’t panic – there are solutions that will allow you to still celebrate this well-loved fall holiday, despite COVID-19 restrictions.
I’ve mentioned in other posts that my boyfriend, Jake, is ALL about Halloween. He was so disappointed when COVID numbers in our state began to spike again – he said “Halloween won’t be the same.” Obviously, with a two year old in our lives, we totally understand WHY it can’t be the same – why trick or treating is unsafe and why bobbing for apples isn’t a healthy choice – but it was still a little heart wrenching for my spooky-season-loving guy.
Y’all better believe that I wasn’t going to let Halloween season go by without SOME level of fun, even in a pandemic. And we went ahead and did our Halloween stuff this past weekend, since I don’t have my toddler on actual Halloween this year.
Here are 5 ways you can celebrate this fall holiday in the midst of our national and global pandemic!
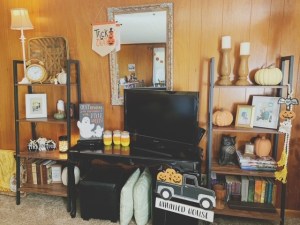
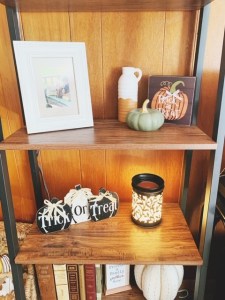
#1: Decorate Your Home
I’ve never been much of a Halloween-decorator. I love my fall stuff so much that I don’t usually take it down until the day after Thanksgiving. But with a toddler who loves imaginative play and a boyfriend who adores all things Halloween, it seemed time to start thinking about at least a few Halloween-inspired décor pieces.
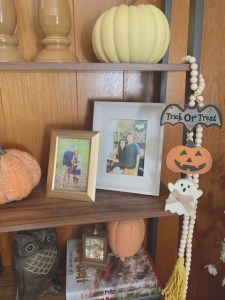
I collected just enough to decorate my living room shelves and make a display.
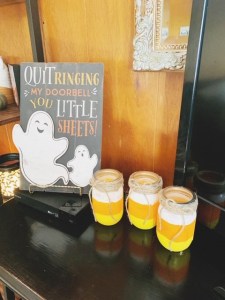
You can see my step-by-step tutorial for my candy-corn jar lanterns here. I found the “haunted house” truck stand at Big Lots for about $14-15 – I’ll eventually use that as front porch décor, but decided to use it indoors this year. I found the “little sheets” sign at Walmart and the burlap-esque banner at Dollar Tree.
The hanging wooden bat, pumpkin, and ghost décor was a Walmart find. The wood block pumpkin and the three black and white pumpkins were each found at Dollar General.
I really am a fan of this more traditional Halloween look. I like jack-o-lanterns and ghosts instead of skulls and severed fingers, personally, and I think they’re much more kid-friendly, too. Although, I’ll admit – I’ve seen some really pretty and glamorous skulls with glitter and roses, and if you have a house with glam décor, you can probably rock it!
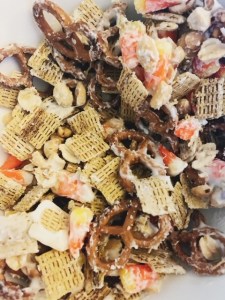
#2: Halloween Snacks
Halloween is the holiday of snacks and candy, and this year should be no exception!
Whether you’re making Pillsbury’s ready-to-bake pumpkin sugar cookies, making homemade treats, or simply eating candy corn out of the bag, there’s something special about Halloween-themed snacks.
You can also try my Halloween Salty and Sweet Snack Mix. It’s just 5 ingredients – and it’s so delicious, you’d never guess how easy it is! Click here for the recipe.
Halloween snacks like this are perfect for watching family movies like Halloweentown, fall football, or – spookiest of all – even fall election news!
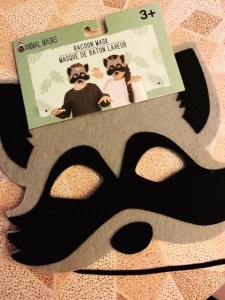
#3: Dress Up at Home
Growing up, I really did love costumes and dressing up for this holiday. Even though my son is with his father this year for official Halloween, we weren’t going to totally skip out on the fun of dressing up!
I found felt animal masks at my local Dollar Tree – and this little racoon was PERFECT for my little one! He had a ball trying it on and saying he was “playing pretend.”
Costumes at home are just as much fun as costumes out and about for the little ones, so don’t hesitate to dress up and take a cell-phone photoshoot in your living room!
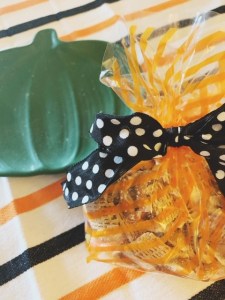
#4: Treat Buckets
If you can’t trick or treat, that doesn’t mean you can’t have treats! I found these cute mini buckets at Dollar Tree and decided to fill them with some treats for my son and boyfriend. Jake’s has a lot of snacks and candy, but my toddler had much less – just one piece of candy, a board book, a stuffed animal black cat, and a pumpkin light.
The pumpkin light was the real winner. He kept saying “this is Halloween” and waving it around proudly. It even had to serve as a nightlight that evening in his room.
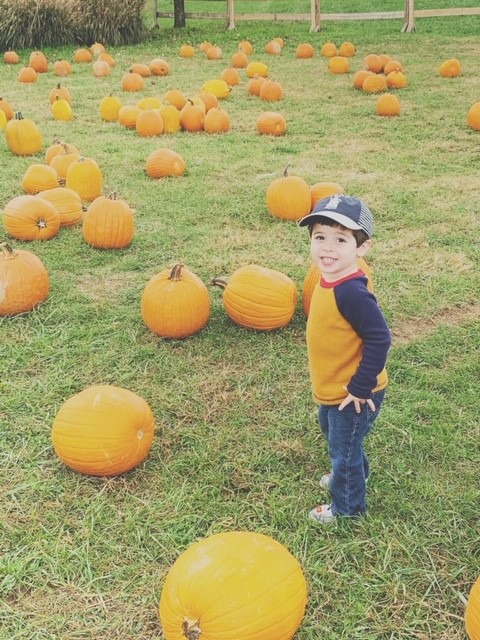
#5: Pumpkin Patch
If you have a local pumpkin patch that you can visit safely, I highly recommend you do so! Oakes Farm is relatively local to us, required ticket purchase in advance with limited spots, and encouraged mask wearing when in large groups. We appreciated their safety measures and decided to visit.
If you’re in East Tennessee, Oakes is a must-visit for you! They have so much to do that is family-friendly. We ran around a kids pumpkin patch (where my son picked the ugliest, bumpiest pumpkin available), picked fall flowers to fill a vase, took a tractor-pulled wagon ride to another pumpkin picking area, had kettle corn and lemonade, and visited the petting zoo.
If this experience didn’t scream fall, I don’t know what would! This was a blast, and we each got to do something we enjoyed.
Happy Halloween! I hope you enjoy this season – even if it looks a little different this year!